Blog grid view

2023-12-04 Eason Painting Richmond MI Guide To Painting Your Dining Room Cabinets

Guide To Painting Your Dining Room Cabinets in Richmond, MI

4 / 12 / 2023 / 0 comments

Guide To Painting Your Dining Room Cabinets in Richmond, MI

Updating the look of your dining room doesn’t always require a complete renovation – sometimes, a fresh coat of paint on even as simple and unassuming as your cabinets can make a significant difference.

If you’re looking for something to guide you as you paint your dining room cabinets, here’s something perfect for you!

Here’s a Guide To Painting Your Dining Room Cabinets.

1. Do Proper Surface Preparation

In any painting project, doing proper surface preparation will always be the first thing to do before applying a fresh coat of paint onto the surface.

Proper surface preparation ensures that you’re going to be painting on a surface that is clean, even, and smooth, which in turn, will also give you favorable painting results.

In this process, you will want to:

  1. Clean Thoroughly: First, give your cabinets a thorough cleaning. Remove any dirt, grease, or grime using a mixture of warm water and a mild detergent. Wipe down all surfaces, inside and out, and then rinse them with clean water to remove any residue.
  2. Sand the Surfaces: Sanding is a crucial step in ensuring the paint adheres properly to the cabinet surfaces. You’ll want to use fine-grit sandpaper to lightly sand your cabinets. This will help remove any rough spots, imperfections, or glossy finishes. Be sure to wear a dust mask and safety goggles during this step, and remember to wipe away any dust with a tack cloth.
  3. Fill Imperfections: Inspect your cabinets for any holes, dents, or scratches. Use a filler to patch up these imperfections. Once the filler is dry, sand the repaired areas to make them smooth and level with the rest of the surface.

2. Choose the Right Paint and Color

Choosing the right paint is an important decision that often holds a lot of weight – ending up with the wrong kind of paint or the wrong color could change the whole trajectory of your project.

Ideally, you’d want to end up with a paint formulation specially made for cabinet painting, and the kind of surface you have with your cabinets – wooden surfaces and metal surfaces have different paint needs, so you’ll want to ask a paint professional which is the right choice for you.

There are also factors to choosing the right paint color: the kind of lighting present in the room, and the colors and elements that may already be present in the space.

These two factors are important since:

  1. Lighting has a significant effect on how your paint color will eventually look. Depending on the lighting present, there could be a slight difference between your expected outcome vs. how it will actually look. So, to offset this, make sure to check your chosen paint color with the lighting present in your dining room first.
  2. You’ll want to end up with a paint color that goes well with the existing elements and colors in your dining room space, to ensure an overall cohesive appeal – so keep this in mind!

3. Remove Your Cabinet Doors

To paint your dining room cabinets better, you’ll want to remove the doors off your cabinet frame.

You will eventually find that it’ll be hard to cover an even coat of paint on your cabinet doors without getting paint smudges all over the place, which is just the kind of mess you’re looking to avoid in your project.

To paint the area better, you should get your doors off your cabinet frame and lay them flat on a surface, where it’ll be much easier to paint them.

Just remember to keep all the necessary hardware, such as bolts and screws, so you can put them back in place when you’ve finished painting and drying them!

4. Proper Painting Techniques

Achieving a professional-looking finish requires attention to detail and the use of proper painting techniques.

Here are some techniques that may come in handy in painting your cabinets:

  1. Prime Before Painting: To ensure that your paint adheres well and provides an even finish, apply a coat of primer to your cabinets. Primer helps seal the wood, prevents stains from bleeding through, and promotes better paint adhesion.
  2. Apply Thin, Even Coats: When it’s time to paint, use a high-quality brush or foam roller for a smooth finish. Start with a thin coat of paint and work in long, even strokes. Avoid applying too much paint at once, as it can lead to drips and an uneven surface. Remember that it’s better to apply multiple thin coats than just one, thick coat.
  3. Let Each Coat Dry: Patience is crucial when painting cabinets. Follow the manufacturer’s recommended drying times between coats. This will help prevent smudging and ensure a flawless finish.

If you need professional help with your interior painting project, Eason Painting can help.

Our home interior painting services are available in Washington Township, Rochester, Romeo, Shelby Township, Harrison Township, and Clinton Township, MI.

Call us today at 586-465-5081 for a FREE painting estimate.

Related: Common Paint Problems And How To Prevent Them in Washington, MI

Hallway Painting Tips For Lesser Mess in Washington, MI

2023-11-25 Eason Painting Rochester MI Tips To Know For Your Hallway Painting Project

Tips To Know For Your Hallway Painting Project in Rochester, MI

25 / 11 / 2023 / 0 comments

Tips To Know For Your Hallway Painting Project in Rochester, MI

While often disregarded, our hallway space is actually an important area in our home that needs attention and maintenance from time to time – which, one of the best ways to do this would be through a fresh coat of paint.

However, before picking up that paintbrush and actually painting, you must get acquainted with some of the most basic tips and tricks to doing a hallway painting project, or else you’re just setting yourself up for failure!

So, without further ado, here are Tips To Know For Your Hallway Painting Project.

1. Plan and Prepare

Before starting your hallway painting project, or really any painting project in general, doing proper planning and preparation sets the foundation for your project, and eventually leads you to a successful one.

Doing proper planning and preparation sets your initial pacing and progress, and essentially ensures that you’re on top of all things and processes involved in your project – in turn, this ensures a smooth, hassle-free experience in doing the project!

So, to do this, you’ll want to start by planning and brainstorming what it is that you want to do for your project, so you can also decide on which materials to get (such as paint color, type of paint, and other essentials).

Additionally, make sure to list all of these so you won’t be forgetting anything!

Then, you’ll want to undergo your preparation process: to do this, you’ll want to clear your hallway of everything that may be in the space since there will be a disruption in your process.

You’ll also want to inspect your hallway surface for any signs of damage and patch them up accordingly, which is important for a smooth paint finish.

You can do this with a spackling compound, and sand them smooth for an even finish.

Finally, don’t forget to clean the walls thoroughly to remove dust, dirt, and grease – this step is often overlooked, but it’s crucial for ensuring that the paint adheres properly to your surface.

2. Choose the Right Paint

In any painting project, you will have to do the often daunting and confusing task of acquiring the right kind of paint for your project.

To do this, here are a few factors you must keep in mind:

  1. Formulation: You’ll want to end up with a kind of paint specially made for indoors, to ensure compatibility. You can ask a local paint professional for your best options!
  2. Color: Be certain of what you want with your hallway. It is also important to remember that lighting often influences the way a paint color would appear on a surface the most – so make sure to check your chosen paint color with the lighting present in your hallway space, to be certain of its eventual appearance and finish.
  3. Finish: Paint finishes range from flat (matte) to high-gloss. Hallways typically benefit from semi-gloss or satin finishes as they are more durable and easier to clean. These finishes also reflect light well, brightening up the space.
  4. Quality: While investing in high-quality paint may be something that could bloat up your expenses, this could actually help you save in the long run. High-quality paint is built to last, eliminating the need for frequent repaints – which will just double your time, effort, and expense.

3. Use Painter’s Tape for Clean Edges

In painting your hallway, you might find it difficult to apply an even coat of paint on your trims and edges without getting smudges all over the place – which is why you’re going to want to use painter’s tape for your project.

To do this, you’ll want to apply painter’s tape carefully along the edges of the walls, trim, and any other areas you want to protect from paint.

Take your time to ensure that the tape is straight and well-adhered to prevent paint bleed-through.

Then, when it’s time to paint, start with the edges and corners by using a brush to cut in, before moving on to the larger wall surfaces with a roller.

4. Employ Proper Painting Techniques

Lastly, it will be for the best of your project that you employ proper painting techniques for your hallway painting project.

Here are a few painting techniques and tips to keep in mind:

  1. Start From The Top: Begin painting at the top of the hallway and work your way down. This prevents paint from dripping onto previously painted areas.
  2. Paint In Even Strokes: Use long, even strokes when applying paint with a roller. Overlapping slightly with each pass will ensure even coverage.
  3. Work Quickly But Carefully: Avoid letting one section of the paint dry before moving on to the next, as this can result in visible seams or lap marks. Keep a “wet edge” by maintaining a consistent pace.
  4. Don’t Skimp On Coats: Apply at least two coats of paint to ensure thorough coverage and a rich, even color. Allow each coat to dry fully before applying the next.


If you need professional help with your interior painting project, Eason Painting can help.

Our home interior painting services are available in Washington Township, Rochester, Romeo, Shelby Township, Harrison Township, and Clinton Township, MI.

Call us today at 586-465-5081 for a FREE painting estimate.

Related: Guide To Choosing A Paint Color For Your Guest Room in Richmond, MI

Signs That You Should Be Repainting Your Roof in Richmond, MI

2023-11-16 Eason Painting Romeo MI Preparing For An Exterior Painting Project

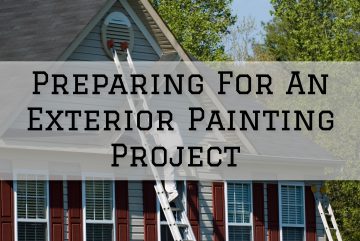
Preparing For An Exterior Painting Project in Romeo, MI

16 / 11 / 2023 / 0 comments

Preparing For An Exterior Painting Project in Romeo, MI

Your exterior holds a certain level of significance, especially since it is the first thing that people will see of your property.

Its overall appearance, condition, and appeal dictate anyone’s first impression of your home and is essentially indicative of you as a person.

So, if you want to ensure all good impressions on your home, doing an exterior painting project should be your best bet – nothing transforms a space better than a fresh coat of paint!

But, how do you prepare for such a project, you may ask?

To help you with this, here are tips for Preparing For An Exterior Painting Project.

1. Ensure Weather Conditions

In preparing for your exterior commercial painting project, one of the first things that you will want to prepare ahead of time is to check and ensure that the weather conditions during the time you do your project will be appropriate for painting.

Ideally, you would want to ensure that you’ll be painting on a dry and clear day so you can paint hassle-free.

You wouldn’t want to paint on a rainy day since you essentially would not be able to do that, since painting and rain won’t really mix.

So, to ensure that your exterior commercial painting project goes well, you should check weather conditions ahead of time so you can know when to schedule your project, and that the project goes according to plan.

2. Estimate How Much Paint You’ll Need

In preparing for your exterior commercial painting project, you will also want to estimate how much paint you’ll need for the project.

This is to ensure that you can buy the right amount of paint needed to successfully complete the project.

It’ll be such a hassle for you to either keep on going back and forth to the paint store because you’ve bought way too little paint and you’ve suddenly run out in the middle of your project or find out that you have bought way too much paint in the first place – which both wastes your effort and money, essentially.

Additionally, estimating how much paint you’ll need will get you

an idea of how much surface area you’re working with, so you can decide accordingly whether this is something you can handle on your own or whether you’d need a team to help you get it done.

3. Inspect The Surface For Signs of Damage

Prior to painting the exterior of your commercial property, you should ensure to inspect it first for any signs of damage.

This is important because no amount of paint nor primer will be ever enough to successfully cover up these existing damages on your exterior surface if there are any.

You would need to patch them up accordingly first before applying a coat of paint on them, to ensure that you will have a more seamless paint finish once you’ve finished.

In doing this, you could opt to either do it all by yourself or, if you’re not entirely sure how to do it, get it done by a professional, which is your best choice.

4. Clean Your Exterior Surface

Before painting the exterior of your commercial property, it is important that you clean your exterior surface first.

Over time, your commercial property’s exterior will have some kind of dirt build-up due to constant exposure to tons of external factors, which you will have to remove prior to painting it.

Depending on your property’s overall condition, you can either opt to just scrub it using some kind of cleaning detergent and rinse it or opt for a more powerful clean with a power washer.

Just make sure that you give your surface ample time to dry first before you apply any coat of paint on it!


If you need professional help with your interior painting project, Eason Painting can help.

Our home interior painting services are available in Washington Township, Rochester, Romeo, Shelby Township, Harrison Township, and Clinton Township, MI.

Call us today at 586-465-5081 for a FREE painting estimate.

Related: Tips For Painting A Small Bathroom in Washington, MI

Repainting Your Home Exterior: Handy Tips To Keep in Mind in Romeo, MI

2023-11-11 Eason Painting Washington MI Hallway Painting Tips For Lesser Mess

Hallway Painting Tips For Lesser Mess in Washington, MI

11 / 11 / 2023 / 0 comments

Hallway Painting Tips For Lesser Mess in Washington, MI

While hallways are often overlooked when it comes to home improvement and maintenance projects, painting your hallway could actually breathe new life into your home interior, and could bring a lot more appeal than we give it credit for.

However, just like any other painting project, painting your hallway can also be a messy and challenging project if not approached with care and preparation.

So, if you’re looking to do a hallway painting project as smooth and seamless as possible, here’s something you’ll want to read!

Let us look at these Hallway Painting Tips For a Lesser Mess.

1. Do Proper Preparation

To ensure as little mess as possible in your hallway painting project, one of the first things that you should do in your project is proper preparation.

Doing proper preparation prior to your painting project ensures a seamless painting process for your project, hindering the possibility of any problems that might arise later on in your project, which will eventually cause the mess you’re trying to avoid.

So, to do this, here’s what you’ll need to do:

  • Clear the Space: Remove all furniture, decorations, and items from the hallway. This includes rugs, wall art, and any small objects that might get in the way.
  • Patch and Sand: Inspect the walls for any holes, cracks, or imperfections. Patch and sand these areas until they are smooth. A smooth surface will result in a neater paint finish.
  • Clean the Walls: Wipe down the walls to remove dust, dirt, and any residual grime. A clean surface allows the paint to adhere better and reduces the chances of uneven coverage.
  • Acquire the Right Paint: Select a high-quality, low-splatter paint designed for interior walls. Consider using paint with a built-in primer, as it can reduce the number of coats needed.

2. Cover Up Necessary Areas

Paint drips and spills are often inevitable in any painting project – this is the unfortunate tendency when you’re working with paint since this creates such a mess that can be a hassle to clean up.

So, to avoid this, you’ll want to cover up necessary areas using a drop cloth, and painter’s tape.

Your floors and fixtures, which cannot be temporarily relocated or moved, will be left vulnerable to these pesky paint drips and spills, thus, you’ll fare better by covering them up with a drop cloth.

Ideally, you’d want to use a canvas-type drop cloth, as this is the kind of fabric that doesn’t let paint seep through it.

You might also find it hard to paint an even coat on the edges and crevices of your hallway without getting paint smudges all over the place – which is what painter’s tape is for.

However, do make sure to not let the tape on for too long on the surface, or you might be peeling off some parts of your fresh coat of paint when you finally do.

3. Work Strategically

In reducing, if not totally avoiding, mess in your hallway painting project, you must work strategically to achieve a mess-free painting project.

Here are a few strategies you might want to employ:

  • Start from the Top: Begin by painting the ceiling and upper edges of the walls. This way, any paint drips that occur will fall onto areas that haven’t been painted yet. You can then touch up the lower portions of the walls afterward.
  • Paint in Sections: Divide your hallway into manageable sections, typically 4 to 6 feet wide, and complete one section at a time. This allows you to maintain control over the paint application and reduces the risk of drips and spills.
  • Keep a Damp Cloth Nearby: Have a damp cloth or sponge nearby to quickly wipe off any accidental paint splatters or drips. The sooner you address these, the easier they are to remove.

4. Take Your Time and Be Patient

Last, but not the least, you should take your sweet time and be patient with your hallway painting project.

You must remember that rushing the process will lead to some kind of mistake or problem, and dealing with these mistakes will inevitably cause the mess you’re trying to avoid in the first place.

After all, a painting project is more enjoyable when it is taken slowly, smoothly, but surely, which will eventually lead you to a project done successfully.


If you need professional help with your interior painting project, Eason Painting can help.

Our home interior painting services are available in Washington Township, Rochester, Romeo, Shelby Township, Harrison Township, and Clinton Township, MI.

Call us today at 586-465-5081 for a FREE painting estimate.

Related: Tips For Painting A Small Bathroom in Washington, MI

Reasons To Do A Bathroom Cabinet Painting Project in Richmond, MI