Blog grid view

7 Tips For Painting Your Ceiling in Washington, MI

4 / 07 / 2021 / 0 comments

7 Tips For Painting Your Ceiling in Washington, MI

Painting your ceiling can give an updated and modern feel to your home interior.

Moreover, it can liven up your ambiance where you will feel much more comfortable and relaxed.

However, if you’re planning to have a makeover to your ceiling, it’s very important that you have proper knowledge and skills in painting.

So with that in mind, here are the 7 tips for painting your ceiling in Washington, MI.

1. Make Sure To Clean Up the Area

Before you proceed with painting your ceiling, make sure that you have removed light fixtures at your home so they will not be damaged by the paint.

You would not want to ruin your furniture, so make sure to place it in a separate safer area.

Moreover, if you have furniture or other things that we’re unable to be removed, cover them with a drop cloth as well.

Because preparing your room for painting will make it easier for you to move around in the room while painting.

2. Choose The Best Tools and Equipment

If you’re planning to have DIY’s it’s very essential that you have with you the right tools.

Having the right tools for painting a ceiling will absolutely make your job fast and easy.

Always prepare tools and equipment like a ladder, high-quality roller, paint tray, premium paints, sanding paper, and even cleaning materials to make sure that your painting area will be clean.

By preparing all the necessary materials, it will let your DIY go smoothly and efficiently.

3. Sand Your Ceiling

As time goes by, the layers of paint may build up and can get stuck to your ceiling.

So to achieve a perfectly smooth paint job, sanding with 100 grit abrasive paper may help to increase paint bonding.

Moreover, you may opt to use a sanding pole to make working easier, then wipe the ceiling afterward with a damp sponge to remove the dust.

4. Use Stain-Blocking Prime

Many factors such as roof leaks, overflowing sinks, smoke, and spills can make your ceilings look bad which are impossible to cover by paint.

Using stain-blocking prime in your ceiling beforehand will make your painting smoother and flatter the result lessening your worries!

Moreover, the primer will preserve the base of the surface and allow for an even first coating of colored paint.

5. Choose Premium Paint

To get the most optimum result to choose the paint that’s best formulated for a ceiling application.

In addition, pick a high-viscosity paint to minimize drippage because the best paint for ceilings has a consistency close to that of thinned-out honey.

Choosing premium paint can help you achieve that professional look for any room.

6. Use Flat Finish Color

Using different finishes is good but not all the time. For your ceiling, it’s best to go for a simple look so to ensure that your ceiling looks best, flat finish paint works very well.

Going for a lighter color can help your ceiling bounce light properly and also create the illusion of a bigger room.

Moreover, a flat finish can easily hide a ceiling with uneven texture or previous blemishes rather than high-gloss and semi-gloss paint.

7. Work In Section

Working in a hurry will finish the project faster, however, you can lose track of what you’ve painted.

Working in a section is a great way to make your work easier and faster, however, sectioning is difficult when you’re using light colors.

So to do this, you can overlap a fresh coat of paint over a dried section by the edge this marks a new section to work on.

Always remember that for you to have an extraordinary job, patience and preparedness are a must!

If you need professional help with your interior painting project, Eason Painting can help.

Our home interior painting services are available in Washington Township, Rochester, Romeo, Shelby Township, Harrison Township, and Clinton Township, MI.

Call us today at 586-465-5081 for a FREE painting estimate.

Related: 7 Misconceptions You Should Not Believe About Interior Painting in Romeo, MI

7 Mistakes To Avoid While Painting Your Ceiling in Washington, MI

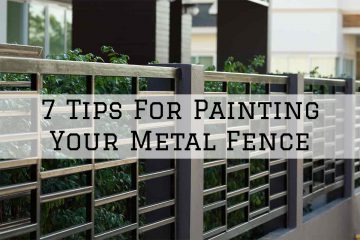
25-06-2021 Eason Painting Romeo MI tips for painting your metal fence

7 Tips For Painting Your Metal Fence in Romeo, MI

25 / 06 / 2021 / 0 comments

7 Tips For Painting Your Metal Fence in Romeo, MI

Painting your metal fence is a very great technique to protect it from rust formation.

 At the same time, coating metal fence gives color and aesthetic appeal to the design of your house.

However, proper knowledge and skills are required to do it, that’s why knowing some advice for painting your metal fence can save you a lot of effort and time.

With that in mind, here are the 7 tips for painting your metal fence in Romeo, MI.

1. Consider The Weather In Your Area.

One of the very first things you need to consider when applying paint to your fence is the local weather.

The ideal temperature for painting a metal fence is between 50-80 degrees Fahrenheit and the humidity should not be high.

2. Remove The Rust

Not removing the rust off your metal fence may weaken its surface and worse is it will continue to spread.

 So keep in mind that if you’re planning to paint your fence it’s important to check the fence properly and get rid of all the rust so that the primer will be fully absorbed.

However, you should bear in mind that in removing rust, wear safety gloves, glasses, and a facemask because of the health risk of these substances. In addition, to effectively eliminate the rust from your metal fence, you may use a steel brush, steel wool, or high grit sandpaper.

3. Sand and Clean The Surface Of The Fence

After removing the rust from your metal fence, the next thing you need to do is to sand and clean the surface as smoothly as possible.

You can use fine-grain sandpaper to smooth out any rust deposit, and the uneven parts of the metal fence as well. Sanding may be tiring and time-consuming but you have to do it to get better results.

When the sanding process is complete, you are now ready to clean the fence to make sure that no debris is left. In cleaning, you may prepare liquid dish soap and warm water to make sure that you remove all the sanding dust, grease, and oil on the metal. And let it dry so it will be ready for primer application.

4. Apply Primer

The primer contains several components highly effective for cleaning, sealing, and protecting metal. That’s why applying primer to your metal fence is very important, but make sure that you choose the right and best primer for the best result.

Applying metal primer allows your new paint to stick properly and last for a long time. But make sure that you let it dry for about 1 to 2 days.

5. Paint Your Metal Fence

In applying paint on your metal fence, you have to make sure that you’re using metal paint.

Because there are various kinds of paints that are made exclusively only for metal, wood, plastic, etc.

Dip a clean paintbrush (make sure that you will use a high-quality brush) into your new paint and start painting across the surface of your metal fence slowly and evenly. And make sure to let it dry completely before applying a second coat.

6. Apply a Second Coat For A More Optimized Result

After applying the first coat, it is best to apply a follow-up coat because this will provide you a more smooth and pleasant result.

Applying several coats can make the lifespan of your metal long-lasting from wear and tear.

 7. Apply A Sealant

Your metal fence is always exposed to different elements and substances, so to maintain the fresh appearance of your metal hence it’s always a good idea to apply a sealant. Always check and read for the instruction so that you will be guided properly and get the best results.

If you need professional help with your interior painting project, Eason Painting can help.

Our home interior painting services are available in Washington Township, Rochester, Romeo, Shelby Township, Harrison Township, and Clinton Township, MI.

Call us today at 586-465-5081 for a FREE painting estimate.

Related: 7 Tips For Painting Light Over Dark Walls in Romeo, MI.

7 Mistakes To Avoid When Painting Your Living Room in Rochester, MI.


18-06-2021 Eason Painting Rochester MI tips for painting your bathroom

7 Tips For Painting Your Bathroom in Rochester, MI

18 / 06 / 2021 / 0 comments

7 Tips For Painting Your Bathroom in Rochester, MI

Your bathroom is a place where you can be alone for a while and self-actualize while taking a shower.

But what’s bothersome is the paint peeling off due to longevity and the accumulated dirt on the walls.

It also conveys neglect of the owner as guests visit your house and take a step in the bathroom.

If you’re planning on getting a DIY makeover for your bathroom, here are 7 tips for painting your bathroom in Rochester, MI.

1. Take Your Time to Plan and Prepare

This is the first tip among the seven as this is the most important of them all.

You don’t want to stop in the middle of the project just to go out to the hardware store.

In addition to this, you do not want to waste your time cleaning up drips on fixtures.

Doing a DIY project is exciting but take your time to prepare all the necessary tools beforehand.

2. Cover All Hardware, Plumbing, and Porcelains or Ceramics

It is important to cover up the faucet, plumbing lines under the toilet, and the shower area.

Drape them with a tarp or a cloth to avoid the paint from splashing and dripping all over them.

You should also use painter’s tape to keep the sheets in place and cover areas in general.

There are also areas wherein it will be necessary to uninstall or remove furniture and fixtures.

3. Clean the Surface to be Painted

The bathroom walls are more likely to get wet so dirt, grimes, and soap can easily accumulate.

With this said, these substances can cause the paint to peel off eventually without cleaning.

And most probably, the paint won’t stick at all no matter how hard you try.

You can use chemicals such as Trisodium phosphate to get rid of the gunk and scum.

Once cleaned, you can easily start painting your bathroom without worrying about the paint peeling off eventually.

4. Use The Best Paint For Your Bathroom

Bathroom paint is designed particularly for the bathroom walls, ceilings, and floor if not tiled.

The paint has mold-inhibiting and water resistance agents that contribute to the durability of the work.

Paint with a higher sheen is quite expensive but can withstand more moisture, thus more durability and longevity.

5. Calculate How Much Paint You Need

As mentioned earlier, you do not want to stop in the middle of the painting job just to buy more gallons of paint.

If you’re planning on painting your bathroom, you should calculate first how much paint you need.

You can use online tools or apps that can easily calculate how much paint you need, and it’s free.

Give an allowance for excess paint than the calculated to save time and effort going to the store.

6. Follow the Cutting-Roller Steps

It is better to start cutting on the edges of the wall or against the painter’s tape.

Use a sash brush to paint against the painter’s mask to provide a more even finish.

If you’re planning to paint the ceiling, start at it before moving on to the wall.

You don’t want to mess up the walls once you’re done with them and move to the ceiling part.

Once done with the cuts, you can easily hover and roll the paint all over the surface.

You should paint over in 3×3 size by portion, then move on to the next area of the surface.

7. Second Coating

To achieve better results, you should apply a second coating on the dried painted areas.

Allow the first coat to dry up for at least two to three hours and repeat tip#6.

A second coat gives your wall a smoother finish, thicker protection from moisture, and better paint durability.

Once you’re done painting your bathroom, you can remove the covers on all the obstructions.

If you need professional help with your interior painting project, Eason Painting can help.

Our home interior painting services are available in Washington Township, Rochester, Romeo, Shelby Township, Harrison Township, and Clinton Township, MI.

Call us today at 586-465-5081 for a FREE painting estimate.

Related: 7 Mistakes to Avoid When Painting Your Bathroom in Romeo, MI

5 Tips For Resurfacing Your Bathroom Cabinets in Washington, MI


11-06-2021 Eason Painting Washington MI mistakes to avoid when power washing (1)

7 Mistakes to Avoid When Power Washing Your Home’s Exterior in Washington, MI

11 / 06 / 2021 / 0 comments

7 Mistakes to Avoid When Power Washing Your Home’s Exterior in Washington, MI

Power washing your home’s exterior can make your home look as fresh as new.

Most of the time, a thorough cleaning is enough to maintain the cleanliness of your home.

Certain mistakes could lead to tearing and damage in certain materials due to simple overlooked mistakes.

It is ideal to know these mistakes to get the most and avoid further expenses and dismay.

With that in mind, here are 7 mistakes when power washing your home’s exterior in Washington, MI.

1. Not starting at the top

It might sound obvious to some, however, some often overlook this guideline.

If you plan on washing the roof, it is ideal to start from the top.

Once done, move on to the exterior walls, to the porch and railings, and down the driveway.

The idea is to clean from the top so that the molds and mildew won’t drip on cleaned areas.

Starting from the bottom would mess up your hard-earned cleaned pavements when it’s time to clean the upper parts.

2. Washing The Painted Areas

It might seem satisfying but power washing could ruin the paint especially those which have been exposed to sunlight.

Even the lightest spray could ruin paint so it is highly discouraged unless you plan to remove it.

If you’re planning a general makeover, you can wash off the paint and repaint it with new ones.

3. Not Using Proper Angle

The angle of the spray nozzle should not be underestimated as certain angles work efficiently on specific materials.

If you plan on washing hard surfaces or materials with high PSI, use a 15-degree spray nozzle.

On the other hand, you should use a 25 to 30-degree nozzle to wash softer materials with lower PSI.

Improper use of spray nozzle can result in unsatisfying results, or worse, damage and deterioration of materials.

4. Using Hot Water

Although it is what distinguishes power washing from pressure washing, sometimes, hot water is not necessary for cleaning.

Hot water could indeed make cleaning molds, grimes, dirt, chewing gum, and other impurities easier.

However, softer materials don’t need to be washed with hot water as it could lead to deterioration.

Only use hot water on hard surfaces and materials that won’t warp with too much heat.

5. Not Using the Right Detergent

There are different detergents to choose from when using power washers and there’re industrial-grade detergents available in the market.

However, since you’re cleaning your home’s exterior, ensure that you utilize the right detergent to avoid damage on surfaces.

Some detergents are stronger than others as they contain certain chemicals that are engineered for specific uses.

6. Ignoring The Landscape

Power washers use a detergent that contains chemicals that could cause harm to organisms and plants.

This is why you should ensure to cover the plants with a tarp or plastic sheets before spraying.

Chemicals can burn the foliage of the plants, but there are milder detergents available in the market.

Additionally, you should the foliage to maintain the moisture and avoid the chemicals from drying on the leaves.

7. Using Too Much Pressure

In addition to the angle mentioned earlier, the pressure also depends on the materials and surface to be washed.

The power washer machine’s pressure can be adjusted between gentle to heavy cleaning depending on your need.

Too much pressure can splinter wood materials, etch concrete, or even punch holes on your vinyl siding or drywall.

Make sure to read the manual and set your washer to the suitable pressure on specific surfaces.

If you need professional help with your interior painting project, Eason Painting can help.

Our home interior painting services are available in Washington Township, Rochester, Romeo, Shelby Township, Harrison Township, and Clinton Township, MI.

Call us today at 586-465-5081 for a FREE painting estimate.

Related: 7 Tips for Power Washing Your Home Exterior in Romeo, MI.

What You Need to Know About Maintaining Your Exterior Woodwork