Posts by Nadia Burnett

2024-01-04 Eason Painting Richmond MI Guide For Preparing To Paint Your Living Room

Guide For Preparing To Paint Your Living Room in Richmond, MI

Guide For Preparing To Paint Your Living Room in Richmond, MI

If you are looking for a way to refresh your living room space without spending too much on new things and the hassle of a full-blown renovation, doing a painting project will be your best bet.

Whether you’re looking to change the color scheme, cover up imperfections, or simply update the decor, a fresh coat of paint can work wonders.

So, if you are currently wondering how you can prepare for such a project, fret not – here’s a handy guide to assist you in your latest painting venture!

Without further ado, here’s a Guide For Preparing To Paint Your Living Room.

1. Choosing A Color Palette

To start your living room painting project, you will have to be certain first of exactly what you want to do for the project and choose a color palette to go with the project.

It is important to know that the color you choose will determine your living room’s appearance, and significantly impact the overall ambiance and feel of the space – so this choice is absolutely crucial!

To end up with the best choice, here are some factors to consider:

  • Consider the Space: Think about the size and layout of your living room. Lighter colors can make a room feel more spacious, while darker shades can create a cozy and intimate atmosphere.
  • Match Your Decor: Take into account your existing furniture, decor, and flooring. Your paint colors should complement and enhance your existing design elements.
  • Test Swatches: Before committing to a color, buy sample paint pots and apply swatches to your walls. Observe how they look in different lighting conditions throughout the day to ensure you’re happy with your choice.
  • Think About the Ceiling: Don’t forget to consider the color of your ceiling. Many homeowners opt for a lighter shade than the walls to make the room feel taller and more open.

2. Gather Your Painting Supplies

To help you apply the paint to your living room, you will have to gather your painting supplies and tools.

Making sure that you have acquired all the materials you need is an important factor in a smooth, hassle-free painting project.

Here is a list of items you might need:

  • Paint: Purchase high-quality paint in the colors you’ve selected. Consider the finish (e.g., matte, eggshell, satin, or semi-gloss) that suits your living room’s needs and style.
  • Paint Brushes and Rollers: Invest in a variety of brushes and rollers for different surfaces and details. A high-quality paintbrush can make a significant difference in achieving smooth, even coverage.
  • Drop Cloths or Tarps: Cover your floors and furniture with drop cloths or plastic tarps to protect them from paint splatter and spills.
  • Painter’s Tape: Use painter’s tape to mask off areas you don’t want to paint, such as trim, baseboards, and outlets.
  • Paint Trays and Liners: Paint trays and disposable liners make the painting process more efficient and less messy.
  • Paint Tray Liner Bags: These are handy for easy cleanup after you’ve finished painting.
  • Paint Stirrer and Roller Tray: A paint stirrer ensures your paint is thoroughly mixed, and a roller tray makes it easier to load paint onto your roller.
  • Sandpaper and Putty: Use sandpaper to smooth rough surfaces and putty to fill any holes or cracks in the walls.
  • Extension Poles: These are useful for reaching high walls and ceilings without the need for a ladder.

3. Prepare the Room

Another important thing to do in preparation for your living room painting project would be to prepare your living room space for the project.

You can do this by clearing the room of any furniture, decorations, and any other items that might get in your way as you paint in the room.

You’ll also want to cover up necessary areas, such as your floors and living room fixtures, with drop cloths or plastic sheeting, to avoid getting mess such as paint drips and spills all over them.

This is an important process to undertake in preparing for your project to ensure little to no problems in your painting project, which will just cause further delay in your progress.

4. Prime the Walls

Lastly, just before you let your paintbrush touch your living room walls, make sure that you apply a coat of primer on your living room walls first.

Applying primer is an essential step in a painting project that is often overlooked, but this is the kind of mistake that would cost you later.

First, primer helps the paint adhere to the surface more effectively, ensuring better coverage and durability, and can hide stains, marks, and imperfections on the walls, creating a clean canvas for your paint.

More importantly, primer seals the walls, preventing them from soaking up too much paint, which can lead to uneven results.


If you need professional help with your interior painting project, Eason Painting can help.

Our home interior painting services are available in Washington Township, Rochester, Romeo, Shelby Township, Harrison Township, and Clinton Township, MI.

Call us today at 586-465-5081 for a FREE painting estimate.

Related: Signs That You Should Be Repainting Your Dining Room Cabinets in Washington, MI

Materials To Get For An Exterior Painting Project in Rochester, MI

Read more
2023-12-25 Eason Painting Rochester MI Signs That You Should Be Repainting Your Bedroom Cabinets

Signs That You Should Be Repainting Your Bedroom Cabinets in Rochester, MI

Signs That You Should Be Repainting Your Bedroom Cabinets in Rochester, MI

While often overlooked, one of the key elements in your bedroom space would be your cabinets – not only do they provide you with extra storage solutions, but they also play an essential role in your space’s overall appeal, making your bedroom feel complete and organized.

Over time, though, bedroom cabinets can begin to show signs of wear and tear – which a fresh coat of paint can quickly fix.

So, if you’re wondering whether it is time for you to treat your bedroom cabinets to a fresh coat of paint or not, here’s something to help you!

Here are Signs That You Should Be Repainting Your Bedroom Cabinets.

Fading Paint

If you happen to notice that the paint on your bedroom cabinets seems more drab or mundane than its usual bright and vivid finish, chances are that its coat of paint might have started to fade – and a rather obvious sign that you should be treating it with a fresh coat.

Paint fading is one of the most common paint problems among the average household, which happens due to several factors, such as:

  1. Excessive exposure to sunlight;
  2. Unsteady weather patterns;
  3. A lack of primer application before applying the coat of paint;
  4. Using low-quality paint;
  5. An overall abysmal painting procedure

On top of all these, your coat of paint can also fade naturally over time, which means that it might have been a while since you last painted your cabinets, and you’re way overdue for a fresh coat.

Repainting your bedroom cabinets will be a great way to address the existing paint problem on it, and to essentially breathe new life to these bedroom fixtures!

However, do keep in mind to not repeat the said mistakes listed above, to ensure that your coat of paint won’t be fading again anytime soon!

Peeling/Cracking Paint

If you’re seeing strips of paint peeling all over your bedroom cabinets, or just various parts of your cabinets with paint cracking across them, then this is another clear sign for you to be repainting your cabinets.

Just like paint fading, paint peeling/cracking is also another kind of paint problem that can be common among households.

The coat of paint on your cabinets, or any surface in general, might fade due to the presence of moisture on the surface, a lack of proper surface preparation beforehand, a lack of primer application before the coat of paint, or just an overall bad painting project.

Additionally, using low-quality paint could also compromise the overall quality of your coat of paint, leading to paint problems such as peeling/cracking paint.

So, in repainting your bedroom cabinets, keep the said mistakes listed above, to ensure that you won’t be seeing your cabinets with peeling paint anytime soon!

Scratches, Dents, and Stains

Bedroom cabinets often endure a fair amount of use, from opening and closing drawers to placing items on their surfaces.

As a result, it’s not uncommon for cabinets to accumulate scratches, dents, and stains over time, and these little imperfections might negatively affect your cabinets’ overall appearance, and in turn, bring down your bedroom’s overall appeal.

Thus, repainting your bedroom cabinets will be an effective way to conceal these blemishes and spruce up their overall appearance, and essentially ensure that you’re maintaining your bedroom’s overall appeal in the process.

Physical Damage

If your bedroom cabinets have seen better days and are showing signs of extensive wear and tear or physical damage, it’s a clear indication that repainting is in order.

Cabinets that have physical damage on their surface will inevitably need a fresh coat of paint since as the surface is damaged, the coat of paint present is also affected.

However, an important thing to remember in repainting damaged surfaces would be to patch up the damages present first before applying any coat of paint on it.

While paint is extremely transformative, it still won’t be able to cover up physical damages on a surface, and painting on a damaged surface will just result in an ugly, uneven paint finish.

Improved Home Value:

Lastly, repainting your bedroom cabinets isn’t just about personal satisfaction; it can also have a positive impact on improving your home’s value.

When potential buyers or renters view your bedroom, well-maintained cabinets can leave a lasting impression and make your property more appealing.

Investing in a fresh coat of paint for your cabinets can be a relatively low-cost home improvement project with a potentially high return on investment.


If you need professional help with your interior painting project, Eason Painting can help.

Our home interior painting services are available in Washington Township, Rochester, Romeo, Shelby Township, Harrison Township, and Clinton Township, MI.

Call us today at 586-465-5081 for a FREE painting estimate.

Related: Tips To Know For Your Hallway Painting Project in Rochester, MI

Preparing For An Exterior Painting Project in Romeo, MI

Read more
2023-12-18 Eason Painting Rochester MI Materials To Get For An Exterior Painting Project

Materials To Get For An Exterior Painting Project in Rochester, MI

Materials To Get For An Exterior Painting Project in Rochester, MI

Preparing for an exterior painting project can be daunting, especially if you do not know where to begin!

An exterior painting project tends to be a big project that involves a lot of materials, and making sure that you have all you need in your shopping cart can be a confusing task to do!

So, if you are currently looking for assistance as you’re on the way to the paint store, here’s something you can read on the way!

Check out this list of Materials To Get For An Exterior Painting Project.

High-Quality Exterior Paint

The most crucial material for any painting project is, of course, the paint itself.

When it comes to doing an exterior painting project, it’s imperative that you invest in high-quality exterior paint that is specifically designed for outdoor use.

Exterior paint is specifically formulated to withstand harsh elements your exterior is usually subjected to, such as rain, UV rays, and temperature fluctuations.

In turn, this ensures durability and longevity for your coat of paint, ensuring that it will maintain its quality for a longer time.

Surface Preparation Materials

Before applying any kind of paint on your exterior, you must see to it that you undergo proper surface preparation first – to which, you’ll also need to have the materials for it.

Depending on the condition of your home’s exterior, you may need the following materials:

  1. Pressure Washer: Use a pressure washer to thoroughly clean the exterior surfaces, removing dirt, dust, mold, mildew, and loose paint. Allow the surface to dry completely before proceeding.
  2. Scrapers: For scraping off loose or peeling paint, use a combination of hand scrapers and power sanders to smooth rough areas.
  3. Patch and Repair Materials: Fill any holes, cracks, or gaps in the surface with an appropriate filler or patching compound. Once the compound is dry, sand them down for a smoother finish.
  4. Caulk and Caulking Gun: Seal any gaps or joints in the siding, trim, or other exterior elements with high-quality exterior caulk to prevent water infiltration.

Primer

While most people may overlook its importance in a painting project, this is also exactly the kind of mistake that will lead you to failure.

Thus, don’t underestimate the importance of primer in your exterior painting project, since primer serves these several crucial functions:

  1. It provides a stable surface for the paint to adhere to, especially on porous or uneven surfaces.
  2. It helps the paint achieve better coverage, reducing the number of coats required.
  3. Primer can block stains, knots, and tannins from bleeding through the paint.
  4. It improves paint adhesion and enhances the durability of the finish.

In applying primer, make sure to clean your exterior surface prior to application, remove any loose or peeling paint, and patch up any damages present on the surface.

Lastly, primer comes in both oil-based and latex-based varieties, so choose one that is compatible with the type of paint you plan to use.

Painting Tools and Equipment

To apply your paint, you will require a set of painting tools and equipment to help you with this.

To have an idea of which materials you should be getting, here is a list of items:

  1. Paintbrushes: Invest in high-quality paintbrushes designed for exterior use. A 3-4 inch brush is suitable for most surfaces, while smaller brushes can be used for trim and details.
  2. Roller and Roller Covers: Use a roller with a long handle for large, flat surfaces like siding. Choose roller covers appropriate for the texture of your exterior, such as smooth or rough.
  3. Paint Tray and Liners: A paint tray with disposable liners makes cleanup much easier.
  4. Extension Pole: This will help you reach high or hard-to-access areas without the need for a ladder.
  5. Drop Cloths: Cover the ground and any nearby plants or landscaping with drop cloths to protect them from paint splatters.
  6. Painter’s Tape: Use painter’s tape to mask off areas you don’t want to paint, such as windows, trim, and hardware.
  7. Paint Sprayer (Optional): If you have a large area to paint, consider using a paint sprayer for faster and more even coverage. However, using a paint sprayer requires experience to avoid overspray and achieve a smooth finish.

Safety Gear

Lastly, in doing an exterior painting project, your safety should always be a top priority.

Some aspects of doing an exterior painting project can be risky – so to avoid any sort of accidents, here are some safety items you must acquire:

  1. Safety Glasses: Protect your eyes from paint splatters, debris, and dust.
  2. Respirator or Dust Mask: Especially important when sanding or working in dusty conditions.
  3. Gloves: Keep your hands safe from chemicals, rough surfaces, and paint.
  4. Ladder: Ensure you have a stable ladder that is the right height for your project. Always follow ladder safety guidelines to prevent accidents.


If you need professional help with your interior painting project, Eason Painting can help.

Our home interior painting services are available in Washington Township, Rochester, Romeo, Shelby Township, Harrison Township, and Clinton Township, MI.

Call us today at 586-465-5081 for a FREE painting estimate.

Related: Preparing For An Exterior Painting Project in Romeo, MI

Guide To Choosing A Paint Color For Your Guest Room in Richmond, MI

Read more
2023-12-11 Eason Painting Washington MI Signs That You Should Be Repainting Your Dining Room Cabinets

Signs That You Should Be Repainting Your Dining Room Cabinets in Washington, MI

Signs That You Should Be Repainting Your Dining Room Cabinets in Washington, MI

Your dining room is a central part of your home; this is the place you spend with your family talking and sharing stories over a warm meal, enjoying each other’s company and bonding.

So, it is important that every aspect of your dining room is in great shape – and this includes your dining room cabinets.

Over time, your cabinets could be subjected to various kinds of wear and tear, which could be remedied by a fresh coat of paint.

But what are the signs that you should be doing so?

To help you with that, here is a list of Signs That You Should Be Repainting Your Dining Room Cabinets.

1. Paint Problems

One of the most obvious signs that it’s time for you to treat your dining room cabinets for a fresh coat of paint is if you’re already seeing various signs of wear and tear on its surface.

Over time, the daily use of these cabinets can lead to a variety of issues – such as paint peeling, cracking, fading of paint, and many other problems associated with paint.

Having these on your cabinets can be an eye sore, something that you just cannot take your eyes off of, and bring the overall aesthetic and appeal of your dining room.

So, if you’re in between deciding whether to push through with your dining room cabinet repainting project or not, here’s your sign to go through with it!

2. Physical Damage

If you’re seeing cracks, dents, holes, or other kinds of physical damage on your dining room cabinets, this is also another classic sign that you should be thinking of repainting your dining room cabinets.

Over time, your cabinets might have acquired all sorts of physical damage from its repeated usage – may it be through accidentally bumping into it, children’s rough play, pets that may have come into contact with it, and other related factors.

These physical damages do not only pose a significant risk for your cabinets, but also ruin the coat of paint present on its surface.

So, to remedy this, you’ll want to apply a fresh coat of paint over them.

However, before doing so, make sure to patch up the physical damages on your cabinets first.

Addressing the damages will ensure that you won’t be totally renovating your cabinets and that you’ll have a smooth paint finish as a result of your project.

3. Moisture Damage and Mold

Kitchens and dining areas are prone to moisture, and over time, this can lead to damage to your dining room cabinets.

Moisture damage is not only disgusting, but it could also ruin your cabinet’s material if left unattended.

Signs of moisture damage include warping, swelling, or discoloration of the wood.

In more severe cases, you might even notice mold growth, which is not only unsightly, but it can also be harmful to your health.

So, in repainting your dining room cabinets, make sure to address the moisture problem first – may it be through a hole somewhere near your cabinets? A leaky water tube? Humidity problems?

Addressing this first is important to ensure that the moisture problem won’t persist after repainting.

For signs of molds, make sure to get rid of the molds first and repaint using mold-inhibiting paint.

4. Decreased Functionality

Sometimes, the issue with dining room cabinets isn’t just aesthetic.

If the doors are sticking, not closing properly, or the hinges are squeaky, it could indicate that the layers of paint have built up over time and are affecting the functionality.

Repainting your cabinets not only refreshes their look but also gives you the opportunity to address these functional issues, ensuring your cabinets work as well as they look.


If you need professional help with your interior painting project, Eason Painting can help.

Our home interior painting services are available in Washington Township, Rochester, Romeo, Shelby Township, Harrison Township, and Clinton Township, MI.

Call us today at 586-465-5081 for a FREE painting estimate.

Related: Tips To Know For Your Hallway Painting Project in Rochester, MI

Guide To Choosing A Paint Color For Your Guest Room in Richmond, MI

Read more
2023-12-04 Eason Painting Richmond MI Guide To Painting Your Dining Room Cabinets

Guide To Painting Your Dining Room Cabinets in Richmond, MI

Guide To Painting Your Dining Room Cabinets in Richmond, MI

Updating the look of your dining room doesn’t always require a complete renovation – sometimes, a fresh coat of paint on even as simple and unassuming as your cabinets can make a significant difference.

If you’re looking for something to guide you as you paint your dining room cabinets, here’s something perfect for you!

Here’s a Guide To Painting Your Dining Room Cabinets.

1. Do Proper Surface Preparation

In any painting project, doing proper surface preparation will always be the first thing to do before applying a fresh coat of paint onto the surface.

Proper surface preparation ensures that you’re going to be painting on a surface that is clean, even, and smooth, which in turn, will also give you favorable painting results.

In this process, you will want to:

  1. Clean Thoroughly: First, give your cabinets a thorough cleaning. Remove any dirt, grease, or grime using a mixture of warm water and a mild detergent. Wipe down all surfaces, inside and out, and then rinse them with clean water to remove any residue.
  2. Sand the Surfaces: Sanding is a crucial step in ensuring the paint adheres properly to the cabinet surfaces. You’ll want to use fine-grit sandpaper to lightly sand your cabinets. This will help remove any rough spots, imperfections, or glossy finishes. Be sure to wear a dust mask and safety goggles during this step, and remember to wipe away any dust with a tack cloth.
  3. Fill Imperfections: Inspect your cabinets for any holes, dents, or scratches. Use a filler to patch up these imperfections. Once the filler is dry, sand the repaired areas to make them smooth and level with the rest of the surface.

2. Choose the Right Paint and Color

Choosing the right paint is an important decision that often holds a lot of weight – ending up with the wrong kind of paint or the wrong color could change the whole trajectory of your project.

Ideally, you’d want to end up with a paint formulation specially made for cabinet painting, and the kind of surface you have with your cabinets – wooden surfaces and metal surfaces have different paint needs, so you’ll want to ask a paint professional which is the right choice for you.

There are also factors to choosing the right paint color: the kind of lighting present in the room, and the colors and elements that may already be present in the space.

These two factors are important since:

  1. Lighting has a significant effect on how your paint color will eventually look. Depending on the lighting present, there could be a slight difference between your expected outcome vs. how it will actually look. So, to offset this, make sure to check your chosen paint color with the lighting present in your dining room first.
  2. You’ll want to end up with a paint color that goes well with the existing elements and colors in your dining room space, to ensure an overall cohesive appeal – so keep this in mind!

3. Remove Your Cabinet Doors

To paint your dining room cabinets better, you’ll want to remove the doors off your cabinet frame.

You will eventually find that it’ll be hard to cover an even coat of paint on your cabinet doors without getting paint smudges all over the place, which is just the kind of mess you’re looking to avoid in your project.

To paint the area better, you should get your doors off your cabinet frame and lay them flat on a surface, where it’ll be much easier to paint them.

Just remember to keep all the necessary hardware, such as bolts and screws, so you can put them back in place when you’ve finished painting and drying them!

4. Proper Painting Techniques

Achieving a professional-looking finish requires attention to detail and the use of proper painting techniques.

Here are some techniques that may come in handy in painting your cabinets:

  1. Prime Before Painting: To ensure that your paint adheres well and provides an even finish, apply a coat of primer to your cabinets. Primer helps seal the wood, prevents stains from bleeding through, and promotes better paint adhesion.
  2. Apply Thin, Even Coats: When it’s time to paint, use a high-quality brush or foam roller for a smooth finish. Start with a thin coat of paint and work in long, even strokes. Avoid applying too much paint at once, as it can lead to drips and an uneven surface. Remember that it’s better to apply multiple thin coats than just one, thick coat.
  3. Let Each Coat Dry: Patience is crucial when painting cabinets. Follow the manufacturer’s recommended drying times between coats. This will help prevent smudging and ensure a flawless finish.

If you need professional help with your interior painting project, Eason Painting can help.

Our home interior painting services are available in Washington Township, Rochester, Romeo, Shelby Township, Harrison Township, and Clinton Township, MI.

Call us today at 586-465-5081 for a FREE painting estimate.

Related: Common Paint Problems And How To Prevent Them in Washington, MI

Hallway Painting Tips For Lesser Mess in Washington, MI

Read more
2023-11-25 Eason Painting Rochester MI Tips To Know For Your Hallway Painting Project

Tips To Know For Your Hallway Painting Project in Rochester, MI

Tips To Know For Your Hallway Painting Project in Rochester, MI
While often disregarded, our hallway space is actually an important area in our home that needs attention and maintenance from time to time – which, one of the best ways to do this would be through a fresh coat of paint.

However, before picking up that paintbrush and actually painting, you must get acquainted with some of the most basic tips and tricks to doing a hallway painting project, or else you’re just setting yourself up for failure!

So, without further ado, here are Tips To Know For Your Hallway Painting Project.

1. Plan and Prepare

Before starting your hallway painting project, or really any painting project in general, doing proper planning and preparation sets the foundation for your project, and eventually leads you to a successful one.

Doing proper planning and preparation sets your initial pacing and progress, and essentially ensures that you’re on top of all things and processes involved in your project – in turn, this ensures a smooth, hassle-free experience in doing the project!

So, to do this, you’ll want to start by planning and brainstorming what it is that you want to do for your project, so you can also decide on which materials to get (such as paint color, type of paint, and other essentials).

Additionally, make sure to list all of these so you won’t be forgetting anything!

Then, you’ll want to undergo your preparation process: to do this, you’ll want to clear your hallway of everything that may be in the space since there will be a disruption in your process.

You’ll also want to inspect your hallway surface for any signs of damage and patch them up accordingly, which is important for a smooth paint finish.

You can do this with a spackling compound, and sand them smooth for an even finish.

Finally, don’t forget to clean the walls thoroughly to remove dust, dirt, and grease – this step is often overlooked, but it’s crucial for ensuring that the paint adheres properly to your surface.

2. Choose the Right Paint

In any painting project, you will have to do the often daunting and confusing task of acquiring the right kind of paint for your project.

To do this, here are a few factors you must keep in mind:

  1. Formulation: You’ll want to end up with a kind of paint specially made for indoors, to ensure compatibility. You can ask a local paint professional for your best options!
  2. Color: Be certain of what you want with your hallway. It is also important to remember that lighting often influences the way a paint color would appear on a surface the most – so make sure to check your chosen paint color with the lighting present in your hallway space, to be certain of its eventual appearance and finish.
  3. Finish: Paint finishes range from flat (matte) to high-gloss. Hallways typically benefit from semi-gloss or satin finishes as they are more durable and easier to clean. These finishes also reflect light well, brightening up the space.
  4. Quality: While investing in high-quality paint may be something that could bloat up your expenses, this could actually help you save in the long run. High-quality paint is built to last, eliminating the need for frequent repaints – which will just double your time, effort, and expense.

3. Use Painter’s Tape for Clean Edges

In painting your hallway, you might find it difficult to apply an even coat of paint on your trims and edges without getting smudges all over the place – which is why you’re going to want to use painter’s tape for your project.

To do this, you’ll want to apply painter’s tape carefully along the edges of the walls, trim, and any other areas you want to protect from paint.

Take your time to ensure that the tape is straight and well-adhered to prevent paint bleed-through.

Then, when it’s time to paint, start with the edges and corners by using a brush to cut in, before moving on to the larger wall surfaces with a roller.

4. Employ Proper Painting Techniques

Lastly, it will be for the best of your project that you employ proper painting techniques for your hallway painting project.

Here are a few painting techniques and tips to keep in mind:

  1. Start From The Top: Begin painting at the top of the hallway and work your way down. This prevents paint from dripping onto previously painted areas.
  2. Paint In Even Strokes: Use long, even strokes when applying paint with a roller. Overlapping slightly with each pass will ensure even coverage.
  3. Work Quickly But Carefully: Avoid letting one section of the paint dry before moving on to the next, as this can result in visible seams or lap marks. Keep a “wet edge” by maintaining a consistent pace.
  4. Don’t Skimp On Coats: Apply at least two coats of paint to ensure thorough coverage and a rich, even color. Allow each coat to dry fully before applying the next.


If you need professional help with your interior painting project, Eason Painting can help.

Our home interior painting services are available in Washington Township, Rochester, Romeo, Shelby Township, Harrison Township, and Clinton Township, MI.

Call us today at 586-465-5081 for a FREE painting estimate.

Related: Guide To Choosing A Paint Color For Your Guest Room in Richmond, MI

Signs That You Should Be Repainting Your Roof in Richmond, MI

Read more
2023-11-16 Eason Painting Romeo MI Preparing For An Exterior Painting Project

Preparing For An Exterior Painting Project in Romeo, MI

Preparing For An Exterior Painting Project in Romeo, MI

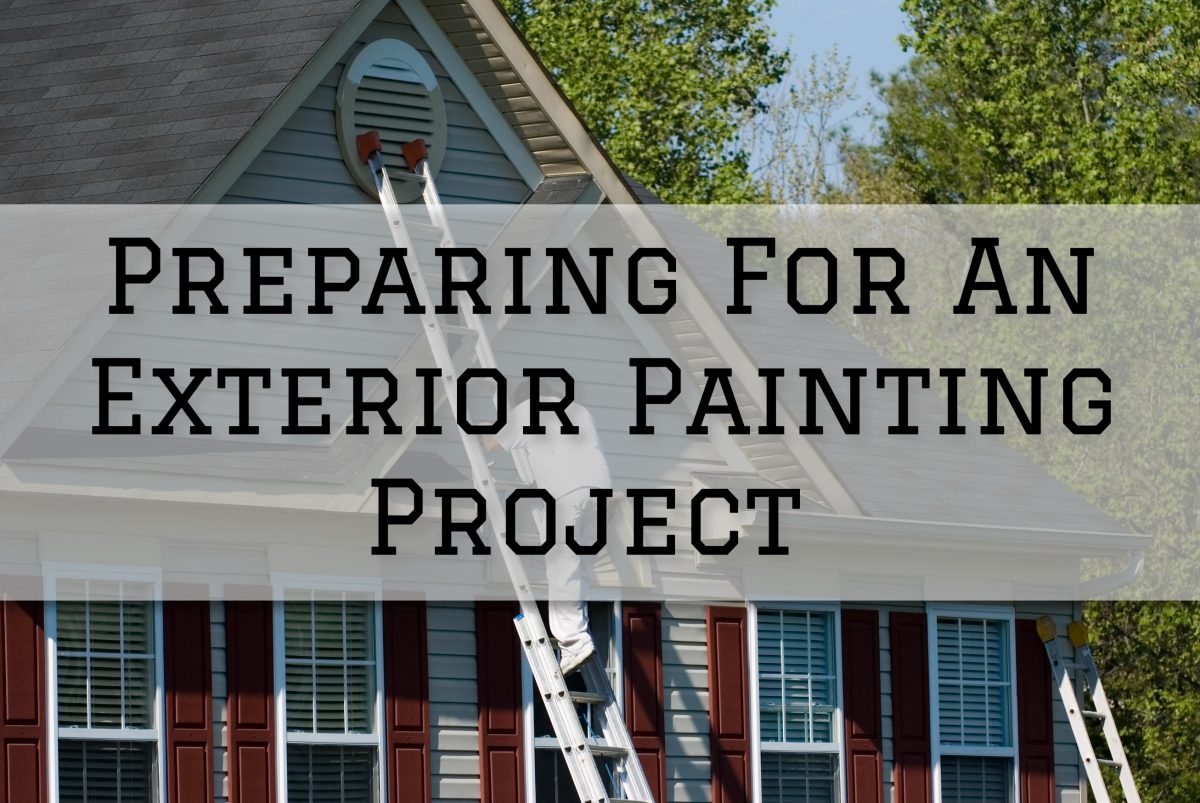
Your exterior holds a certain level of significance, especially since it is the first thing that people will see of your property.

Its overall appearance, condition, and appeal dictate anyone’s first impression of your home and is essentially indicative of you as a person.

So, if you want to ensure all good impressions on your home, doing an exterior painting project should be your best bet – nothing transforms a space better than a fresh coat of paint!

But, how do you prepare for such a project, you may ask?

To help you with this, here are tips for Preparing For An Exterior Painting Project.

1. Ensure Weather Conditions

In preparing for your exterior commercial painting project, one of the first things that you will want to prepare ahead of time is to check and ensure that the weather conditions during the time you do your project will be appropriate for painting.

Ideally, you would want to ensure that you’ll be painting on a dry and clear day so you can paint hassle-free.

You wouldn’t want to paint on a rainy day since you essentially would not be able to do that, since painting and rain won’t really mix.

So, to ensure that your exterior commercial painting project goes well, you should check weather conditions ahead of time so you can know when to schedule your project, and that the project goes according to plan.

2. Estimate How Much Paint You’ll Need

In preparing for your exterior commercial painting project, you will also want to estimate how much paint you’ll need for the project.

This is to ensure that you can buy the right amount of paint needed to successfully complete the project.

It’ll be such a hassle for you to either keep on going back and forth to the paint store because you’ve bought way too little paint and you’ve suddenly run out in the middle of your project or find out that you have bought way too much paint in the first place – which both wastes your effort and money, essentially.

Additionally, estimating how much paint you’ll need will get you

an idea of how much surface area you’re working with, so you can decide accordingly whether this is something you can handle on your own or whether you’d need a team to help you get it done.

3. Inspect The Surface For Signs of Damage

Prior to painting the exterior of your commercial property, you should ensure to inspect it first for any signs of damage.

This is important because no amount of paint nor primer will be ever enough to successfully cover up these existing damages on your exterior surface if there are any.

You would need to patch them up accordingly first before applying a coat of paint on them, to ensure that you will have a more seamless paint finish once you’ve finished.

In doing this, you could opt to either do it all by yourself or, if you’re not entirely sure how to do it, get it done by a professional, which is your best choice.

4. Clean Your Exterior Surface

Before painting the exterior of your commercial property, it is important that you clean your exterior surface first.

Over time, your commercial property’s exterior will have some kind of dirt build-up due to constant exposure to tons of external factors, which you will have to remove prior to painting it.

Depending on your property’s overall condition, you can either opt to just scrub it using some kind of cleaning detergent and rinse it or opt for a more powerful clean with a power washer.

Just make sure that you give your surface ample time to dry first before you apply any coat of paint on it!


If you need professional help with your interior painting project, Eason Painting can help.

Our home interior painting services are available in Washington Township, Rochester, Romeo, Shelby Township, Harrison Township, and Clinton Township, MI.

Call us today at 586-465-5081 for a FREE painting estimate.

Related: Tips For Painting A Small Bathroom in Washington, MI

Repainting Your Home Exterior: Handy Tips To Keep in Mind in Romeo, MI

Read more
2023-11-11 Eason Painting Washington MI Hallway Painting Tips For Lesser Mess

Hallway Painting Tips For Lesser Mess in Washington, MI

Hallway Painting Tips For Lesser Mess in Washington, MI

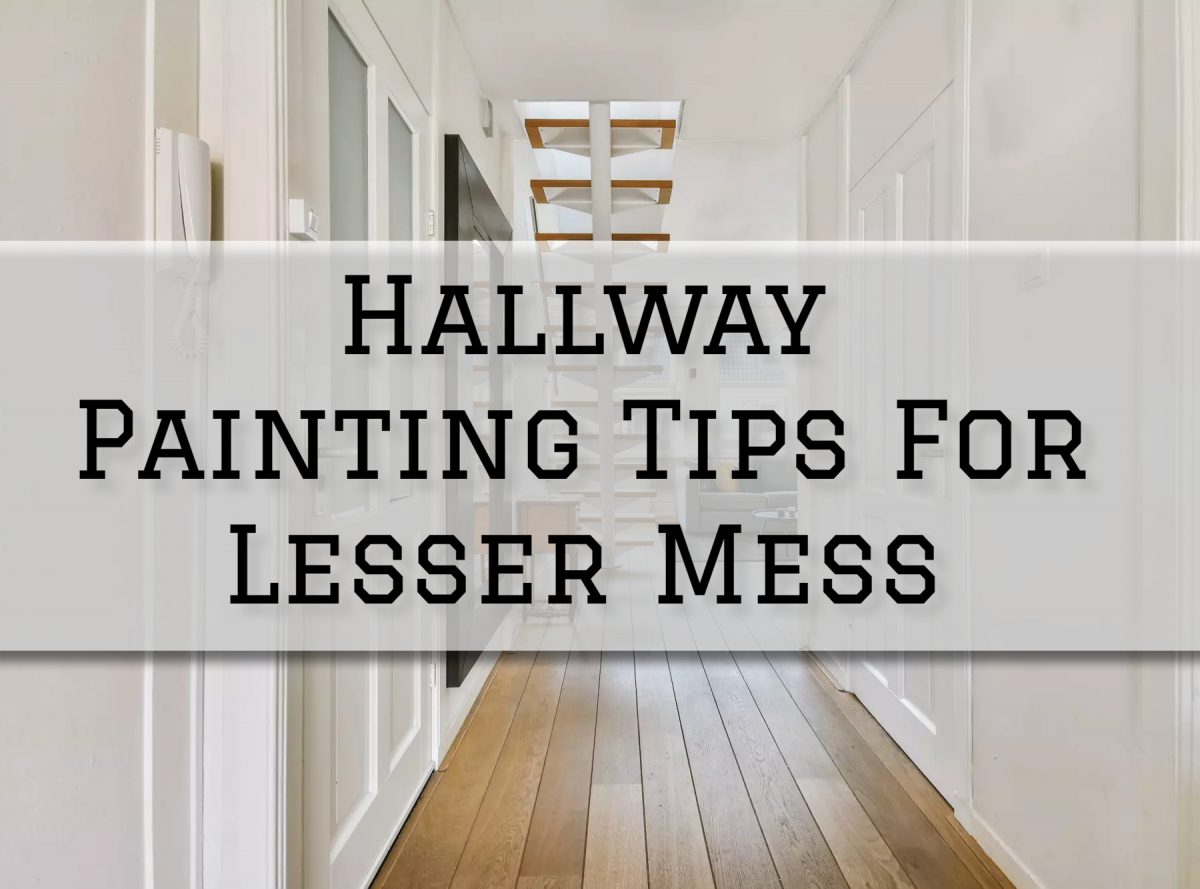
While hallways are often overlooked when it comes to home improvement and maintenance projects, painting your hallway could actually breathe new life into your home interior, and could bring a lot more appeal than we give it credit for.

However, just like any other painting project, painting your hallway can also be a messy and challenging project if not approached with care and preparation.

So, if you’re looking to do a hallway painting project as smooth and seamless as possible, here’s something you’ll want to read!

Let us look at these Hallway Painting Tips For a Lesser Mess.

1. Do Proper Preparation

To ensure as little mess as possible in your hallway painting project, one of the first things that you should do in your project is proper preparation.

Doing proper preparation prior to your painting project ensures a seamless painting process for your project, hindering the possibility of any problems that might arise later on in your project, which will eventually cause the mess you’re trying to avoid.

So, to do this, here’s what you’ll need to do:

  • Clear the Space: Remove all furniture, decorations, and items from the hallway. This includes rugs, wall art, and any small objects that might get in the way.
  • Patch and Sand: Inspect the walls for any holes, cracks, or imperfections. Patch and sand these areas until they are smooth. A smooth surface will result in a neater paint finish.
  • Clean the Walls: Wipe down the walls to remove dust, dirt, and any residual grime. A clean surface allows the paint to adhere better and reduces the chances of uneven coverage.
  • Acquire the Right Paint: Select a high-quality, low-splatter paint designed for interior walls. Consider using paint with a built-in primer, as it can reduce the number of coats needed.

2. Cover Up Necessary Areas

Paint drips and spills are often inevitable in any painting project – this is the unfortunate tendency when you’re working with paint since this creates such a mess that can be a hassle to clean up.

So, to avoid this, you’ll want to cover up necessary areas using a drop cloth, and painter’s tape.

Your floors and fixtures, which cannot be temporarily relocated or moved, will be left vulnerable to these pesky paint drips and spills, thus, you’ll fare better by covering them up with a drop cloth.

Ideally, you’d want to use a canvas-type drop cloth, as this is the kind of fabric that doesn’t let paint seep through it.

You might also find it hard to paint an even coat on the edges and crevices of your hallway without getting paint smudges all over the place – which is what painter’s tape is for.

However, do make sure to not let the tape on for too long on the surface, or you might be peeling off some parts of your fresh coat of paint when you finally do.

3. Work Strategically

In reducing, if not totally avoiding, mess in your hallway painting project, you must work strategically to achieve a mess-free painting project.

Here are a few strategies you might want to employ:

  • Start from the Top: Begin by painting the ceiling and upper edges of the walls. This way, any paint drips that occur will fall onto areas that haven’t been painted yet. You can then touch up the lower portions of the walls afterward.
  • Paint in Sections: Divide your hallway into manageable sections, typically 4 to 6 feet wide, and complete one section at a time. This allows you to maintain control over the paint application and reduces the risk of drips and spills.
  • Keep a Damp Cloth Nearby: Have a damp cloth or sponge nearby to quickly wipe off any accidental paint splatters or drips. The sooner you address these, the easier they are to remove.

4. Take Your Time and Be Patient

Last, but not the least, you should take your sweet time and be patient with your hallway painting project.

You must remember that rushing the process will lead to some kind of mistake or problem, and dealing with these mistakes will inevitably cause the mess you’re trying to avoid in the first place.

After all, a painting project is more enjoyable when it is taken slowly, smoothly, but surely, which will eventually lead you to a project done successfully.


If you need professional help with your interior painting project, Eason Painting can help.

Our home interior painting services are available in Washington Township, Rochester, Romeo, Shelby Township, Harrison Township, and Clinton Township, MI.

Call us today at 586-465-5081 for a FREE painting estimate.

Related: Tips For Painting A Small Bathroom in Washington, MI

Reasons To Do A Bathroom Cabinet Painting Project in Richmond, MI

Read more

Guide To Choosing A Paint Color For Your Guest Room in Richmond, MI

Guide To Choosing A Paint Color For Your Guest Room in Richmond, MI

In any painting project, choosing a paint color is one of the most important decisions that you would have to make – and your guest room painting project is not an exception to this.

There are several factors that go into your decision to ensure that you end up with the best possible choice.

So, if you’re about to go to the paint store to shop for paint, here’s something you might want to read on the way!

Here’s a Guide To Choosing A Paint Color For Your Guest Room.

1. Consider the Purpose of the Guest Room

In choosing a paint color for your guest room, one of the first things you should consider would be the purpose of your guest room.

While guest rooms are typically used as bedrooms for your guests, they could also double as a space where your guests could engage in some form of activity and bond with you.

Understanding the room’s purpose will help you choose a paint color that complements its intended use.

For a versatile guest room that serves multiple functions, consider neutral colors like soft grays, muted blues, or warm taupes.

These shades provide a calm and adaptable backdrop that can accommodate various activities while remaining inviting to guests.

On the other hand, if your guest room is a dedicated space for guests to sleep and unwind, you have more freedom to experiment with bolder colors.

Rich jewel tones like deep blues, emerald greens, or plum purples can add a touch of luxury and sophistication to the room, making it feel like a cozy retreat.

2. Look At The Lighting In The Area

The lighting present in your guest room space is also an important factor to consider in deciding on a paint color to use for your guest room since this will have a significant effect on how your paint color will eventually look once painted there.

Depending on the lighting present, your coat of paint can end up in varying appearances – which can cause a difference between your expected paint color and how it eventually appeared.

So, to be certain of how your paint color will look, check paint samples in your guest room, where they will be lit under the lighting present in the space, and you can see how it might affect your possible color choices.

This way, you also get to make an informed decision and reduce any risk of regrettable decisions.

3. Harmonize with Existing Decor and Furnishings

Another important factor to consider in deciding on a paint color for your guest room would be the existing colors and elements present in the space – and this can be seen with the decor and furnishings present in the space.

To do this, take note of the dominant colors and elements present in the space, which can be seen through the furniture, bedding, and accessories present in the room.

If you have furniture and decor in a particular color scheme, select a paint color that complements or contrasts with these elements in a pleasing way.

4. Test Paint Samples

Underestimating the effect of testing paint samples prior to committing to a final decision is a fatal mistake to make.

Paint can look drastically different on a small swatch compared to an entire wall, and the lighting conditions in your guest room can also affect how the color appears.

To ensure you choose the perfect paint color, purchase a few paint samples of your top contenders and apply them to a small section of your guest room’s walls. Observe how the colors look in different lighting conditions, both during the day and at night.

This will help you see how the paint color interacts with the room’s furnishings and whether it achieves the desired mood and atmosphere.

Remember that paint colors can also be affected by adjacent colors, so consider the room’s overall color scheme when making your final decision.

Take your time with this step, as it’s essential to be confident in your choice before you start painting the entire room.


If you need professional help with your interior painting project, Eason Painting can help.

Our home interior painting services are available in Washington Township, Rochester, Romeo, Shelby Township, Harrison Township, and Clinton Township, MI.

Call us today at 586-465-5081 for a FREE painting estimate.

Related: Tips For Doing A Roof Painting Project All On Your Own in Romeo, MI

Safety Painting Tips For Your Bathroom Painting Project in Washington, MI

Read more
2023-10-25 Eason Painting Rochester MI How To Repaint Your Peeling Cracked Interior

How To Repaint Your Peeling/Cracked Interior in Rochester, MI

How To Repaint Your Peeling/Cracked Interior in Rochester, MI

Peeling/cracking paint on your home interior can be very unsightly, messy, and bring down your home’s overall appeal.

While this can be a common paint problem among households, this doesn’t mean that this warrants lesser urgency – when left untreated, the existing peeling problem on your interior could escalate to an even bigger problem.

By that time, it might already be too big and complicated of a problem to take care of, and one you could have fully prevented had you given the issue the proper intervention on its first signs.

So, if you’re seeing early signs of paint peeling on your interior and would like to do the responsible thing of getting it fixed as soon as possible, here’s something you’ll find useful!

Check out this guide on How To Repaint Your Peeling/Cracked Interior.

Step 1: Inspect The Existing Damage

Before anything else, you must inspect the existing damage on your interior first.

This will be important so you can have an assessment of the extent of the damage on your interior, and possibly have a guess on why your interior’s coat of paint has peeled in the first place.

Paint peeling/cracking can be a common paint problem among households, which might be a direct/indirect effect of the following:

  • Lack of surface preparation prior to painting;
  • Lack of primer application;
  • Moisture present on the surface you’ve painted;
  • Using low-quality paint;
  • An overall abysmal painting project

Knowing these will give you a significant boost on how you should plan out your painting project, how to best address the problem, and essentially what to avoid to prevent the problem from happening again.

Step 2: Do Proper Preparation

After having a thorough inspection of your damaged interior, and strategizing accordingly, you’ll now want to proceed with the next part of your process and the first step in any painting project: proper preparation.

To do this, you’ll want to:

  1. Clear the room: Remove all furniture, decor, and items from the room. If you can’t move some furniture, push it to the center of the room and cover it with plastic sheets to protect it from paint splatters.
  2. Protect floors and trim: Cover the floors with drop cloths or plastic sheeting to prevent paint from dripping onto them. To protect your edges and trims from paint smudges, use painter’s tape.
  3. Clean the walls: Having dust and dirt on your surface will prevent proper paint adhesion. So, use a damp cloth to wipe down the walls and remove any grime. If your walls are exceptionally dirty, you may need to use a mild detergent solution.
  4. Repair cracks and holes: Fill any cracks or holes in the walls with a patching compound. After drying the compound, you’ll want to sand them to achieve a smoother and even feel.

Step 3: Prime Your Walls

In fixing the existing paint peeling/cracking problem on your home interior, it is necessary that you prime your walls first prior to adding your brand-new coat of paint.

As has been previously mentioned, a lack of primer application can lead you to the same paint problem – which is the exact kind of thing you’re trying to fix in the first place!

So, prior to applying your brand new coat of paint, apply a coat of primer to your walls first, and allow it to dry completely before proceeding.

Step 4: Apply Your Paint

Now here comes the fun part of your project: applying your paint!

To do these, here are a few pointers to keep in mind:

  1. Cut in: Start by using a brush to cut in around the edges of the walls, including corners, ceilings, and baseboards. This ensures clean lines and a neat finish.
  2. Roll on the paint: Use a roller to apply paint to the larger wall areas. Roll the paint in a “W” or “M” shape to evenly distribute it, then roll it out in long, vertical strokes to create a uniform finish.
  3. Work in sections: To avoid lap marks, work in small sections at a time. Keep a wet edge by overlapping your strokes with the previously painted area while it’s still wet.
  4. Apply a second coat: Once the first coat has dried completely, typically in a few hours, apply a second coat for better coverage and durability.

Step 5: Clean Up

After successfully applying your fresh coat of paint, you’ll now want to clean up and proceed with your other post-painting necessities.

Here’s what you’ll want to do:

  1. Remove painter’s tape: Carefully remove the painter’s tape before the paint dries completely to avoid peeling the paint off with it.
  2. Clean your tools: Thoroughly clean your brushes, rollers, and other painting tools with soap and water or the recommended cleaner for the type of paint you used.
  3. Inspect your work: Once the paint is dry, inspect your walls for any imperfections, drips, or missed spots. Touch up any areas that need attention with a small brush or roller.
  4. Reassemble the room: Once you’re satisfied with the results, move your furniture and decor back into the room.


If you need professional help with your interior painting project, Eason Painting can help.

Our home interior painting services are available in Washington Township, Rochester, Romeo, Shelby Township, Harrison Township, and Clinton Township, MI.

Call us today at 586-465-5081 for a FREE painting estimate.

Related: Reasons To Do A Bathroom Cabinet Painting Project in Richmond, MI

Safety Painting Tips For Your Roof Painting Project in Rochester, MI
Read more