Archives for Interior Painting

2024-01-04 Eason Painting Richmond MI Guide For Preparing To Paint Your Living Room

Guide For Preparing To Paint Your Living Room in Richmond, MI

Guide For Preparing To Paint Your Living Room in Richmond, MI

If you are looking for a way to refresh your living room space without spending too much on new things and the hassle of a full-blown renovation, doing a painting project will be your best bet.

Whether you’re looking to change the color scheme, cover up imperfections, or simply update the decor, a fresh coat of paint can work wonders.

So, if you are currently wondering how you can prepare for such a project, fret not – here’s a handy guide to assist you in your latest painting venture!

Without further ado, here’s a Guide For Preparing To Paint Your Living Room.

1. Choosing A Color Palette

To start your living room painting project, you will have to be certain first of exactly what you want to do for the project and choose a color palette to go with the project.

It is important to know that the color you choose will determine your living room’s appearance, and significantly impact the overall ambiance and feel of the space – so this choice is absolutely crucial!

To end up with the best choice, here are some factors to consider:

  • Consider the Space: Think about the size and layout of your living room. Lighter colors can make a room feel more spacious, while darker shades can create a cozy and intimate atmosphere.
  • Match Your Decor: Take into account your existing furniture, decor, and flooring. Your paint colors should complement and enhance your existing design elements.
  • Test Swatches: Before committing to a color, buy sample paint pots and apply swatches to your walls. Observe how they look in different lighting conditions throughout the day to ensure you’re happy with your choice.
  • Think About the Ceiling: Don’t forget to consider the color of your ceiling. Many homeowners opt for a lighter shade than the walls to make the room feel taller and more open.

2. Gather Your Painting Supplies

To help you apply the paint to your living room, you will have to gather your painting supplies and tools.

Making sure that you have acquired all the materials you need is an important factor in a smooth, hassle-free painting project.

Here is a list of items you might need:

  • Paint: Purchase high-quality paint in the colors you’ve selected. Consider the finish (e.g., matte, eggshell, satin, or semi-gloss) that suits your living room’s needs and style.
  • Paint Brushes and Rollers: Invest in a variety of brushes and rollers for different surfaces and details. A high-quality paintbrush can make a significant difference in achieving smooth, even coverage.
  • Drop Cloths or Tarps: Cover your floors and furniture with drop cloths or plastic tarps to protect them from paint splatter and spills.
  • Painter’s Tape: Use painter’s tape to mask off areas you don’t want to paint, such as trim, baseboards, and outlets.
  • Paint Trays and Liners: Paint trays and disposable liners make the painting process more efficient and less messy.
  • Paint Tray Liner Bags: These are handy for easy cleanup after you’ve finished painting.
  • Paint Stirrer and Roller Tray: A paint stirrer ensures your paint is thoroughly mixed, and a roller tray makes it easier to load paint onto your roller.
  • Sandpaper and Putty: Use sandpaper to smooth rough surfaces and putty to fill any holes or cracks in the walls.
  • Extension Poles: These are useful for reaching high walls and ceilings without the need for a ladder.

3. Prepare the Room

Another important thing to do in preparation for your living room painting project would be to prepare your living room space for the project.

You can do this by clearing the room of any furniture, decorations, and any other items that might get in your way as you paint in the room.

You’ll also want to cover up necessary areas, such as your floors and living room fixtures, with drop cloths or plastic sheeting, to avoid getting mess such as paint drips and spills all over them.

This is an important process to undertake in preparing for your project to ensure little to no problems in your painting project, which will just cause further delay in your progress.

4. Prime the Walls

Lastly, just before you let your paintbrush touch your living room walls, make sure that you apply a coat of primer on your living room walls first.

Applying primer is an essential step in a painting project that is often overlooked, but this is the kind of mistake that would cost you later.

First, primer helps the paint adhere to the surface more effectively, ensuring better coverage and durability, and can hide stains, marks, and imperfections on the walls, creating a clean canvas for your paint.

More importantly, primer seals the walls, preventing them from soaking up too much paint, which can lead to uneven results.


If you need professional help with your interior painting project, Eason Painting can help.

Our home interior painting services are available in Washington Township, Rochester, Romeo, Shelby Township, Harrison Township, and Clinton Township, MI.

Call us today at 586-465-5081 for a FREE painting estimate.

Related: Signs That You Should Be Repainting Your Dining Room Cabinets in Washington, MI

Materials To Get For An Exterior Painting Project in Rochester, MI

Read more
2023-12-25 Eason Painting Rochester MI Signs That You Should Be Repainting Your Bedroom Cabinets

Signs That You Should Be Repainting Your Bedroom Cabinets in Rochester, MI

Signs That You Should Be Repainting Your Bedroom Cabinets in Rochester, MI

While often overlooked, one of the key elements in your bedroom space would be your cabinets – not only do they provide you with extra storage solutions, but they also play an essential role in your space’s overall appeal, making your bedroom feel complete and organized.

Over time, though, bedroom cabinets can begin to show signs of wear and tear – which a fresh coat of paint can quickly fix.

So, if you’re wondering whether it is time for you to treat your bedroom cabinets to a fresh coat of paint or not, here’s something to help you!

Here are Signs That You Should Be Repainting Your Bedroom Cabinets.

Fading Paint

If you happen to notice that the paint on your bedroom cabinets seems more drab or mundane than its usual bright and vivid finish, chances are that its coat of paint might have started to fade – and a rather obvious sign that you should be treating it with a fresh coat.

Paint fading is one of the most common paint problems among the average household, which happens due to several factors, such as:

  1. Excessive exposure to sunlight;
  2. Unsteady weather patterns;
  3. A lack of primer application before applying the coat of paint;
  4. Using low-quality paint;
  5. An overall abysmal painting procedure

On top of all these, your coat of paint can also fade naturally over time, which means that it might have been a while since you last painted your cabinets, and you’re way overdue for a fresh coat.

Repainting your bedroom cabinets will be a great way to address the existing paint problem on it, and to essentially breathe new life to these bedroom fixtures!

However, do keep in mind to not repeat the said mistakes listed above, to ensure that your coat of paint won’t be fading again anytime soon!

Peeling/Cracking Paint

If you’re seeing strips of paint peeling all over your bedroom cabinets, or just various parts of your cabinets with paint cracking across them, then this is another clear sign for you to be repainting your cabinets.

Just like paint fading, paint peeling/cracking is also another kind of paint problem that can be common among households.

The coat of paint on your cabinets, or any surface in general, might fade due to the presence of moisture on the surface, a lack of proper surface preparation beforehand, a lack of primer application before the coat of paint, or just an overall bad painting project.

Additionally, using low-quality paint could also compromise the overall quality of your coat of paint, leading to paint problems such as peeling/cracking paint.

So, in repainting your bedroom cabinets, keep the said mistakes listed above, to ensure that you won’t be seeing your cabinets with peeling paint anytime soon!

Scratches, Dents, and Stains

Bedroom cabinets often endure a fair amount of use, from opening and closing drawers to placing items on their surfaces.

As a result, it’s not uncommon for cabinets to accumulate scratches, dents, and stains over time, and these little imperfections might negatively affect your cabinets’ overall appearance, and in turn, bring down your bedroom’s overall appeal.

Thus, repainting your bedroom cabinets will be an effective way to conceal these blemishes and spruce up their overall appearance, and essentially ensure that you’re maintaining your bedroom’s overall appeal in the process.

Physical Damage

If your bedroom cabinets have seen better days and are showing signs of extensive wear and tear or physical damage, it’s a clear indication that repainting is in order.

Cabinets that have physical damage on their surface will inevitably need a fresh coat of paint since as the surface is damaged, the coat of paint present is also affected.

However, an important thing to remember in repainting damaged surfaces would be to patch up the damages present first before applying any coat of paint on it.

While paint is extremely transformative, it still won’t be able to cover up physical damages on a surface, and painting on a damaged surface will just result in an ugly, uneven paint finish.

Improved Home Value:

Lastly, repainting your bedroom cabinets isn’t just about personal satisfaction; it can also have a positive impact on improving your home’s value.

When potential buyers or renters view your bedroom, well-maintained cabinets can leave a lasting impression and make your property more appealing.

Investing in a fresh coat of paint for your cabinets can be a relatively low-cost home improvement project with a potentially high return on investment.


If you need professional help with your interior painting project, Eason Painting can help.

Our home interior painting services are available in Washington Township, Rochester, Romeo, Shelby Township, Harrison Township, and Clinton Township, MI.

Call us today at 586-465-5081 for a FREE painting estimate.

Related: Tips To Know For Your Hallway Painting Project in Rochester, MI

Preparing For An Exterior Painting Project in Romeo, MI

Read more
2023-12-11 Eason Painting Washington MI Signs That You Should Be Repainting Your Dining Room Cabinets

Signs That You Should Be Repainting Your Dining Room Cabinets in Washington, MI

Signs That You Should Be Repainting Your Dining Room Cabinets in Washington, MI

Your dining room is a central part of your home; this is the place you spend with your family talking and sharing stories over a warm meal, enjoying each other’s company and bonding.

So, it is important that every aspect of your dining room is in great shape – and this includes your dining room cabinets.

Over time, your cabinets could be subjected to various kinds of wear and tear, which could be remedied by a fresh coat of paint.

But what are the signs that you should be doing so?

To help you with that, here is a list of Signs That You Should Be Repainting Your Dining Room Cabinets.

1. Paint Problems

One of the most obvious signs that it’s time for you to treat your dining room cabinets for a fresh coat of paint is if you’re already seeing various signs of wear and tear on its surface.

Over time, the daily use of these cabinets can lead to a variety of issues – such as paint peeling, cracking, fading of paint, and many other problems associated with paint.

Having these on your cabinets can be an eye sore, something that you just cannot take your eyes off of, and bring the overall aesthetic and appeal of your dining room.

So, if you’re in between deciding whether to push through with your dining room cabinet repainting project or not, here’s your sign to go through with it!

2. Physical Damage

If you’re seeing cracks, dents, holes, or other kinds of physical damage on your dining room cabinets, this is also another classic sign that you should be thinking of repainting your dining room cabinets.

Over time, your cabinets might have acquired all sorts of physical damage from its repeated usage – may it be through accidentally bumping into it, children’s rough play, pets that may have come into contact with it, and other related factors.

These physical damages do not only pose a significant risk for your cabinets, but also ruin the coat of paint present on its surface.

So, to remedy this, you’ll want to apply a fresh coat of paint over them.

However, before doing so, make sure to patch up the physical damages on your cabinets first.

Addressing the damages will ensure that you won’t be totally renovating your cabinets and that you’ll have a smooth paint finish as a result of your project.

3. Moisture Damage and Mold

Kitchens and dining areas are prone to moisture, and over time, this can lead to damage to your dining room cabinets.

Moisture damage is not only disgusting, but it could also ruin your cabinet’s material if left unattended.

Signs of moisture damage include warping, swelling, or discoloration of the wood.

In more severe cases, you might even notice mold growth, which is not only unsightly, but it can also be harmful to your health.

So, in repainting your dining room cabinets, make sure to address the moisture problem first – may it be through a hole somewhere near your cabinets? A leaky water tube? Humidity problems?

Addressing this first is important to ensure that the moisture problem won’t persist after repainting.

For signs of molds, make sure to get rid of the molds first and repaint using mold-inhibiting paint.

4. Decreased Functionality

Sometimes, the issue with dining room cabinets isn’t just aesthetic.

If the doors are sticking, not closing properly, or the hinges are squeaky, it could indicate that the layers of paint have built up over time and are affecting the functionality.

Repainting your cabinets not only refreshes their look but also gives you the opportunity to address these functional issues, ensuring your cabinets work as well as they look.


If you need professional help with your interior painting project, Eason Painting can help.

Our home interior painting services are available in Washington Township, Rochester, Romeo, Shelby Township, Harrison Township, and Clinton Township, MI.

Call us today at 586-465-5081 for a FREE painting estimate.

Related: Tips To Know For Your Hallway Painting Project in Rochester, MI
Guide To Choosing A Paint Color For Your Guest Room in Richmond, MI

Read more
2023-12-04 Eason Painting Richmond MI Guide To Painting Your Dining Room Cabinets

Guide To Painting Your Dining Room Cabinets in Richmond, MI

Guide To Painting Your Dining Room Cabinets in Richmond, MI

Updating the look of your dining room doesn’t always require a complete renovation – sometimes, a fresh coat of paint on even as simple and unassuming as your cabinets can make a significant difference.

If you’re looking for something to guide you as you paint your dining room cabinets, here’s something perfect for you!

Here’s a Guide To Painting Your Dining Room Cabinets.

1. Do Proper Surface Preparation

In any painting project, doing proper surface preparation will always be the first thing to do before applying a fresh coat of paint onto the surface.

Proper surface preparation ensures that you’re going to be painting on a surface that is clean, even, and smooth, which in turn, will also give you favorable painting results.

In this process, you will want to:

  1. Clean Thoroughly: First, give your cabinets a thorough cleaning. Remove any dirt, grease, or grime using a mixture of warm water and a mild detergent. Wipe down all surfaces, inside and out, and then rinse them with clean water to remove any residue.
  2. Sand the Surfaces: Sanding is a crucial step in ensuring the paint adheres properly to the cabinet surfaces. You’ll want to use fine-grit sandpaper to lightly sand your cabinets. This will help remove any rough spots, imperfections, or glossy finishes. Be sure to wear a dust mask and safety goggles during this step, and remember to wipe away any dust with a tack cloth.
  3. Fill Imperfections: Inspect your cabinets for any holes, dents, or scratches. Use a filler to patch up these imperfections. Once the filler is dry, sand the repaired areas to make them smooth and level with the rest of the surface.

2. Choose the Right Paint and Color

Choosing the right paint is an important decision that often holds a lot of weight – ending up with the wrong kind of paint or the wrong color could change the whole trajectory of your project.

Ideally, you’d want to end up with a paint formulation specially made for cabinet painting, and the kind of surface you have with your cabinets – wooden surfaces and metal surfaces have different paint needs, so you’ll want to ask a paint professional which is the right choice for you.

There are also factors to choosing the right paint color: the kind of lighting present in the room, and the colors and elements that may already be present in the space.

These two factors are important since:

  1. Lighting has a significant effect on how your paint color will eventually look. Depending on the lighting present, there could be a slight difference between your expected outcome vs. how it will actually look. So, to offset this, make sure to check your chosen paint color with the lighting present in your dining room first.
  2. You’ll want to end up with a paint color that goes well with the existing elements and colors in your dining room space, to ensure an overall cohesive appeal – so keep this in mind!

3. Remove Your Cabinet Doors

To paint your dining room cabinets better, you’ll want to remove the doors off your cabinet frame.

You will eventually find that it’ll be hard to cover an even coat of paint on your cabinet doors without getting paint smudges all over the place, which is just the kind of mess you’re looking to avoid in your project.

To paint the area better, you should get your doors off your cabinet frame and lay them flat on a surface, where it’ll be much easier to paint them.

Just remember to keep all the necessary hardware, such as bolts and screws, so you can put them back in place when you’ve finished painting and drying them!

4. Proper Painting Techniques

Achieving a professional-looking finish requires attention to detail and the use of proper painting techniques.

Here are some techniques that may come in handy in painting your cabinets:

  1. Prime Before Painting: To ensure that your paint adheres well and provides an even finish, apply a coat of primer to your cabinets. Primer helps seal the wood, prevents stains from bleeding through, and promotes better paint adhesion.
  2. Apply Thin, Even Coats: When it’s time to paint, use a high-quality brush or foam roller for a smooth finish. Start with a thin coat of paint and work in long, even strokes. Avoid applying too much paint at once, as it can lead to drips and an uneven surface. Remember that it’s better to apply multiple thin coats than just one, thick coat.
  3. Let Each Coat Dry: Patience is crucial when painting cabinets. Follow the manufacturer’s recommended drying times between coats. This will help prevent smudging and ensure a flawless finish.

If you need professional help with your interior painting project, Eason Painting can help.

Our home interior painting services are available in Washington Township, Rochester, Romeo, Shelby Township, Harrison Township, and Clinton Township, MI.

Call us today at 586-465-5081 for a FREE painting estimate.

Related: Common Paint Problems And How To Prevent Them in Washington, MI

Hallway Painting Tips For Lesser Mess in Washington, MI

Read more
2023-11-25 Eason Painting Rochester MI Tips To Know For Your Hallway Painting Project

Tips To Know For Your Hallway Painting Project in Rochester, MI

Tips To Know For Your Hallway Painting Project in Rochester, MI

While often disregarded, our hallway space is actually an important area in our home that needs attention and maintenance from time to time – which, one of the best ways to do this would be through a fresh coat of paint.

However, before picking up that paintbrush and actually painting, you must get acquainted with some of the most basic tips and tricks to doing a hallway painting project, or else you’re just setting yourself up for failure!

So, without further ado, here are Tips To Know For Your Hallway Painting Project.

1. Plan and Prepare

Before starting your hallway painting project, or really any painting project in general, doing proper planning and preparation sets the foundation for your project, and eventually leads you to a successful one.

Doing proper planning and preparation sets your initial pacing and progress, and essentially ensures that you’re on top of all things and processes involved in your project – in turn, this ensures a smooth, hassle-free experience in doing the project!

So, to do this, you’ll want to start by planning and brainstorming what it is that you want to do for your project, so you can also decide on which materials to get (such as paint color, type of paint, and other essentials).

Additionally, make sure to list all of these so you won’t be forgetting anything!

Then, you’ll want to undergo your preparation process: to do this, you’ll want to clear your hallway of everything that may be in the space since there will be a disruption in your process.

You’ll also want to inspect your hallway surface for any signs of damage and patch them up accordingly, which is important for a smooth paint finish.

You can do this with a spackling compound, and sand them smooth for an even finish.

Finally, don’t forget to clean the walls thoroughly to remove dust, dirt, and grease – this step is often overlooked, but it’s crucial for ensuring that the paint adheres properly to your surface.

2. Choose the Right Paint

In any painting project, you will have to do the often daunting and confusing task of acquiring the right kind of paint for your project.

To do this, here are a few factors you must keep in mind:

  1. Formulation: You’ll want to end up with a kind of paint specially made for indoors, to ensure compatibility. You can ask a local paint professional for your best options!
  2. Color: Be certain of what you want with your hallway. It is also important to remember that lighting often influences the way a paint color would appear on a surface the most – so make sure to check your chosen paint color with the lighting present in your hallway space, to be certain of its eventual appearance and finish.
  3. Finish: Paint finishes range from flat (matte) to high-gloss. Hallways typically benefit from semi-gloss or satin finishes as they are more durable and easier to clean. These finishes also reflect light well, brightening up the space.
  4. Quality: While investing in high-quality paint may be something that could bloat up your expenses, this could actually help you save in the long run. High-quality paint is built to last, eliminating the need for frequent repaints – which will just double your time, effort, and expense.

3. Use Painter’s Tape for Clean Edges

In painting your hallway, you might find it difficult to apply an even coat of paint on your trims and edges without getting smudges all over the place – which is why you’re going to want to use painter’s tape for your project.

To do this, you’ll want to apply painter’s tape carefully along the edges of the walls, trim, and any other areas you want to protect from paint.

Take your time to ensure that the tape is straight and well-adhered to prevent paint bleed-through.

Then, when it’s time to paint, start with the edges and corners by using a brush to cut in, before moving on to the larger wall surfaces with a roller.

4. Employ Proper Painting Techniques

Lastly, it will be for the best of your project that you employ proper painting techniques for your hallway painting project.

Here are a few painting techniques and tips to keep in mind:

  1. Start From The Top: Begin painting at the top of the hallway and work your way down. This prevents paint from dripping onto previously painted areas.
  2. Paint In Even Strokes: Use long, even strokes when applying paint with a roller. Overlapping slightly with each pass will ensure even coverage.
  3. Work Quickly But Carefully: Avoid letting one section of the paint dry before moving on to the next, as this can result in visible seams or lap marks. Keep a “wet edge” by maintaining a consistent pace.
  4. Don’t Skimp On Coats: Apply at least two coats of paint to ensure thorough coverage and a rich, even color. Allow each coat to dry fully before applying the next.


If you need professional help with your interior painting project, Eason Painting can help.

Our home interior painting services are available in Washington Township, Rochester, Romeo, Shelby Township, Harrison Township, and Clinton Township, MI.

Call us today at 586-465-5081 for a FREE painting estimate.

Related: Guide To Choosing A Paint Color For Your Guest Room in Richmond, MI

Signs That You Should Be Repainting Your Roof in Richmond, MI

Read more
2023-11-11 Eason Painting Washington MI Hallway Painting Tips For Lesser Mess

Hallway Painting Tips For Lesser Mess in Washington, MI

Hallway Painting Tips For Lesser Mess in Washington, MI

While hallways are often overlooked when it comes to home improvement and maintenance projects, painting your hallway could actually breathe new life into your home interior, and could bring a lot more appeal than we give it credit for.

However, just like any other painting project, painting your hallway can also be a messy and challenging project if not approached with care and preparation.

So, if you’re looking to do a hallway painting project as smooth and seamless as possible, here’s something you’ll want to read!

Let us look at these Hallway Painting Tips For a Lesser Mess.

1. Do Proper Preparation

To ensure as little mess as possible in your hallway painting project, one of the first things that you should do in your project is proper preparation.

Doing proper preparation prior to your painting project ensures a seamless painting process for your project, hindering the possibility of any problems that might arise later on in your project, which will eventually cause the mess you’re trying to avoid.

So, to do this, here’s what you’ll need to do:

  • Clear the Space: Remove all furniture, decorations, and items from the hallway. This includes rugs, wall art, and any small objects that might get in the way.
  • Patch and Sand: Inspect the walls for any holes, cracks, or imperfections. Patch and sand these areas until they are smooth. A smooth surface will result in a neater paint finish.
  • Clean the Walls: Wipe down the walls to remove dust, dirt, and any residual grime. A clean surface allows the paint to adhere better and reduces the chances of uneven coverage.
  • Acquire the Right Paint: Select a high-quality, low-splatter paint designed for interior walls. Consider using paint with a built-in primer, as it can reduce the number of coats needed.

2. Cover Up Necessary Areas

Paint drips and spills are often inevitable in any painting project – this is the unfortunate tendency when you’re working with paint since this creates such a mess that can be a hassle to clean up.

So, to avoid this, you’ll want to cover up necessary areas using a drop cloth, and painter’s tape.

Your floors and fixtures, which cannot be temporarily relocated or moved, will be left vulnerable to these pesky paint drips and spills, thus, you’ll fare better by covering them up with a drop cloth.

Ideally, you’d want to use a canvas-type drop cloth, as this is the kind of fabric that doesn’t let paint seep through it.

You might also find it hard to paint an even coat on the edges and crevices of your hallway without getting paint smudges all over the place – which is what painter’s tape is for.

However, do make sure to not let the tape on for too long on the surface, or you might be peeling off some parts of your fresh coat of paint when you finally do.

3. Work Strategically

In reducing, if not totally avoiding, mess in your hallway painting project, you must work strategically to achieve a mess-free painting project.

Here are a few strategies you might want to employ:

  • Start from the Top: Begin by painting the ceiling and upper edges of the walls. This way, any paint drips that occur will fall onto areas that haven’t been painted yet. You can then touch up the lower portions of the walls afterward.
  • Paint in Sections: Divide your hallway into manageable sections, typically 4 to 6 feet wide, and complete one section at a time. This allows you to maintain control over the paint application and reduces the risk of drips and spills.
  • Keep a Damp Cloth Nearby: Have a damp cloth or sponge nearby to quickly wipe off any accidental paint splatters or drips. The sooner you address these, the easier they are to remove.

4. Take Your Time and Be Patient

Last, but not the least, you should take your sweet time and be patient with your hallway painting project.

You must remember that rushing the process will lead to some kind of mistake or problem, and dealing with these mistakes will inevitably cause the mess you’re trying to avoid in the first place.

After all, a painting project is more enjoyable when it is taken slowly, smoothly, but surely, which will eventually lead you to a project done successfully.


If you need professional help with your interior painting project, Eason Painting can help.

Our home interior painting services are available in Washington Township, Rochester, Romeo, Shelby Township, Harrison Township, and Clinton Township, MI.

Call us today at 586-465-5081 for a FREE painting estimate.

Related: Tips For Painting A Small Bathroom in Washington, MI

Reasons To Do A Bathroom Cabinet Painting Project in Richmond, MI

Read more

Guide To Choosing A Paint Color For Your Guest Room in Richmond, MI

Guide To Choosing A Paint Color For Your Guest Room in Richmond, MI

In any painting project, choosing a paint color is one of the most important decisions that you would have to make – and your guest room painting project is not an exception to this.

There are several factors that go into your decision to ensure that you end up with the best possible choice.

So, if you’re about to go to the paint store to shop for paint, here’s something you might want to read on the way!

Here’s a Guide To Choosing A Paint Color For Your Guest Room.

1. Consider the Purpose of the Guest Room

In choosing a paint color for your guest room, one of the first things you should consider would be the purpose of your guest room.

While guest rooms are typically used as bedrooms for your guests, they could also double as a space where your guests could engage in some form of activity and bond with you.

Understanding the room’s purpose will help you choose a paint color that complements its intended use.

For a versatile guest room that serves multiple functions, consider neutral colors like soft grays, muted blues, or warm taupes.

These shades provide a calm and adaptable backdrop that can accommodate various activities while remaining inviting to guests.

On the other hand, if your guest room is a dedicated space for guests to sleep and unwind, you have more freedom to experiment with bolder colors.

Rich jewel tones like deep blues, emerald greens, or plum purples can add a touch of luxury and sophistication to the room, making it feel like a cozy retreat.

2. Look At The Lighting In The Area

The lighting present in your guest room space is also an important factor to consider in deciding on a paint color to use for your guest room since this will have a significant effect on how your paint color will eventually look once painted there.

Depending on the lighting present, your coat of paint can end up in varying appearances – which can cause a difference between your expected paint color and how it eventually appeared.

So, to be certain of how your paint color will look, check paint samples in your guest room, where they will be lit under the lighting present in the space, and you can see how it might affect your possible color choices.

This way, you also get to make an informed decision and reduce any risk of regrettable decisions.

3. Harmonize with Existing Decor and Furnishings

Another important factor to consider in deciding on a paint color for your guest room would be the existing colors and elements present in the space – and this can be seen with the decor and furnishings present in the space.

To do this, take note of the dominant colors and elements present in the space, which can be seen through the furniture, bedding, and accessories present in the room.

If you have furniture and decor in a particular color scheme, select a paint color that complements or contrasts with these elements in a pleasing way.

4. Test Paint Samples

Underestimating the effect of testing paint samples prior to committing to a final decision is a fatal mistake to make.

Paint can look drastically different on a small swatch compared to an entire wall, and the lighting conditions in your guest room can also affect how the color appears.

To ensure you choose the perfect paint color, purchase a few paint samples of your top contenders and apply them to a small section of your guest room’s walls. Observe how the colors look in different lighting conditions, both during the day and at night.

This will help you see how the paint color interacts with the room’s furnishings and whether it achieves the desired mood and atmosphere.

Remember that paint colors can also be affected by adjacent colors, so consider the room’s overall color scheme when making your final decision.

Take your time with this step, as it’s essential to be confident in your choice before you start painting the entire room.


If you need professional help with your interior painting project, Eason Painting can help.

Our home interior painting services are available in Washington Township, Rochester, Romeo, Shelby Township, Harrison Township, and Clinton Township, MI.

Call us today at 586-465-5081 for a FREE painting estimate.

Related: Tips For Doing A Roof Painting Project All On Your Own in Romeo, MI

Safety Painting Tips For Your Bathroom Painting Project in Washington, MI

Read more
2023-10-25 Eason Painting Rochester MI How To Repaint Your Peeling Cracked Interior

How To Repaint Your Peeling/Cracked Interior in Rochester, MI

How To Repaint Your Peeling/Cracked Interior in Rochester, MI

Peeling/cracking paint on your home interior can be very unsightly, messy, and bring down your home’s overall appeal.

While this can be a common paint problem among households, this doesn’t mean that this warrants lesser urgency – when left untreated, the existing peeling problem on your interior could escalate to an even bigger problem.

By that time, it might already be too big and complicated of a problem to take care of, and one you could have fully prevented had you given the issue the proper intervention on its first signs.

So, if you’re seeing early signs of paint peeling on your interior and would like to do the responsible thing of getting it fixed as soon as possible, here’s something you’ll find useful!

Check out this guide on How To Repaint Your Peeling/Cracked Interior.

Step 1: Inspect The Existing Damage

Before anything else, you must inspect the existing damage on your interior first.

This will be important so you can have an assessment of the extent of the damage on your interior, and possibly have a guess on why your interior’s coat of paint has peeled in the first place.

Paint peeling/cracking can be a common paint problem among households, which might be a direct/indirect effect of the following:

  • Lack of surface preparation prior to painting;
  • Lack of primer application;
  • Moisture present on the surface you’ve painted;
  • Using low-quality paint;
  • An overall abysmal painting project

Knowing these will give you a significant boost on how you should plan out your painting project, how to best address the problem, and essentially what to avoid to prevent the problem from happening again.

Step 2: Do Proper Preparation

After having a thorough inspection of your damaged interior, and strategizing accordingly, you’ll now want to proceed with the next part of your process and the first step in any painting project: proper preparation.

To do this, you’ll want to:

  1. Clear the room: Remove all furniture, decor, and items from the room. If you can’t move some furniture, push it to the center of the room and cover it with plastic sheets to protect it from paint splatters.
  2. Protect floors and trim: Cover the floors with drop cloths or plastic sheeting to prevent paint from dripping onto them. To protect your edges and trims from paint smudges, use painter’s tape.
  3. Clean the walls: Having dust and dirt on your surface will prevent proper paint adhesion. So, use a damp cloth to wipe down the walls and remove any grime. If your walls are exceptionally dirty, you may need to use a mild detergent solution.
  4. Repair cracks and holes: Fill any cracks or holes in the walls with a patching compound. After drying the compound, you’ll want to sand them to achieve a smoother and even feel.

Step 3: Prime Your Walls

In fixing the existing paint peeling/cracking problem on your home interior, it is necessary that you prime your walls first prior to adding your brand-new coat of paint.

As has been previously mentioned, a lack of primer application can lead you to the same paint problem – which is the exact kind of thing you’re trying to fix in the first place!

So, prior to applying your brand new coat of paint, apply a coat of primer to your walls first, and allow it to dry completely before proceeding.

Step 4: Apply Your Paint

Now here comes the fun part of your project: applying your paint!

To do these, here are a few pointers to keep in mind:

  1. Cut in: Start by using a brush to cut in around the edges of the walls, including corners, ceilings, and baseboards. This ensures clean lines and a neat finish.
  2. Roll on the paint: Use a roller to apply paint to the larger wall areas. Roll the paint in a “W” or “M” shape to evenly distribute it, then roll it out in long, vertical strokes to create a uniform finish.
  3. Work in sections: To avoid lap marks, work in small sections at a time. Keep a wet edge by overlapping your strokes with the previously painted area while it’s still wet.
  4. Apply a second coat: Once the first coat has dried completely, typically in a few hours, apply a second coat for better coverage and durability.

Step 5: Clean Up

After successfully applying your fresh coat of paint, you’ll now want to clean up and proceed with your other post-painting necessities.

Here’s what you’ll want to do:

  1. Remove painter’s tape: Carefully remove the painter’s tape before the paint dries completely to avoid peeling the paint off with it.
  2. Clean your tools: Thoroughly clean your brushes, rollers, and other painting tools with soap and water or the recommended cleaner for the type of paint you used.
  3. Inspect your work: Once the paint is dry, inspect your walls for any imperfections, drips, or missed spots. Touch up any areas that need attention with a small brush or roller.
  4. Reassemble the room: Once you’re satisfied with the results, move your furniture and decor back into the room.


If you need professional help with your interior painting project, Eason Painting can help.

Our home interior painting services are available in Washington Township, Rochester, Romeo, Shelby Township, Harrison Township, and Clinton Township, MI.

Call us today at 586-465-5081 for a FREE painting estimate.

Related: Reasons To Do A Bathroom Cabinet Painting Project in Richmond, MI

Safety Painting Tips For Your Roof Painting Project in Rochester, MI

Read more
2023-10-04 Eason Painting Romeo MI Guide To Repainting Your Faded Home Interior

Guide To Repainting Your Faded Home Interior in Romeo, MI

Guide To Repainting Your Faded Home Interior in Romeo, MI

Paint fading can be a common paint problem among households – and it tends to drag down the overall appeal of your home interior.

If you happen to notice that your home interior seems more mundane than usual, looking a little pale and lifeless, then its coat of paint might have started to fade or is already faded.

But, this isn’t a problem a fresh coat of paint won’t be able to solve!

So, if you are looking to fix your faded home interior in hopes of revitalizing its appeal, here’s something you might find useful!

Here’s a Guide To Repainting Your Faded Home Interior.

1. Assess Why Your Coat Of Paint Faded

To start repairing your faded coat of paint, make sure to assess why it has faded in the first place.

Inspecting and assessing why your coat of paint has faded in the first place is important so you’ll know the culprit behind the paint problem, and essentially ensure to avoid the same instance.

To give you a reference, your coat of paint can fade due to these instances:

  • Investing in low-quality paint;
  • Failure to apply a coat of primer prior to paint application;
  • Skipping proper surface preparation;
  • Too much sun exposure in the area

Additionally, your coat of paint can also naturally fade over time, so if this is your instance, then your home interior is definitely long overdue for a fresh coat of paint.

2. Prepare The Area For Painting

When you know the culprit for your faded coat of paint and have taken the appropriate measures to avoid this moving forward, you’ll know want to start preparing the area for a fresh coat of paint.

You’ll want to start by clearing the space, which you can do by removing as much furniture and decoration from the room.

For fixtures that you cannot temporarily relocate, make sure to cover them with drop cloths or plastic sheets to avoid getting paint drips and splatters all over them.

Then, you’ll want to clean the surface you’re going to be painting and repair any physical damage that may be present on it, as this will ensure that you get a smooth paint finish as a result.

3. Choosing the Right Paint and Color

In repainting your faded home interior, choosing the right paint and color will be crucial decisions to make.

Making the right decisions when it comes to paint formula and color selection is crucial so you won’t find your home interior fading again anytime soon.

So, in doing this, here are a few factors you’ll need to consider:

  • Paint formula: You’ll want to end up with a high-quality paint formula that is resistant to early signs of paint fading. While it is tempting to invest in cheaper paint, this decision will also lead you back to the initial paint problem you are trying to solve in the first place.
  • Paint color: In choosing a paint color, you have two options: repainting using the same paint color, and using an entirely different color – which you’ll have to think about properly to ensure that you won’t regret the end results!

4. Apply Primer

If you are planning to repaint your interior using an entirely different color, applying primer prior to your brand-new coat of paint is crucial to achieving a bright and vivid paint finish.

Primer will help you achieve a better coverage, which in turn, will also help your brand new paint color look brighter and more vivid.

This is especially necessary if you are painting over a darker wall with a lighter paint color.

Additionally, the primer will also ensure that your coat of paint won’t fade again anytime soon – which is essentially what you are trying to do!


If you need professional help with your interior painting project, Eason Painting can help.

Our home interior painting services are available in Washington Township, Rochester, Romeo, Shelby Township, Harrison Township, and Clinton Township, MI.

Call us today at 586-465-5081 for a FREE painting estimate.

Related: Reasons To Do A Bathroom Cabinet Painting Project in Richmond, MI

Dining Room Repainting Tips You Should Know in Romeo, MI

Read more
2023-09-25 Eason Painting Rochester MI Mistakes To Avoid In Painting Your Bedroom Cabinets

Mistakes To Avoid In Painting Your Bedroom Cabinets in Rochester, MI

Mistakes To Avoid In Painting Your Bedroom Cabinets in Rochester, MI

While it can be extremely easy and straightforward to paint your bedroom cabinets, it is still very easy to set yourself up for failure if you go through it hastily.

Thus, making sure to avoid some of the most common mistakes you might make in your bedroom cabinet painting project is crucial to achieving a successful project.

So, without further ado, take a look at these Mistakes To Avoid In Painting Your Bedroom Cabinets.

1. Skipping the Prep Work

In doing a bedroom cabinet painting project, or really any painting project at all, skipping prep work will be a mistake that could put your whole project at stake.

This is because proper preparation will lay the necessary foundation that will propel your project to success, thus, skipping proper preparation will literally set you up for failure.

So, to do this, you’ll want to do two things: prepare your bedroom cabinets and the nearby space, and your cabinet’s surface.

First, you’ll want to clear your bedroom cabinets of everything that may be stored in there – things such as clothes, towels, and other bedroom essentials that you may have kept on your cabinets.

Then, you’ll also want to prepare the space near your cabinets by laying down drop cloths in the area, to avoid getting those pesky paint drips and spills that will be a hassle to clean up.

After that, you’ll want to do proper surface preparation by cleaning your cabinet’s surface, inspecting it for any signs of physical damage, and getting them fixed if there are any.

This is important so you can ensure a smooth paint finish in the end.

2. Hastily Choosing A Paint Color

There’s a lot that goes into deciding on a paint color to use for your bedroom cabinets, and it will be so easy to bring home the wrong choice and regret it afterward.

So, hastily choosing a paint color and not thinking about it more than you should is a mistake you should not be making.

To choose a paint color properly, here are the two factors you should be thinking of: the lighting present in the space you’re painting, and the surrounding colors present.

Lighting will have a significant effect on how your paint color will eventually look, thus, you should make sure to check paint samples under the right lighting – which in this case, is the lighting present in your bedroom!

You can also acquire samples of your chosen paint color/s and test them on a small portion of your bedroom cabinets – this way you can see how the lighting present in this space influences these colors, and decide accordingly.

The colors present in your bedroom are also a significant factor to consider in your decision, since you’ll want to paint your cabinets with a color that goes well with them, allowing for an overall cohesive appeal.

3. Rushing Through Coats

A painting project is indeed a project that would require your patience, thus, rushing to paint your cabinets would be a costly mistake on your part.

Rushing through your painting process can lead to uneven coverage, drips, and a generally abysmal paint finish – and one that you are bound to redo and repeat, which is just a hassle!

So, in painting your cabinets, take your time and apply thin, even coats of paint, allowing each coat to dry thoroughly before applying the next.

Remember that patience is key to ensuring a smooth finish and preventing the need for redoing and revisiting your project all over again.

4. Forgetting To Remove Your Cabinet Doors

In doing a bedroom cabinet painting project, a mistake that is very easy to commit would be removing your cabinet doors.

When they are left on your cabinets, your doors can be especially on study to paint on, making it hard for you to put an even coat on them.

Thus to make things easier, it will be better to temporarily remove your cabinet doors and lay them flat on a surface, where they will be much more stable and it will be much easier to put a coat of paint on them.

However, do make sure to keep all the necessary hardware in place, such as bolts, screws, and metal plates, so you can put your doors up with no problem after the paint has dried.


If you need professional help with your interior painting project, Eason Painting can help.

Our home interior painting services are available in Washington Township, Rochester, Romeo, Shelby Township, Harrison Township, and Clinton Township, MI.

Call us today at 586-465-5081 for a FREE painting estimate.

Related: Safety Painting Tips For Your Roof Painting Project in Rochester, MI

Tips For Avoiding Mess In Your Living Room Painting Project in Romeo, MI

Read more
2023-09-18 Eason Painting Washington MI Tips For Painting A Small Bathroom

Tips For Painting A Small Bathroom in Washington, MI

Tips For Painting A Small Bathroom in Washington, MI

While doing a painting project in a small bathroom space can seem to be a venture that doesn’t need that much thinking and strategizing, there are actually a lot of little details and adjustments that need to go into such a project to ensure that you don’t end up cramping the space.

If you go into it uninformed of these, you might be setting yourself up for failure.

So, if you are doing the right thing and researching first before proceeding to paint with your small bathroom space, here’s something you should be reading!

Check out these Tips For Painting A Small Bathroom.

1. Go With Lighter, Brighter Colors

In working with a small bathroom, you’d fare better by selecting lighter and brighter colors for your project.

Generally, in working with a smaller space for a painting project, light colors are usually recommended since these colors reflect more light, which then gives way to a brighter and airier room, and essentially makes the space feel bigger than it is.

So, in painting your small bathroom, you should go for lighter colors such as soft whites, pale pastels, and neutrals, to ensure that you end up with a space that feels light and bright.

Additionally, in choosing a paint color, you should consider the lighting present in the space and the surrounding colors in your bathroom – these are important factors to consider to ensure that you end up with the best possible choice.

If you’re concerned about the space feeling too monotonous, consider using different shades of the same color or introducing a subtle pattern through accessories like towels and shower curtains.

2. Be Wise With Your Color Options

In working with an already limited space, there are limitations to what you can incorporate into the space – thus, you’ll need to be wise with your color options.

As a general rule, you’ll want to end up with two to three colors at max – one as your primary/main color, and one/two colors that will serve as your accent or highlight colors.

Incorporating way too many colors into an already limited space will cramp the space and negatively affect it, making it look overwhelming to the eyes – which is the type of thing you should avoid when working with a small space.

3. Embrace Vertical Lines

When painting a small space such as a small bathroom, embracing vertical lines and incorporating these into the space will be a great way to maximize the space.

This is because vertical lines tend to accentuate the height of your space, and in turn, have the illusion of a larger space and maximizing your small bathroom!

To do this, you can incorporate vertical lines into your bathroom interior using accent colors, accentuate long, vertical fixtures on your bathroom, or incorporate vertical furnishings into your bathroom space.

However, do make sure to do this with moderation and appropriately, as you don’t want to overwhelm the space with too many of these elements.

4. Paint Using The Same Color

In working with a small bathroom, you might want to consider painting the entirety of the space using the same color.

Why is this?

Painting the entirety of your bathroom space with the same paint color will give you the illusion of a larger space, since you essentially take out your borders in this fashion, which can indicate how big or small a space is.

To do this, you’ll want to paint your walls and your ceiling with the same paint color – just make sure to paint at the top first so you can avoid paint drips from destroying your fresh coat of paint!


If you need professional help with your interior painting project, Eason Painting can help.

Our home interior painting services are available in Washington Township, Rochester, Romeo, Shelby Township, Harrison Township, and Clinton Township, MI.

Call us today at 586-465-5081 for a FREE painting estimate.

Related: Fence Painting: Practical Reasons Why You Should Do It in Richmond, MI

Safety Painting Tips For Your Bathroom Painting Project in Washington, MI

Read more
2023-09-04 Eason Painting Richmond MI Reasons To Do A Bathroom Cabinet Painting Project

Reasons To Do A Bathroom Cabinet Painting Project in Richmond, MI

Reasons To Do A Bathroom Cabinet Painting Project in Richmond, MI

While it’s pretty straightforward to do a bathroom cabinet painting project, some people still have reservations to do it; may it be because of a financing issue, a commitment conflict, or maybe they just do not see the importance of coating your bathroom cabinets with fresh paint.

But this is the kind of thinking that gets people to end up with a bathroom that does not feel comfortable to be in, which is just counterproductive to what it’s supposed to be – a comfort room!

So, if you are currently trying to see why you probably should be treating your bathroom cabinets to a fresh coat of paint, here’s something that might convince you!

Here are the Reasons To Do A Bathroom Cabinet Painting Project.

1. Enhance Your Cabinet’s Appearance

One of the obvious reasons why you should probably consider doing a bathroom cabinet painting project would be to enhance its overall appearance.

Bathroom cabinets are a huge and important part of our bathroom spaces, thus, it is important that we get them the necessary maintenance they need from time to time – which would be a fresh coat of paint.

A fresh coat of paint will breathe new life into your cabinets, and essentially within the whole space.

2. Improve Your Bathroom’s Overall Appeal

Since your bathroom cabinets are a significant part of your bathroom space, they will inevitably affect the space’s overall appeal – thus, its overall appearance becomes a huge factor to consider.

So, if you are finding that your cabinets seem to be dragging down your bathroom’s overall appeal, then maybe this will be a good reason to treat them to a fresh coat of paint.

Doing a bathroom cabinet painting project will be the perfect way to address an aesthetic appeal issue present in the area, which is just a testament to how transformative a coat of paint really is.

It is important to be reminded that our bathroom cabinets are not there for merely extra storage space, but they also greatly contribute to the area’s overall appeal and makes the area feel more tied up and complete.

After all, a bathroom space just won’t feel right without cabinets, right?

3. Address Present Damages

Over time, your bathroom cabinets can accumulate wear and tear due to regular use, may it be due to exposure to moisture, or unanticipated accidents.

These come in the form of scratches, chipped paint, water stains, and other blemishes that tend to be unsightly and could cause further damage to your cabinet’s material.

A part of doing a painting project requires you to address current physical damages on the surface that you’re going to be painting, to essentially ensure a smooth paint finish.

Thus, in doing a bathroom cabinet painting project, you do not only elevate and improve your current bathroom appeal situation, but you also get an excellent opportunity to address these present damages and give your bathroom a fresh start.

While a bathroom cabinet painting project can be costly, it will be the cheaper option than having to replace your cabinets entirely – which will not only be expensive but will be much more extensive and a hassle!

4. Ensure The Cabinet Material’s Longevity

Painting your bathroom cabinets is more than just a cosmetic improvement; it can also act as a protective layer that shields the cabinet material from moisture and other environmental factors.

Choosing the right type of paint and applying it correctly can significantly extend the lifespan of your cabinets.

Water-resistant paints, such as acrylic or oil-based paints, can create a barrier against moisture, preventing the material from excessive water exposure and becoming compromised.

This ensures that your cabinets not only look good but also stand the test of time.

5. Avoid Getting Molds All Over Them

Mold growth is a common concern in bathrooms due to its naturally humid conditions, and unpainted or damaged cabinets can be particularly susceptible to mold infestations.

Additionally, mold does not only pose certain health risks but can also cause irreversible damage to the cabinet material.

So, by painting your bathroom cabinets, you create a sealed surface that is less prone to mold growth.

To do this, you need to ensure to get paint that has mold and mildew-resistant properties, which you can do with the help of a paint professional if you are having a hard time picking this on your own.

If you need professional help with your interior painting project, Eason Painting can help.

Our home interior painting services are available in Washington Township, Rochester, Romeo, Shelby Township, Harrison Township, and Clinton Township, MI.

Call us today at 586-465-5081 for a FREE painting estimate.

Related: Bedroom Cabinet Painting Tips To Know in Richmond, MI

Guide To Choosing A Paint Color For Your Kitchen Cabinets in Richmond, MI

Read more
2023-08-25 Eason Painting Rochester MI How To Choose A Paint Color For Your Bedroom Cabinets

How To Choose A Paint Color For Your Bedroom Cabinets in Rochester, MI

How To Choose A Paint Color For Your Bedroom Cabinets in Rochester, MI

In your bedroom, you’d find an essential fixture that is both useful for storage and contributes to your bedroom area’s overall appeal – the cabinets.

Because of this, it is important that we maintain our bedroom cabinets from time to time, which is often best done with a fresh coat of paint.

In doing a bedroom cabinet painting project, one of the most important choices that you will have to make would be the paint color to use for it, and there are factors to consider to ensure that you end up with the best choice.

So, if you are currently burdened with this decision, fret not – here’s something you can quickly read on the way to the paint store!

Here’s How To Choose A Paint Color For Your Bedroom Cabinets.

1. Follow A Theme

In choosing a paint color for your bedroom cabinets, following a general theme will be one factor that you might want to consider in your decision.

Choosing a paint color can be a hard choice, especially with the number of variations out there in the paint market, so it pays to be ready and clear with your vision before going to the paint store.

In following a general theme, you get to determine which colors will fit best with your vision, thus, helping you narrow down your paint color choices to a specific set of colors!

However, you’ll want to remember to choose a theme fit for your bedroom, since you’ll want to paint your cabinets with a color that goes well with the rest of your bedroom interior.

2. Take The Lighting Present In The Space To Consideration

Lighting will also be an important factor to consider in your choice since this will have a significant impact on how your paint color will eventually look once painted on the surface.

Depending on the source of light present in your bedroom, your coat of paint could end up in varying outcomes – shades darker or lighter, paler or deeper in color, or have some undertones that you could only see in certain lighting conditions!

Thus, to ensure that you know exactly how your chosen paint color will look, you’ll want to check your paint color choice under your bedroom’s lighting.

3. Take Inspiration from Existing Bedroom Elements

You’ll also want to look at the existing elements in your bedroom and consider these in deciding on a paint color for your bedroom cabinets.

This is important since you’ll want to end up with a paint color that goes well with the rest of your bedroom interior, which then allows for a more cohesive, and essentially aesthetically appealing finish.

To do this, you’ll want to take a good look at your bedroom space and observe the dominant colors and elements present in the area, and make sure to think about this when choosing a paint color.

If you are having a hard time determining which paint color should go well with which colors and elements, you can also refer to color palettes or design inspirations available online.

Or, if you can, it’ll be much better to approach a paint professional and ask for their opinion – they are color experts, and can definitely lead you to your best choices!

5. Test The Paint Color First Before Making a Final Decision

Lastly, if you have a paint color in mind, you should make sure to test the paint color first before making a final decision.

This is important since you’ll want to be certain with your choices and to avoid any abrupt changes in your painting project that will just delay your progress.

It will be such a hassle to suddenly change your paint color in the middle of your painting project; you’ll have to start from scratch, shop for paint again, and double your expense in the process!

So, to do this, you’ll want to acquire samples of the paint color/s you’ve chosen, and paint them on a small portion of your bedroom cabinets, so you can really see how they would look once painted there!

Remember that a paint color’s appearance depends on so many factors, so it’s crucial to test the colors in the actual space they will be applied.


If you need professional help with your interior painting project, Eason Painting can help.

Our home interior painting services are available in Washington Township, Rochester, Romeo, Shelby Township, Harrison Township, and Clinton Township, MI.

Call us today at 586-465-5081 for a FREE painting estimate.

Related: Safety Painting Tips For Your Roof Painting Project in Rochester, MI

Reasons Why You Should Paint Your Fences in Washington, MI

Read more
2023-08-18 Eason Painting Washington MI Safety Painting Tips For Your Bathroom Painting Project

Safety Painting Tips For Your Bathroom Painting Project in Washington, MI

Safety Painting Tips For Your Bathroom Painting Project in Washington, MI

Doing a bathroom painting project is definitely one of the best ways to elevate and transform your bathroom space, and is rather easier compared to other kinds of painting projects!

However, this is not a reason to stay lenient in doing such a project, as there are some risks you must avoid to ensure that you stay safe throughout your project.

So, if you have been looking for safety painting tips for your upcoming bathroom painting project, here’s a must read!

Here are Safety Painting Tips For Your Bathroom Painting Project.

1. Eliminate All Traces Of Molds and Muck

In trying to stay safe throughout your bathroom painting project, you’ll want to eliminate and remove all traces of mold and muck on your bathroom interior.

Since your bathroom is an area in your home that tends to be wet and possesses cold temperatures, these conditions make it the perfect place for mold growth – which can pose health hazards for you.

Additionally, muck can develop and accumulate on your bathroom floors and walls over time, which creates a slippery surface and makes another safety hazard for your project.

Thus, before proceeding with your painting project, make sure to clean your bathroom accordingly.

You can start by scrubbing the muck off your bathroom interior and floors using detergent and a brush – this will not only aid in your safety but could also help ensure that you get a smooth and clean paint finish for your project.

For molds, you can use a mixture of bleach and water and spray them onto affected areas.

However, if the mold problem on your interior is something beyond what you think you can handle, you should seek help from a professional – better to be safe than risk your health and be sorry!

2. Dry Your Floors

After making sure that all the muck is off your bathroom floors, you should now ensure to dry your floors completely before going through your painting project.

Wet floors will be slippery, and working on slippery floors is just a sure way to meet an accident – which is the exact opposite of what you’re trying to avoid in the first place!

So, in doing a bathroom painting project, make sure to provide the space ample time to completely dry up first after thoroughly cleaning it, to ensure that no accidents shall ensue in the process.

3. Disable All Electrical Appliances

You’ll also want to disable all electrical appliances in your bathroom since this poses a significant risk to your safety.

These come in the form of light bulbs, hair dryers, shower heaters, or any other devices that you might have in your bathroom space that run on electricity.

This is to prevent coming into contact with these electrical devices unexpectedly, which can result in electrocution, or worse, a very regrettable accident.

So, for a safe bathroom painting experience, make sure to temporarily disable all electrical switches in the bathroom.

However, if handling electrical devices is something out of your specialty or knowledge, do not hesitate to contact a professional for this – electricity can be very delicate to handle, and one mistake could lead you to an accident!

4. Clear Your Bathroom

Lastly, in preparation for a new coat of paint for your bathroom space, you’ll want to clear the area.

While this is a known essential for painting preparation, this is also a great safety tip to keep in mind!

Clearing your bathroom space helps remove any possible obstruction in the area, prevent them from falling over you or stepping over them, and essentially reduce any chances for an accident.

Additionally, this also helps you to prevent any unnecessary mess that could come from accidentally tripping or slipping over these obstructions, especially when you are handling paint!


If you need professional help with your interior painting project, Eason Painting can help.

Our home interior painting services are available in Washington Township, Rochester, Romeo, Shelby Township, Harrison Township, and Clinton Township, MI.

Call us today at 586-465-5081 for a FREE painting estimate.

Related: Bedroom Cabinet Painting Tips To Know in Richmond, MI

Kitchen Cabinet Painting Tips You Should Know in Richmond, MI

Read more
2023-08-11 Eason Painting Romeo MI Tips For Avoiding Mess In Your Living Room Painting Project

Tips For Avoiding Mess In Your Living Room Painting Project in Romeo, MI

Tips For Avoiding Mess In Your Living Room Painting Project in Romeo, MI

Doing a living room painting project is one of the best ways to completely revamp the space – a fresh coat of paint just brings a lot of appeal to a space.

However, a painting project can get a little messy, since you’re going to be working with paint, which can also be a hassle to take care of, especially with the burden of already doing a painting project!

But, this is not to say that it is impossible to avoid making a mess in your living room painting project – there are certain tips and tricks you can follow for a mess-free living room painting project!

So, without further ado, here are Tips For Avoiding Mess In Your Living Room Painting Project.

1. Clear And Protect The Space

Before diving into your painting project, it’s crucial to clear the room of furniture, decorations, and other living room essentials that you might have in the space.

Emptying the space will not only provide you with ample room to work but also prevent accidental paint splatters or damage to your belongings since you’re going to be removing all possible obstructions that can cause the mess in your living room.

You’ll also find that some stuff in your living room is rather difficult to move or is fixed in place, so you’ll have to acquire a drop cloth to cover them, protecting them from those pesky paint drips and spills.

Additionally, you should also cover the floors with drop cloths or plastic sheeting to shield them from paint drips and spills.

As an added tip: you’ll want to get a canvas-type drop cloth, as this is the type of fabric that doesn’t let paint seep through it – ensuring secure protection for your living room fixtures and floors!

2. Prepare Your Living Room

Proper surface preparation is key to achieving a clean and long-lasting paint job – and also to avoid a messy painting project!

This is because a surface that has not been properly prepared prior to a coat of paint will inevitably lead to a messy paint finish – one you’re bound to repeat, and will just double your expense and effort in the process.

So, to avoid this, you’ll want to clean your living room interior first – you can do this by cleaning the walls with a mixture of warm water and mild detergent to remove any dust, dirt, or grease that may interfere with paint adhesion.

Allow the walls to dry thoroughly before moving forward.

Next, inspect the walls for any cracks, holes, or any physical damage, and make sure to get them patched up accordingly.

This is to ensure a smooth paint finish, and after all, paint won’t be able to completely conceal physical damages on a surface all on its own.

3. Divide The Room Into Sections

A tip that will be really helpful to avoiding mess in your painting project would be to divide your living room in sections, since this can help you get organized and essentially produce little to no mess in your painting project.

This approach allows you to focus on one area, ensuring that you cover all spots and corners thoroughly without rushing, and so you can dry each coat of paint accordingly.

In doing this, you’ll want to paint each section carefully, starting from the top and working your way down – this way, paint drips won’t be much of a problem for your project!

4. Clean As You Go

Lastly, maintaining a clean workspace is essential throughout your painting project, and will eventually lead you to a project with lesser mess.

In doing this, you’ll want to keep a damp cloth or sponge handy to immediately clean up any accidental spills, drips, or smudges before they dry.

Keeping a sponge or a cloth will be important since wet paint is essentially easier to remove, so wiping them off any surface as soon as possible will save you from any extensive clean-up later on.

Additionally, as you progress with your painting, periodically inspect your brushes and rollers for any built-up paint or debris.

Cleaning them regularly will ensure smoother application and prevent any dried paint from contaminating your fresh coat – which causes an entirely new kind of mess that will be a hassle to take care of!


If you need professional help with your interior painting project, Eason Painting can help.

Our home interior painting services are available in Washington Township, Rochester, Romeo, Shelby Township, Harrison Township, and Clinton Township, MI.

Call us today at 586-465-5081 for a FREE painting estimate.

Related: Bedroom Cabinet Painting Tips To Know in Richmond, MI

Painting and Decorating Your Living Room On A Budget in Romeo, MI

Read more
2023-07-25 Eason Painting Rochester MI Safety Painting Tips For Your Roof Painting Project

Safety Painting Tips For Your Roof Painting Project in Rochester, MI

Safety Painting Tips For Your Roof Painting Project in Rochester, MI

If you’re looking for a way to enhance your overall curb appeal, you might want to consider doing a roof painting project – not only will this help you enhance your exterior’s overall appeal, but will also help you enhance your roof’s protection against external elements that might break it down.

However, it is also common knowledge that doing a roof painting project can be especially risky,

Thus, before embarking on such a project, it is important that you equip yourself accordingly and get familiar with the do’s and don’ts of a roof painting project.

So, if you are currently planning to do a roof painting project, here’s something you might want to read first.

Check out these Safety Painting Tips For Your Roof Painting Project.

1. Assess and Prepare the Roof

Before you start any painting work, it’s important that you assess your roof’s overall condition first and prepare it accordingly for your painting project.

This will be an important task to ensure your safety since your roof might have damage present on its surface, which could cause any unexpected accidents that could compromise your overall safety.

So, to begin, you should be inspecting your roof for any structural damage, loose shingles, or weak spots, and fully ensure that the roof is in a stable condition and capable of supporting your weight.

If you are iffy doing this all on your own, it would be recommended that you contact a paint professional to check your roof for you.

When all is safe and checked out, you’ll now want to do the necessary surface preparations for your roof – such as removing any debris or dust that might have accumulated on it over time, and making sure that the surface is clean, smooth, and overall ready for a fresh coat of paint.

2. Check Weather Conditions

To ensure your safety for your roof painting project, you’ll also want to check the weather conditions ahead of time.

Since you are going to be painting your roof, weather conditions will be a huge factor to your painting project, so you’ll want to ensure favorable weather conditions to ensure your safety and essentially secure a successful painting project.

For reasons that are very obvious, it will be impossible for you to paint your roof when it is raining outside – aside from the fact that it’ll be impossible, it’ll also be slippery for you to do so, which can be a safety hazard.

Additionally, you should also look out for particularly windy days, as the strong winds might set you off balance and make you lose your footing, which could possibly result in a very regrettable accident.

3. Wear Appropriate Safety Gear

To stay safe all throughout your roof painting project, you should see to it that you wear the appropriate safety gear.

To start, you can invest in a safety harness or fall protection system that is designed specifically for roof work.

It will also be advantageous for you to wear sturdy, non-slip footwear that provides good traction on different roof surfaces.

You should not also forget to wear your long-sleeved shirts, pants, and face masks to protect your skin from sunburn and/or coming into contact with toxic substances that might be harmful to your health.

4. Use A Stable Ladder

Because you’ll be painting your roof, you’ll naturally need to employ the use of a ladder – and in doing so, you’ll want to acquire a stable ladder to ensure your safety throughout your project.

Before using the ladder for your project, you need to ensure that it passes quality standards and test it first, so you can be really sure that it is steady and stable to use.

Additionally, you should remember to go up or down one step at a time and always face the ladder in doing so, to avoid any unnecessary slip-ups that might lead to an accident.

While it may be more expensive to acquire a stable, high-quality ladder, you also need to remember that you are essentially investing for your safety – and nothing is more worthy of investing than your own welfare.

5. Employ A Buddy System

Lastly, to ensure maximum safety in your roof painting project, it will also be beneficial for you to employ a buddy system in your project.

A buddy system will ensure that you will have someone to assist you, someone to look out for you as you proceed with your project, and essentially someone to call help for you in the instance that something happens in the middle of your painting project.

Get a buddy that you fully trust to help you with your project, and you’re off to a great start!


If you need professional help with your interior painting project, Eason Painting can help.

Our home interior painting services are available in Washington Township, Rochester, Romeo, Shelby Township, Harrison Township, and Clinton Township, MI.

Call us today at 586-465-5081 for a FREE painting estimate.

Related: Signs That You Need To Repaint Your Home Office in Rochester, MI
Painting and Decorating Your Living Room On A Budget in Romeo, MI

Read more
2023-07-11 Eason Painting Romeo MI Dining Room Repainting Tips You Should Know

Dining Room Repainting Tips You Should Know in Romeo, MI

Dining Room Repainting Tips You Should Know in Romeo, MI

If you have been noticing that your dining room feels drab or overall lacking in appeal lately, a fresh coat of paint might help in elevating and updating its overall appearance.

Repainting your dining room will be an excellent way to solve an aesthetic issue in the space!

But before embarking on such a project, it is vital that you inform yourself accordingly on how to do it, or else you’re setting yourself up for failure.

So, without further ado, here are Dining Room Repainting Tips You Should Know.

1. Decide Which Paint Color To Use

In repainting your dining room, you have two options: you can opt to repaint the space using the same color, or do a total overhaul and coat it with a brand-new color.

When you’re doing the first option, it usually warrants lesser hassle, since it’ll be easier to repaint your interior using the same color – you already know how the paint color will look once painted on the surface, so there’ll be no surprises there!

However, if you do decide to do the latter option, you must take note of some factors that you’ll have to consider in your decision.

First, lighting will be a big factor to consider, since this will have a significant effect on how your paint color will eventually look once painted on the surface.

So, make sure to check paint samples in your dining room space so you can see how the lighting present there affect your color choices.

You could also acquire a small amount of the paint color you’re currently eyeing, and do a test paint on a small portion of your dining room, so you can really see how it will look once painted to your interior.

Additionally, you should also be thinking of the colors, styles, and textures already present in your dining room, and consider them in deciding on a paint color – essentially, you’ll want a paint color that goes well with them, to allow a more cohesive appeal.

2. Prep Your Dining Room

Before your painting project, you should also see to it that your dining room area is prepared for the project you’re about to do.

In doing this, you’ll want to clear your dining room of anything and everything that might be in the space – these include your dining room furniture, any appliances, decorations, and other essentials that you might have in it.

It is important that you get these temporarily removed from your dining room area because you will want to free up as much space as possible, so in turn, you can also freely move around as you go through with your project.

There tends to be a lot of movement involved in a painting project, so this is important!

3. Start Painting At The Top

Another helpful tip in repainting your dining room would be to start painting at the top.

This is to get those pesky, inevitable paint drips to follow down surfaces you’re going to eventually cover up as you make your way down, which is a lot easier than the latter option.

Starting from the bottom when a painting gets these paint drips flowing down on your fresh coat of paint, which just ruins it and causes an entirely new paint problem that will be a hassle to take care of.

4. Try To Reuse Painting Materials

Lastly, in doing a repainting project, you might also want to consider reusing your old painting materials to save a few bucks.

It is no secret that a painting project can be expensive, so any tips or hacks that could get you to save money would actually be helpful!

However, do assess the overall quality of these old painting materials first, and if they’re usable at all because you don’t want to compromise the overall quality of your painting project.


If you need professional help with your interior painting project, Eason Painting can help.

Our home interior painting services are available in Washington Township, Rochester, Romeo, Shelby Township, Harrison Township, and Clinton Township, MI.

Call us today at 586-465-5081 for a FREE painting estimate.

Related: Tips For Painting Your Dining Room With Less Mess in Washington, MI

Guide To Choosing A Paint Color For Your Kitchen Cabinets in Richmond, MI

Read more
2023-07-04 Eason Painting Richmond MI Bedroom Cabinet Painting Tips To Know

Bedroom Cabinet Painting Tips To Know in Richmond, MI

Bedroom Cabinet Painting Tips To Know in Richmond, MI

In elevating your bedroom’s overall appeal, you may want to consider painting your bedroom cabinets – they are not merely there to accommodate extra storage space, but to also contribute to the space’s overall appeal.

With this in mind, it is essential that we give our bedroom cabinets the necessary maintenance from time to time – which a fresh coat of paint can conveniently provide.

So, if you are currently thinking of undertaking a bedroom cabinet painting project, here’s something you’ll want to read first.

Here are Bedroom Cabinet Painting Tips To Know.

1. Prepare The Surface For Painting

In painting your bedroom cabinets, one of the first steps that you should be doing would be proper surface preparation, which just means that you need to prepare your bedroom cabinets for painting.

To do this, you will want to first inspect your cabinets for any signs of damage, then get the necessary repairs for them if you have found any.

It is important to remember that paint won’t be able to conceal physical damage on a surface all on its own, so to ensure a smooth paint finish, necessary reparations should be done.

Next, you will want to clean your bedroom cabinets, making sure that they are free of any d over time.

2. Utilize Painter’s Tape

You should also utilize painter’s tape in doing your bedroom cabinet painting project.

Painting over the edges and corners of your bedroom cabinets can be a tedious and messy task to do since paint smudges and smears definitely get in your way – but this is nothing painter’s tape won’t be able to avoid and fix.

Additionally, putting up painter’s tape on the edges of your cabinets helps in ensuring that you will have straight-cut borders after your painting project – which is essentially what you want out of this project!

3. Lay Dropcloths On Necessary Areas

Since you are going to be painting your bedroom cabinets, it will be important for you to lay drop cloths on the necessary areas.

These areas may be the space under your bedroom cabinets, your floors, or any other fixtures or spaces near where you’re going to be painting.

Paint drips and spills will always be an inevitable part of a painting project, which creates the exact kind of mess you don’t want to be taking care of after your painting project – so don’t forget to cover up with dropcloths for your painting project.

As a tip, you should acquire a canvas-type dropcloth for your project, as this is the type that doesn’t let paint seep through it, ensuring spotless protection for your covered surfaces/fixtures!

4. Prime Before Painting

In any painting project, the primer will always be a necessary component to it – and for all the good reasons!

First off, a coat of primer will ensure that your surface will be in its best state to hold a coat of paint since it helps the coat of paint to adhere better to the surface.

It also ensures better coverage for your coat of paint, which will then allow for a brighter and more vivid paint finish.

All in all, a coat of primer will ensure that you will render quality results that will last for a longer time – which is essentially what you want out of this painting project.

So, before applying your coat of paint, make sure to apply a coat or two of primer first to your bedroom cabinets.

5. Remove Cabinet Doors

Lastly, in painting your bedroom cabinets, you should ensure to remove your cabinet doors prior to painting them.

When left attached to the main frame, your cabinet doors tend to be unsteady, with them possibly swiveling back and forth, which then makes it hard for you to apply an even coat of paint on them.

So, as a form of intervention, you should remove your cabinet doors and lay them flat on a surface instead, where they can be steady and you can paint them more conveniently.

However, do make sure to keep all the necessary hardware in place, such as screws and metal plates, so you can still put your doors safely back on your cabinets after drying them.


If you need professional help with your interior painting project, Eason Painting can help.

Our home interior painting services are available in Washington Township, Rochester, Romeo, Shelby Township, Harrison Township, and Clinton Township, MI.

Call us today at 586-465-5081 for a FREE painting estimate.

Related: Guide To Fixing Fading Paint On Your Home Interior in Romeo, MI

Tips For Preparing To Paint Your Game Room in Romeo, MI

Read more
2023-06-25 Eason Painting Rochester MI Signs That You Need To Repaint Your Home Office

Signs That You Need To Repaint Your Home Office in Rochester, MI
Signs That You Need To Repaint Your Home Office in Rochester, MI

In this technologically advanced society that we live in, where everything can easily be accessed and connected through the Internet, people now have the option to work in the comfort of their own homes – thus, the rise of home offices in modern home interiors.

Because our home offices are spaces dedicated to productivity and work, it is important that we keep the place looking neat and clean, thus, proper maintenance should be done from time to time.

However, how do we know that it is time to do so? What are the signs that should tell us that we should repaint our home office?

To help you with that dilemma, here are Signs That You Need To Repaint Your Home Office.

1. Faded or Discolored Walls

If you have been noticing that your once-bright walls have become lackluster or sullen-looking lately, it’s a surefire indication that it’s time for you to repaint your home office.

Faded or discolored walls are one of the most common paint problems that plague the average homeowner, which can be caused by prolonged exposure to sunlight, dirt, or a technical issue in the painting process such as a lack of primer application or using low-quality paint – which can cause paint to lose its vibrancy, resulting in a dull and worn-out appearance.

Additionally, your coat of paint can also naturally fade over time, which is an indication that it has been a while since you last painted the space and that your home office is overdue for a fresh coat.

In repainting your home office, do make sure to invest in quality paint and follow standard painting protocols, so you can ensure that your coat of paint won’t be looking faded or worn out anytime soon.

2. Peeling or Cracked Paint

If there are various areas in your home office with cracked or peeling paint, that is an obvious sign that you’ll need to treat the space with a fresh coat of paint.

Having paint peeling or cracked in your home office interior would not only be an eyesore but would also pertain to a paint problem that needs to be fixed or attended to.

Like paint fading, paint peeling or cracking is a kind of paint problem that can be common among households, but just because its occurrence is common doesn’t mean that it should warrant lesser urgency.

If left as it is, the initial painting issue on your home office could escalate to something much more expansive, which might be a bigger issue and damage to fix by the time you decide to do so – doubling the hassle you could have easily avoided.

If you happen to notice signs of peeling or cracking paint in your home office, it’s crucial to address them promptly to prevent further damage, since repainting will not only restore the appearance of your home office but also protect its walls from further deterioration.

3. Visible Stains or Damage

Accidents happen, whether it’s coffee spills, ink marks, or scratches from moving furniture, and they can lead to stains or physical damage to your home office interior.

While some of these stains can easily be cleaned with a cloth wipe or concealed by moving things around or just simply ignoring them, some stains and damages may not be as insignificant or easy to ignore.

So, in the happenstance that these imperfections already detract from the professional and polished look of your workspace, you’ll want to do some form of intervention – which a painting project can conveniently provide for you.

If the stains present on your home office are already stubborn and cannot be wiped off, it would be much better for you to just get it over with and cover them with a fresh coat of paint than to spend endless hours and waste so much effort getting them off your home office interior.

However, if you are going to be dealing with physical damage, you should ensure to get these damages fixed first – paint won’t be able to cover up physical damages on a surface on its own, so to ensure a smooth paint finish, you’ll want to patch up and fill these damages first.

4. Changes in Function or Design

If you’ve recently changed the function or design of your home office, a new paint job can help reinforce and really establish the transformation.

Repainting allows you to redefine the ambiance and adapt the color scheme to suit the new purpose of your home office, creating an environment that supports your specific needs and enhances productivity.

However, in doing this, make sure to check with the lighting present in your home office, since this will have a significant effect on how your chosen paint color will look once it is in the space.


If you need professional help with your interior painting project, Eason Painting can help.

Our home interior painting services are available in Washington Township, Rochester, Romeo, Shelby Township, Harrison Township, and Clinton Township, MI.

Call us today at 586-465-5081 for a FREE painting estimate.

Related: How To Elevate Your Home Office in Rochester, MI

Guide To Fixing Fading Paint On Your Home Interior in Romeo, MI

Read more
2023-06-11 Eason Painting Romeo MI Painting and Decorating Your Living Room On A Budget

Painting and Decorating Your Living Room On A Budget in Romeo, MI

Painting and Decorating Your Living Room On A Budget in Romeo, MI

In any home, living rooms are almost always the central space in it – this is where we can host visitors, or gather around with our loved ones to spend quality time.

Since it is a space frequently occupied, maintaining its overall appeal is important – which can be done through painting and decorating the room.

However, this can get especially expensive; so what happens if you are on a tight budget, but want to improve or elevate your living room’s current setup and overall appeal?

To help you with this dilemma, here’s a guide to Painting and Decorating Your Living Room On A Budget.

1. Know How Much Paint You Need

In painting your living room on a budget, it is important that you know how much paint you need to complete the project.

Knowing how much paint you’ll need for your project gets you to have a more accurate idea of just how much paint you’ll need to buy for your project, saving you from the mistake of overbuying paint and eventually bloating your expense.

To do this, you can measure the total size of the area you are going to be painting and find out an estimate of how much paint you’ll need through a paint calculator.

However, the best course of action in determining a painting estimate would be through consulting with paint professionals – so if you happen to have one in your local hardware store, don’t be shy to approach them with this query!

2. Borrow Or Recycle Your Materials

In a painting project, shopping for paint materials is one of the main factors why your expenses could bloat or fluctuate, since they tend to be expensive – so, it would be ideal for you to consider borrowing or recycling your painting materials for your upcoming living room painting project.

You may have some old painting materials lying around somewhere in your home that you may have kept from a previous painting project, or someone in your immediate circles who may have painting materials you can borrow.

However, it is still important that you ensure the quality of these secondhand materials since you do not want to compromise the overall quality of your painting project – so, inspect them first before ultimately using them.

3. Look For Bargains

In trying to stay within the budget for your upcoming living room painting project, bargains and sales will be your best bet.

Try to look for any seasonal sales or bargained painting items that may be happening in your locale, since this will be the best way to get new materials without hurting your wallet.

However, just like the latter, you will need to inspect and assess first whether the bargained items you’re buying are usable and still in overall good condition since you don’t want to compromise the overall quality of your project.

4. Rearrange Your Living Room

If you are looking for a way to turn things around in your living room without breaking the bank, one effective way you could do this would be through simply rearranging your living room.

This will be a very transformative way to change how your current living room setup looks, without even spending a single penny.

Rearranging your living room might be the answer to your current dilemma you’d never expect would work so effectively!

5. Use The Same Paint Color

Lastly, if you are trying to stay within a budget for your living room painting project, a great tip would be to use the same paint color your living room is currently in.

While it is imperative that you use primer for any painting project you might undertake, painting using the same color can be an exception to this rule, since you’re essentially going to be putting the same coat of paint.

However, you do need to ensure to do the necessary surface preparation for your living room when skipping primer to ensure that you’ll still be getting quality results out of your painting project.


If you need professional help with your interior painting project, Eason Painting can help.

Our home interior painting services are available in Washington Township, Rochester, Romeo, Shelby Township, Harrison Township, and Clinton Township, MI.

Call us today at 586-465-5081 for a FREE painting estimate.

Related: Guide To Fixing Fading Paint On Your Home Interior in Romeo, MI

Tips For Preparing To Paint Your Game Room in Romeo, MI

Read more
2023-06-04 Eason Painting Richmond MI Kitchen Cabinet Painting Tips You Should Know

Kitchen Cabinet Painting Tips You Should Know in Richmond, MI

Kitchen Cabinet Painting Tips You Should Know in Richmond, MI

Our kitchen cabinets are more than just their immediate purpose, which is to store our kitchen essentials, since they actually contribute to our kitchen’s overall appeal and can come in so many beautiful design variations.

Thus, it is important for our kitchen cabinets to receive the necessary maintenance from time to time, which can be best done through a fresh coat of paint.

So, if you are currently undertaking a kitchen cabinet painting project and are looking for tips to help you in doing so, here’s something perfect for you!

Without further ado, here are Kitchen Cabinet Painting Tips You Should Know.

1. Surface Preparation Before Anything Else

In painting your kitchen cabinets, one of the first things that you should be doing would be surface preparation.

In any painting project, doing proper surface preparation will always be an essential process to take – and it is even more important when you are painting your kitchen cabinets.

Over time your kitchen cabinets will have some kind of build-up of grease, muck, dirt, and even some food that may have gotten stuck on there – which, you will have to remove before adding any coat of paint on them.

Additionally, you will also want to inspect your kitchen cabinets for any signs of damage and repair them accordingly – no amount of paint will ever be able to completely conceal physical damage on a surface, so it is necessary that you get them patched up, if there are any.

A properly prepared surface will result in a clean, smooth, and seamless paint finish – which is essentially the result that you want out of your painting project.

2. Empty Your Cabinets

Of course, when you are painting your kitchen cabinets, you will want to empty your cabinets first before painting them.

Since your kitchen cabinets are essentially in your kitchen for storage, they will have some kitchen essentials and other things in them – which you will have to temporarily relocate since, you’re going to be painting them.

This is a very obvious and straightforward thing to do for your kitchen cabinets that need no further elaboration – so make sure to do this step flawlessly!

3. Use Painter’s Tape

Since you are going to be painting your kitchen cabinets, you will want to employ the use of painter’s tape in your project.

It can be especially hard to paint the edges and corners of your cabinets without getting paint smudges all over them, so painter’s tape will be of great use for this problem.

Painter’s tape will ensure that you have straight-cut edges for your borders, and no smudges or smears to clean off your walls after painting – which can be a tedious task to do post-painting!

However, just make sure that you don’t let the tape on for too long on the surface, since its adhesive might stick on the fresh coat of paint, eventually peeling them off once you decide to remove the tape.

4. Cover Nearby Area With Dropcloths

Because paint drips or spills will be a natural part of any painting project (this is just a natural tendency when you are working with a substance like paint!), you will want to have some form of cover for your kitchen fixtures or the area near your cabinets – which is what a dropcloth is for.

Dropcloths will be a handy solution for these pesky paint drips and spills, as you only need to cover them with it!

However, it is advised that you use a canvas-type dropcloth, as this is the type that doesn’t let paint seep through it – so you can ensure that your kitchen fixtures are spotless after painting!

5. Remove Your Cabinet Doors

Lastly, in painting your kitchen cabinets, a great tip to know would be to remove your cabinet doors prior to painting them.

Your cabinet doors will be very unstable to paint on when they are on your cabinets, since they can swivel back and forth – and will be doing so when you are painting them.

So, a great solution for this would be to remove them from your cabinet and lay them flat on the ground!

Just remember to keep all the necessary hardware in place so you can successfully put them back on your cabinets once they are fully dry from painting.


If you need professional help with your interior painting project, Eason Painting can help.

Our home interior painting services are available in Washington Township, Rochester, Romeo, Shelby Township, Harrison Township, and Clinton Township, MI.

Call us today at 586-465-5081 for a FREE painting estimate.

Related: Guide To Choosing A Paint Color For Your Kitchen Cabinets in Richmond, MI

 Signs That You Should Repaint Your Kitchen Interior in Washington, MI

Read more
2023-05-25 Eason Painting Rochester MI Tips In Preparing To Paint Your Bathroom Cabinets

Tips In Preparing To Paint Your Bathroom Cabinets in Rochester, MI
Tips In Preparing To Paint Your Bathroom Cabinets in Rochester, MI

Painting your bathroom cabinets can definitely add a little spice to your bathrooms and elevate the area’s overall appeal.

This is definitive proof that our bathroom cabinets are not merely for storage, but they actually complete and tie up the whole appeal of your bathroom.

So, if you are currently planning to apply a fresh coat of paint onto your bathroom cabinets and do a painting project, here’s something you might want to read as you prepare for it.

Let’s look at these Tips In Preparing To Paint Your Bathroom Cabinets.

1. Clear Out Your Bathroom Area

In preparing to paint your bathroom cabinets, you must first clear out your bathroom area.

There tends to be a lot of movement and activities involved in a painting project, so clearing your bathroom area prior to your painting project will be a good first step in preparing for it.

In doing this, you’ll want to remove any furniture or decoration that might be in your bathroom area, to avoid having obstructions in the area that might cause delays in your project.

For your bathroom fixtures, such as your sink or toilet, it would be ideal for you to cover them up with dropcloths, to protect them from paint drips and spills – which can be a hassle to clean up!

2. Dry Your Bathroom Floors

Since you are going to be painting in your bathroom, which tends to be a wet place, you will want to ensure that your bathroom floors are dry prior to your painting project.

Wet floors can be slippery, and can cause a safety hazard for you – which will be a problem since, as has been established, there tends to be a lot of movement involved in a painting project.

Additionally, you should inspect your floors for any signs of slime build-up, and scrub them off your floors – this could also be a safety hazard in your painting project, so you’ll want them off the area prior to your project.

3. Inspect and Prepare Your Bathroom Cabinets

You will also want to inspect and prepare your bathroom cabinets themselves as a part of the preparation process of painting them.

In doing this, you will want to inspect your bathroom cabinets for physical damage, and repair these damages accordingly if you have found any.

Paint won’t be able to completely cover up these damages all on their own, so important reparative measures should take place for these damages if you want to ensure a smooth paint finish – just a reminder to know!

Also, it is important that you prepare your bathroom cabinets for painting – in doing this, you will want to clear out your cabinets and remove everything in them, and make sure that your cabinets are clean.

Doing proper surface preparation will ensure that you will have a clean and smooth paint finish as a result – which is essentially what you want out of your painting project!

4. Temporarily Disable Electrical Devices

It is also important that you temporarily disable any electrical devices in your bathroom as a part of your preparation to paint in it.

These electrical devices can pose to be a safety hazard to you, which could definitely lead to dire circumstances that you don’t want to be in.

It will also be much better to paint your bathroom cabinets without looking for electrical wires that might be in the way.

However, in doing this, you will want to ensure that you are knowledgeable in handling electrical devices – if you’re not sure how to do so, it would be better for you to seek professional help.

5. Get The Right Kind of Paint

In every painting project, there is a designated kind of paint specially made for the type of surface you’re going to be painting – so, in your bathroom cabinet painting project, you will want to acquire paint specially made for bathrooms.

Your bathroom is a place constantly exposed to water and moisture, so you will want to acquire a kind of paint that could handle that kind of environment.

Also, because of this tendency, our bathrooms are a perfect environment for mold growth – so, it would be best for you to seek a paint formula that could inhibit the growth of molds.


If you need professional help with your interior painting project, Eason Painting can help.

Our home interior painting services are available in Washington Township, Rochester, Romeo, Shelby Township, Harrison Township, and Clinton Township, MI.

Call us today at 586-465-5081 for a FREE painting estimate.

Related: Signs That You Should Repaint Your Guest Bedroom in Richmond, MI

Signs It’s Time To Repaint Your Bathroom Cabinets in Washington, MI

Read more
2023-05-18 Eason Painting Washington MI Tips For Painting Your Dining Room With Less Mess

Tips For Painting Your Dining Room With Less Mess in Washington, MI

Tips For Painting Your Dining Room With Less Mess in Washington, MI

In any painting project, the mess will always be a part of it – this is just natural when you are working with paint, which is just naturally drippy and messy.

But, this is not to say that there are no measures or tips that you can take to significantly tone down the mess, if not completely avoid it, in your painting project.

So, if you are currently planning to do a dining room painting project and are looking for tips on how to go through the project with as little mess as possible, here’s something you need to read.

Here are Tips For Painting Your Dining Room With Less Mess.

1. Clear Your Dining Room Space First

In order to ensure lesser mess in your dining room painting project, one of the first things that you should be doing would be to clear your dining room area prior to your painting project.

Doing this means temporarily removing any furniture, appliance, decoration, or any dining room essential that you might have in the space, so you can free up more space in the area.

There tends to be a lot of activity and movement involved in a painting project, so clearing your dining room and freeing more space will greatly benefit your painting process and could help avoid any potential mess in your project.

Just think about the mess that could result when you suddenly trip or slip over some kind of obstruction or clutter present in your dining room area, and when you’re carrying paint – just thinking about it already feels like such a hassle!

2. Ensure To Do Proper Surface Preparation

Proper surface preparation will always be essential not only in your dining room painting project, but in any painting project in general – but did you know that it could also help you avoid making a mess in your project?

Proper surface preparation ensures that you will have an ideal surface to paint on, which then allows for better paint adhesion and coverage – resulting in a more durable, brighter, and more vivid, and overall smoother paint finish.

On the contrary, skipping surface preparation will usually result in a messy paint finish, one you will have to redo and repaint all over again – not only wasting your time and effort, but doubling your expense in the process.

So, to avoid going through these hassles, ensure to do proper surface preparation prior to your dining room painting project.

3. Utilize Painter’s Tape

Painter’s tape will also be of great help in avoiding mess in your dining room painting project.

The edges and crevices of your dining room area may be a bit tricky to paint, and could result to paint smudges – which is the exact kind of mess you’re trying to avoid in the first place – but is a good thing that painter’s tape can help you avoid this.

Painter’s tape can also help ensure that you will have straight-cut edges, essentially the marker of a clean paint finish.

But, in using painter’s tape, you must remember to remove the tape after the paint has dried, since the adhesive might stick to your fresh coat and remove them in the process – which creates another kind of mess that you are trying to avoid.

4. Lay Dropcloths on Necessary Areas

Since paint drips and spills will be an inevitable part of your painting project – or any painting project actually, for that matter – you’ll want to lay dropcloths on necessary areas in your dining room.

This might include any dining room fixtures you might have in the space, or your floors – this is so you can avoid getting paint drips and spills all over them, which is exactly the kind of mess you are trying to avoid.

In buying a dropcloth, it would be better to get a canvass-type dropcloth, since this is the type that doesn’t let paint seep through its fabric, so you can ensure that your floors or fixtures will be spotless after your painting project!


If you need professional help with your interior painting project, Eason Painting can help.

Our home interior painting services are available in Washington Township, Rochester, Romeo, Shelby Township, Harrison Township, and Clinton Township, MI.

Call us today at 586-465-5081 for a FREE painting estimate.

Related: Choosing A Paint Color For Your Bathroom Cabinets in Richmond, MI

Tips For Repainting Your Bathroom Cabinets in Romeo, MI

Read more
2023-05-11 Eason Painting Romeo MI Bedroom Painting Tips To Ensure Lesser Mess

Bedroom Painting Tips To Ensure Lesser Mess in Romeo, MI

Bedroom Painting Tips To Ensure Lesser Mess in Romeo, MI

In any painting project, the mess will always be a part of it – so, any tips or tricks that could help you avoid mess will be important and crucial to know.

So, if you are currently scouring the internet in search of tips and tricks to help you significantly reduce, if not completely avoid, the mess in your upcoming bedroom painting project, here’s something you’ll find very useful!

Here are Bedroom Painting Tips To Ensure a Lesser Mess.

1. Clear The Space

In ensuring lesser mess for your bedroom painting project, one of the first things that you should be doing would be to clear your bedroom space.

Clearing your bedroom space will be necessary to avoid a mess in your painting project since this will free up more space for you to freely move into as you paint your bedroom.

There tends to be a lot of movement and activity involved in any painting project, so getting rid of as many things that could potentially be an obstruction will be helpful in avoiding mess in your painting project.

Just imagine the mess that could result when you accidentally trip or slip over some form of clutter present in your bedroom space as you are carrying paint – even the idea of it feels like such an inconvenience!

2. Ensure Proper Surface Preparation

Proper surface preparation will also be necessary to ensure that you will acquire lesser mess in your bedroom painting project.

Before anything else, the proper surface preparation process includes inspecting your surface for any kind of damage, patching up these damages if you have found any, and ensuring that the surface you’re going to be painting is clean and free of any dirt or dust.

Proper surface preparation is important in your bedroom painting project because a lack of it will result in a messy paint finish, which is exactly the thing that you’re trying to avoid in the first place.

3. Use Painter’s Tape

Painter’s tape will also be essential in your painting project if you are trying to avoid making a mess as much as possible.

For starters, painter’s tape ensures that you will have straight lines for your borders, and will make it easier for you to reach the edges and crevices of your bedroom.

Edges and crevices are rather hard to paint since they are prone to paint smudges, which are the kind of mess you are trying to avoid, so employing the use of painter’s tape could significantly reduce this from happening – if not completely avoid it!

However, in using painter’s tape, you should ensure to not let the tape on for too long on the surface, or you might be peeling off some of your fresh coat of paint when you finally do.

4. Start Painting At The Top

Since paint drips are rather inevitable in a painting project, you should start painting at the top.

Painting from the top gets these paint drips to flow down surfaces that you are essentially going to cover up as you make your way down, which will be an efficient and smart way to avoid these drips from becoming a mess!

On the contrary, painting from the bottom will get this paint drips flowing down on your fresh coat of paint, essentially ruining them in the process and creating the mess you are trying to avoid in the first place!

5. Prepare Ahead Of Time

Lastly, to avoid a mess in your bedroom painting project, you should ensure to prepare ahead of time.

Preparing ahead of time gets you to be on top of things regarding your painting project and essentially smoothens the process of painting your bedroom.

A smooth and hassle-free painting process usually denotes a lesser mess to take care of – which is essentially what you are trying to achieve!

Preparing ahead of time might be tedious to undergo prior to your painting project, but it goes such a long way in smoothening out your process and essentially avoiding as much mess as possible.


If you need professional help with your interior painting project, Eason Painting can help.

Our home interior painting services are available in Washington Township, Rochester, Romeo, Shelby Township, Harrison Township, and Clinton Township, MI.

Call us today at 586-465-5081 for a FREE painting estimate.

Related: Signs That You Should Repaint Your Guest Bedroom in Richmond, MI

How To Choose A Paint Color For Your Bedroom in Richmond, MI

Read more
2023-05-04 Eason Painting Richmond MI Tips For Painting Your Fences With Lesser Mess

Tips For Painting Your Fences With Lesser Mess in Richmond, MI

Tips For Painting Your Fences With Lesser Mess in Richmond, MI

Our fences are essentially one of the first things that people will see when they pass by our homes, so it is important that we do the necessary upkeep for them, so we can maintain their overall appearance and appeal.

While there are so many other ways that you can maintain your fences, one of the best ways to do this would be through a fresh coat of paint.

In doing a fence painting project, the mess will always be a part of it – but this doesn’t mean that it is entirely unavoidable.

With the right tips and tricks at hand, one can paint their fences with as little mess as possible!

So, to arm you with these tips and tricks, here are Tips For Painting Your Fences With Lesser Mess.

1. Clear The Area Near Your Fences

In making sure that you create a lesser mess in your fence painting project, one of the first things that you can do would be to clear the area near your fences.

To do this, you’ll want to temporarily remove all of the things that may be near your fences, such as any exterior furniture, decoration, or appliances like a sprinkler system or solar panels.

This will be important since you’ll want to free up as much space as possible for your painting project, so, in turn,  you can freely move about as you go with your project.

Clearing the area near your fences could also reduce your chances of accidentally tripping or slipping over something, which could be the cause of the potential mess that you’re trying to avoid in the first place.

2. Do Proper Surface Preparation

Doing proper surface preparation will also be an important factor when you are trying to avoid a mess in your painting project.

The surface preparation process is important for your fence painting project, and will be a factor in lessening the mess in the process since doing this will ensure that you will have a smooth and clean surface to paint on.

On the other hand, a lack of surface preparation will typically result in a messy paint finish, one that you will inevitably have to redo and repaint – doubling both your hassle and expense.

So to avoid this kind of mess in your painting project, you should remember to do proper surface preparation beforehand.

3. Check Weather Conditions Ahead Of Time

Since you are essentially painting your fences, the weather will play a huge factor in your fence painting project – and one that will also be a considerable factor in lessening the mess in your project.

Ideally, you would want to paint your fences on a clear, dry day, with no imminent risk of sudden rainfall.

For reasons that need no further elaboration, it would be impossible to paint your fences when it is raining outside, and it will definitely be messy to do so.

Additionally, it will not be recommended for you to paint your fences on a particularly hot day, especially under the direct heat of the sun, since the extreme temperatures might mess up your coat of paint and create the exact kind of mess that you’re trying to avoid in the first place.

4. Cover Necessary Areas With Drop Cloths

Lastly, in order to avoid creating a mess in your fence painting project. You should remember to cover all the necessary areas with drop cloths.

Areas such as the ground near your fences, or any exterior fixtures or plants will need some type of cover for the inevitable paint splashes or spills that might happen in your project.

This will be important since it will be an added hassle to clean up paint drips and spills after finishing your painting project – you’ll already be too tired to do so after doing all the work in painting your fences.

So, to completely avoid this hassle, you should ensure to cover up with drop cloths.


If you need professional help with your interior painting project, Eason Painting can help.

Our home interior painting services are available in Washington Township, Rochester, Romeo, Shelby Township, Harrison Township, and Clinton Township, MI.

Call us today at 586-465-5081 for a FREE painting estimate.

Related: Why You Should Hire Paint Professionals For Your Painting Project in Washington, MI

Game Room Painting Tips To Keep In Mind in Washington, MI

Read more
2023-04-25 Eason Painting Rochester MI Signs That You Should Repaint Your Kitchen Cabinets

Signs That You Should Repaint Your Kitchen Cabinets in Rochester, MI
Signs That You Should Repaint Your Kitchen Cabinets in Rochester, MI
Our kitchen cabinets are more than just their immediate functionality – aside from being extra storage options, they also contribute to our kitchen area’s overall appeal, tying up the whole place nicely.

It is important that we do the necessary maintenance for our kitchen cabinets, in order to maintain our kitchen’s overall appeal – and this can be done through a fresh coat of paint.

But how do we know that our kitchen cabinets are due for a fresh coat of paint?

What are the signs to tell us to do so?

To help you with this dilemma, here are Signs That You Should Repaint Your Kitchen Cabinets.

1. Paint Fading

If you have been noticing that your coat of paint it’s already fading or has already faded, then this is a classic sign that you should be repainting your kitchen cabinets.

Paint fading is a type of paint problem that is pretty common among households, and it happens due to the following reasons:

  1. A lack of proper surface preparation beforehand;
  2. Constant exposure to direct heat/sunlight;
  3. Lack of primer application;
  4. Using low-quality paint;
  5. An overall abysmal painting project

On the other hand, your coat of paint can also naturally fade over time, which means two things: first, that it has been a while since you have repainted your kitchen cabinets, and second, that your kitchen cabinets are in absolute need of a fresh coat.

In repainting your faded kitchen cabinets, you will want to ensure to take note of the mistakes listed above, especially primer application and using low-quality paint – these two factors contribute greatly to your coat of paint’s durability against fading and will ensure that you will have a brighter and more vivid paint finish.

2. Paint Peeling

If you have been seeing parts of your kitchen cabinets with paint peeling on them, then this is another classic sign that you should be a fresh coat of paint on them.

Just like paint fading, paint peeling is a type of paint problem that can be common among households – but just because this is a common occurrence doesn’t mean that it warrants lesser urgency.

If left unattended, the peeling issue on your kitchen cabinets might escalate to an even bigger peeling issue, which will be a much bigger hassle to fix by then – and one you could have completely avoided if you had taken care of it in the first place.

In fixing paint peeling, you will want to first scrape off the affected areas and repaint by abiding by proper painting protocols, so you can ensure that your kitchen cabinets won’t be peeling again anytime soon.

3. Water Damage

If there is water leaking somewhere in your kitchen, and the damage has found its way to your kitchen cabinets, then this might also be a sign that you should be repainting your kitchen cabinets.

Water damage will not only affect your coat of paint, but it might also affect your kitchen cabinet’s surface – not only destroying its coat of paint, but also the cabinet itself.

So in repainting your water-damaged kitchen cabinets, you will want to assess the extent of the water damage first, so you will know whether this is something you can still salvage with a fresh coat of paint, or something that you will need to replace entirely.

Additionally, in fixing the water damage on your kitchen cabinets, you will want to also look for the source of the water leak itself and get it fixed accordingly.

It will be useless to add a fresh coat of paint to your kitchen cabinets if the water will eventually find its way again to your cabinets and destroy them all over again.

4. Physical Damages On Surface

If you have been seeing physical damage on your kitchen cabinets, then this is also another immediate sign that you should be repainting them.

Having physical damage on a painted surface will inevitably affect its coat of paint in the process, which in this case, it’ll be better to just apply a fresh coat over it.

However, when you are painting on a damaged surface, it is important that you get the damages itself patched up and fixed first.

It is important to remember that no amount of paint will ever be able to conceal physical damage on a surface, so if you want to ensure that you will have a smooth paint finish, you’ll want to fix the damage on your kitchen cabinets first before applying any coat of paint on them.


If you need professional help with your interior painting project, Eason Painting can help.

Our home interior painting services are available in Washington Township, Rochester, Romeo, Shelby Township, Harrison Township, and Clinton Township, MI.

Call us today at 586-465-5081 for a FREE painting estimate.

Related: Why You Should Hire Paint Professionals For Your Painting Project in Washington, MI

Game Room Painting Tips To Keep In Mind in Washington, MI

Read more
2023-04-11 Eason Painting Romeo MI Tips For Preparing To Paint Your Game Room

Tips For Preparing To Paint Your Game Room in Romeo, MI

Tips For Preparing To Paint Your Game Room in Romeo, MI

When you’re a gamer at heart, you’d definitely want to dedicate an entire space or area in your home to your love of gaming – which is why game rooms are slowly becoming a staple in modern homes.

If you are currently planning to build your very own game room and are preparing to do a painting project for it, here’s something that might be of help to you.

Here are Tips For Preparing To Paint Your Game Room.

1. Clear The Area

In preparing to paint your game room, one of the first things that you’ll want to do would be to clear your game room area.

In clearing your game room area, you will want to rid it of any furniture, appliances, technology, or any other stuff that might be in the space.

Clearing your game room area as a part of your preparation process is important since you’ll want to free up as much space as possible for your project, which is important since there tend to be a lot of activities and movements involved in a painting project.

Ensuring that you get rid of all the stuff present in your game room area will be important to have a seamless and obstruction-free painting process, and to reduce the possibility of making a mess in your painting project.

Just imagine the mess that could result when you suddenly trip or slip over something as you are carrying cans of paint – it’s just a kind of hassle you don’t want to experience!

2. Do Proper Surface Preparation

As a part of your preparation process, you will also want to do proper surface preparation for your game room area.

The surface preparation process includes inspecting your surface for any kinds of damage, making the necessary reparative measures if there are any, and making sure that your surface is smooth and clean; free of any kinds of dirt and dust that might have accumulated on it over time.

It is important that you do proper surface preparation prior to your painting project since this will help ensure a seamless and smooth paint finish, which is essentially what you want out of your painting project.

Sometimes, the difference between a successful painting project and an abysmal one is the lack of proper surface preparation, so keep this tip in mind.

3. Choose A Paint Color Properly

Choosing a paint color is one of the most important decisions that you’ll have to make in your game room painting project, and in doing so, there are several factors that you’ll have to consider in order to arrive at the best possible decision.

First, you will want to consider the lighting present in the space, since this will have a great effect on your paint color choice.

Depending on the lighting present, your coat of paint can end up looking shades darker or lighter than it initially was, or even have some color undertones that weren’t there when you first saw the color.

So, to ensure that you’ll be getting exactly what you want, you should check paint samples under your game room’s lighting, so you can really see how the lighting present there affects your set of paint color choices.

Additionally, you should think about the colors you’re planning to incorporate into your game room area, so you could choose a paint color that will go well with them accordingly, to ensure an overall cohesive finish and appeal.

4. Cover Up With Dropcloths

Lastly, when you are preparing to paint your game room, you should ensure to cover up with dropcloths ahead of time.

Since you are going to be working with paint, chances are you’re going to be experiencing some type of mess in the middle of your painting project, such as paint drips, smudges, splashes, and many other paint-related messes – this is just the natural tendency of working with paint.

So, to protect your floors from getting messy from painting, you should ensure to cover them up with dropcloths – a great tip for this would be to get a canvas-type dropcloth, since this is the type that won’t let paint seep through its fabric.


If you need professional help with your interior painting project, Eason Painting can help.

Our home interior painting services are available in Washington Township, Rochester, Romeo, Shelby Township, Harrison Township, and Clinton Township, MI.

Call us today at 586-465-5081 for a FREE painting estimate.

Related: Game Room Painting Tips To Keep In Mind in Washington, MI

Home Office Painting Preparation in Romeo, MI

Read more
2023-04-04 Eason Painting Richmond MI Guide To Choosing A Paint Color For Your Kitchen Cabinets

Guide To Choosing A Paint Color For Your Kitchen Cabinets in Richmond, MI

Guide To Choosing A Paint Color For Your Kitchen Cabinets in Richmond, MI

Our kitchen cabinets are more than just storage options in our kitchen area – they actually contribute to and tie up our kitchen’s overall appeal.

So maintenance will be necessary for your kitchen cabinets – and a great way to do this would be through a fresh coat of paint.

So if you are currently planning to paint your kitchen cabinets, here’s something you might want to read as you are choosing a paint color to use for it.

Here’s a  Guide To Choosing A Paint Color For Your Kitchen Cabinets.

1. Consider The Colors In Your Kitchen

In choosing a paint color for your kitchen cabinets, a tip that you should keep in mind would be to consider the colors that are already present in your kitchen in your decision.

This is important because you will want to essentially end up with a paint color that goes well with the rest of your kitchen interior, for an overall cohesive finish.

Your kitchen cabinets are essentially a part of your kitchen interior, so you’d want to paint them a color that’ll really tie up your kitchen, and not something that feels off and mismatched.

In doing this, you can refer to color palettes available online, so you can have an idea of which colors go best with which.

However, the best course of action for this, if you are confused about what color to get for your kitchen cabinets, would be to ask a paint professional – they are color experts, and they will definitely know your best choices.

2. Look At The Lighting Present

Aside from the colors already present in your kitchen, another factor that you should be considering in your decision of choosing a paint color for your kitchen cabinets would be the lighting present in your kitchen area.

The lighting present in your kitchen area is an important factor to consider because it will essentially dictate how your paint color will eventually look once it is painted on the surface.

It can either look shades darker or lighter than it initially was, paler or deeper in color, or even have some undertones that weren’t there when you were first checking out the paint color.

So, a great workaround for this would be to check paint samples in your kitchen area, so you can factor in the lighting present there and see how it affects your possible color choices.

Or better yet, if you can do so, it would be better if you would do a test paint on a small portion of your kitchen surface, so you can really see how your chosen paint color will look once it is painted on your kitchen.

3. Follow A General Theme

If you have a general theme going on with your kitchen, then it would be much better if you would follow a general theme in painting your kitchen cabinets.

With a general theme in mind, you already have a predetermined set of colors that are curated to help you achieve that certain theme – which then takes a significant chunk of the burden from your responsibility of choosing a paint color from scratch!

Now, all you have to do is make sure that these set of colors go well with the two factors previously mentioned, and you’re good to go.

4. Lesser Is Better

Lastly, when you are choosing a paint color for your kitchen cabinets, you should remember that lesser is better.

It is very easy to get lost in the array of so many paint color choices out there on the market, which can lead you into getting too many paint colors for your painting project.

As recommended by professionals, it would be better for you to have 2 or 3 colors for your kitchen cabinets; one being the main color and the other one or two colors as your accent/highlight colors.

Any number beyond that would just be considered too much and would run you the risk of getting your kitchen cabinets looking like a mishmash of too many colors.

So, to ensure an aesthetically appealing finish, keep this tip in mind!


If you need professional help with your interior painting project, Eason Painting can help.

Our home interior painting services are available in Washington Township, Rochester, Romeo, Shelby Township, Harrison Township, and Clinton Township, MI.

Call us today at 586-465-5081 for a FREE painting estimate.

Related: Signs To Repaint Your Kitchen Cabinets in Richmond, MI

Signs That You Should Repaint Your Kitchen Interior in Washington, MI

Read more
2023-03-25 Eason Painting Rochester MI When You Should Repaint Your Living Room

When You Should Repaint Your Living Room in Rochester, MI

When You Should Repaint Your Living Room in Rochester, MI

Our living rooms are an essential part of our homes – this is where we can host our visitors, spend time with our loved ones, or even just have a little downtime with ourselves to catch a break from our stressful daily schedules.

So it is important that we maintain our living room’s overall appeal, to make it a comfortable place to stay in.

One of the best forms of maintenance would be through a fresh coat of paint – but how do we really know that our living room is due for one?

So, without further ado, here’s When You Should Repaint Your Living Room.

1. If Your Coat of Paint is Already Peeling

If you are noticing that some parts of your living room’s coat of paint are already peeling, then this is a telltale sign that the room is due to a fresh coat of paint.

Paint peeling can be rather unsightly, and can happen due to a lot of reasons, such as:

  1. A lack of proper surface preparation
  2. Presence of moisture in your living room walls
  3. Applying coats of paint way too fast; not letting the initial coat dry first
  4. An overall abysmal painting job, failure to follow proper painting protocols

While paint peeling can be common, this is not an excuse for you to take the situation lightly – if you do not provide the necessary measures to fix this, your paint peeling problem can escalate to a much even bigger one, which will be a more hassle to fix than your initial problem.

In repainting your feeling living room walls, you must remember to not repeat the mistakes listed above, so you can ensure that your living room won’t have paint peeling again anytime soon.

2. If Your Coat of Paint is Fading

If you have been noticing that your living room seems mundane and drab in color lately, then your coat of paint must have faded already, and another classic sign that you should repaint your living room.

Paint fading, just like paint peeling, is a type of paint problem that can happen due to the following reasons:

  1. A lack of primer application
  2. Using low-quality paint
  3. Lack of proper surface preparation
  4. Failure to follow proper painting protocols

Where your coat of paint can also fade naturally over time, which just means that it has been a while since you have painted your living room and it is long overdue for a fresh coat of paint.

3. If You Have Stubborn-To-Remove Scuff Marks

Because our living room is where we host our visitors and loved ones, you may not notice that they can leave marks on your walls unintentionally.

Or, if you are rearranging your furniture, you may not notice that the surface is grinding with your walls – which could all result in dark marks or scuff marks.

While some scuff marks are hardly noticeable just covered with a piece of furniture or decoration, some scuff marks may not be as easy to ignore.

So in this case you will just want to get it over with and cover them up with a fresh coat of paint rather than spending endless hours getting them off your walls.

In doing the latter, not only are you wasting your effort, but also your precious time.

4. If There Are Physical Damages on the Surface

It is normal to have physical damage on your living room surface over time – may it be through your pets’ rough play, children banging on walls, or it just happened naturally.

But, in the instance that the damages are so severe that they are not as easy to ignore and can be unsightly to see, then it will be much better for you to just plan a living room painting project.

But in doing this, you might want to know that it is important that you get these damages fixed accordingly first because no amount of paint nor primer will ever be enough to cover them up all on their own.

If you want to ensure a smooth and clean paint finish, fix your damaged walls first before applying that coat of paint.

If you need professional help with your interior painting project, Eason Painting can help.

Our home interior painting services are available in Washington Township, Rochester, Romeo, Shelby Township, Harrison Township, and Clinton Township, MI.

Call us today at 586-465-5081 for a FREE painting estimate.

Related: Guide On Choosing A Paint Color For Your Living Room in Rochester, MI

Advantages of Painting Your Living Room White in Richmond, MI

Read more
2023-03-18 Eason Painting Washington MIGuide On Preparing To Repaint Your Living Room

Guide On Preparing To Repaint Your Living Room in Washington, MI

Guide On Preparing To Repaint Your Living Room in Washington, MI

Every once in a while, our living room will need to be treated to a fresh coat of paint – it is part of the needed maintenance we must do to maintain our living room’s overall appeal.

So, if you are currently planning to repaint your living room, here’s something you might find helpful.

Here’s a Guide On Preparing To Repaint Your Living Room.

1. Choose A Paint Color Properly

In preparing to repaint your living room, one of the first things that you will have to decide on will be the paint color you’re going to use – and in doing so, you will want to choose a paint color properly.

In choosing a paint color properly, there are some factors that you will have to consider in your decision in order for you to end up with the best possible paint color choice.

First, you will want to consider the lighting present in your living room.

Lighting will significantly affect the way your paint color will eventually look once it is painted on your living room surface.

Depending on the lighting present, your coat of paint can end up looking darker or lighter, or even reveal some undertones that weren’t even there when you were first seeing the color.

So, to ensure that you will be getting exactly what you envisioned, you will want to check paint samples in your living room so you can see how the lighting present there affect your possible color choices.

Additionally, you will also want to think about the colors already present in your living room, so you can choose a color that will go well with them accordingly, allowing for a more cohesive finish.

2. Clear The Space

In preparing to repaint your living room, you will also want to clear the area of any possible obstructions or clutter.

This includes your appliances, furniture, decorations, and many other living room essentials that you might have in the area.

It is important that you clear up as much space as possible prior to your living room repainting project because you will want to have more space where you can freely move as you paint your living room.

A painting project tends to have a lot of movements and activities involved in it, so this is an important tip to keep in mind.

3. Do Proper Surface Preparation

Prior to applying that first coat of paint onto your living room, you will want to do proper surface preparation first.

Proper surface preparation includes inspecting your surface for any signs of damage, which can be common if it has been a while since you have repainted your living room, and repairing them accordingly if there are any.

It is important that you get these damages repaired first because no amount of paint nor primer will ever be able to conceal them all on their own, and repainting over them will just result in an uneven finish.

Additionally, a part of surface preparation also includes cleaning the surface that you’re going to be painting, to ensure that you will be painting on a smooth and muck-free surface.

4. Gather All The Materials You’ll Need

Lastly, in preparing to repaint your living room, you will want to gather all the materials you’re going to need for the project ahead of time.

Gathering all the materials you’ll need ahead of time will save you from the hassle of running back and forth to the paint store to get more materials.

You’re just going to be wasting time doing this instead of it being spent on finishing your project – which just then hampers your progress and delays your project.

Plus, it’ll just be much better to do a painting project when you already have all the materials you’re going to need in one place, so if you want a seamless painting project, here’s something you should remember!


If you need professional help with your interior painting project, Eason Painting can help.

Our home interior painting services are available in Washington Township, Rochester, Romeo, Shelby Township, Harrison Township, and Clinton Township, MI.

Call us today at 586-465-5081 for a FREE painting estimate.

Related: Budget Dining Room Painting Tips In Romeo, MI

Guide On Choosing A Paint Color For Your Living Room in Rochester, MI

Read more
2023-03-11 Eason Painting Romeo MI Ways You Can Elevate Your Guest Bedroom

Ways You Can Elevate Your Guest Bedroom in Romeo, MI

Ways You Can Elevate Your Guest Bedroom in Romeo, MI

Our guest bedroom is an important aspect of our homes – it is where we can provide shelter for our visitors and loved ones who might be visiting from somewhere far.

With that in mind, it is important that we maintain our guest bedrooms’ overall appeal – its overall state is very indicative of our hospitality, so we must make it a comfortable space to stay in.

So, if you are currently looking for ways to elevate your guest bedroom, here’s something that might be perfect for you.

Here are Ways You Can Elevate Your Guest Bedroom.

1. Repaint Your Walls

One of the most straightforward ways that you can elevate your guest bedroom’s overall appeal would be to repaint its walls.

Treating your guest bedroom to a fresh coat of paint will definitely rejuvenate and revamp its overall appearance, making it look refreshed and updated.

In doing this, you can either choose to repaint your guest bedroom with the same color, just to give it a refreshed appearance, or opt to repaint with another color.

In doing the latter, you should ensure to factor in the lighting present in your guest bedroom and the colors already present in the space in your decision of choosing a paint color.

This is important so that you will end up with a color that goes well with your guest bedroom’s lighting, and an overall cohesive space.

2. Get An Accent Wall

If you don’t feel like doing a full-on painting project, you can still elevate your guest bedroom’s overall appeal by painting an accent wall into the space.

Painting an accent wall would be a perfect way to elevate your guest bedroom’s overall appeal because it is naturally striking and visually interesting.

Accent walls can also take so many design variations – you can choose to go with a simple single-colored accent wall, a two-toned wall, a patterned accent wall, or even a full-on graphic accent wall – it all depends on your vision!

So remember to let your creative juices totally flow when making this one, because you are in full creative control of your accent wall.

3. Repaint Your Guest Room Cabinets

Another thing that will help tie up your guest bedroom’s overall appeal would be your bedroom cabinets – so in your request of elevating your guest bedroom’s overall appeal, why not repaint your bedroom cabinets in the process?

Your cabinets in your guest bedroom are more than just storage solutions because they also contribute to the space’s overall appeal.

In doing this, you might want to be mindful of the color you’re going to paint it with – ideally, you would want to consider the present color of your guest bedroom, so you can choose a paint color that will go best with it accordingly.

This might be that unexpected solution you never thought would work well, so remember to keep this tip in mind!

4. Repaint Your Furniture

If you want an even smaller painting project that will still be equally impactful, you can opt to repaint your guest bedroom furniture.

Repainting your guest bedroom furniture will be a great way to add more spice and renew your guest bedroom space – a tip in doing this would be to paint using the same color, for an overall tied-up and cohesive appeal.

Additionally, opting to repaint your furniture than getting a whole new furniture to match the aesthetic you might have in mind is cheaper, and will save you so much expense – all you need to buy is a can of paint and a brush, and you’re good to go!

5. Simply Rearrange

Another very simple way that you can elevate your guest bedroom’s overall appeal would be to simply rearrange the space.

By rearranging your guest bedroom, you can turn things around in the area without even spending a single penny.

Plus, this might be the handy solution you never expected would work so well!


If you need professional help with your interior painting project, Eason Painting can help.

Our home interior painting services are available in Washington Township, Rochester, Romeo, Shelby Township, Harrison Township, and Clinton Township, MI.

Call us today at 586-465-5081 for a FREE painting estimate.

Related: Guide To Choosing A Paint Color For Your Home Office in Richmond, MI

Tips For Painting And Decorating A Small Living Room in Washington, MI

Read more
2023-03-04 Eason Painting Richmond MI Choosing A Paint Color For Your Bathroom Cabinets

Choosing A Paint Color For Your Bathroom Cabinets in Richmond, MI

Choosing A Paint Color For Your Bathroom Cabinets in Richmond, MI

In doing a bathroom cabinet painting project, one of the most important decisions that you’ll have to do would be to choose a paint color to use for them.

And in doing this task, there are several factors that you’ll have to consider and weigh in your decision in order for you to arrive at the best possible choices.

So if you want to ensure that you know these factors before you go to the hardware store to check out paint samples, here’s something you will want to read.

Here’s an article on Choosing A Paint Color For Your Bathroom Cabinets.

1. Consider The Present Colors In Your Bathroom

When you are choosing a paint color for your bathroom cabinets, one of the most important factors that you’ll have to consider in your decision would be the colors already present in your bathroom.

It is important that you consider this as a factor in your decision of choosing a paint color because you will want to essentially end up with a paint color that goes well with them, which will allow for a more cohesive and aesthetically appealing finish.

This will also ensure that you won’t end up with bathroom cabinets that look too isolating or disjointed from the rest of your bathroom.

In doing this, you can refer to color palettes just available online if you are not sure of which colors go best with which.

However, the best course of action, if you are unsure of which paint color you should get, would be to seek professional advice – local paint professionals will be very happy to help you with this dilemma!

2. Look At The Lighting Present

Another important factor that you should consider in your decision of choosing a paint color for your bathroom cabinets would be the lighting present in your bathroom.

Lighting will have a significant effect on how your chosen paint color will eventually look once it is painted on your bathroom cabinet’s surface.

Depending on the lighting present, it can either look: shades darker or lighter than it initially was, paler or deeper in color, or even have some undertones that you didn’t notice when you were first checking out the color.

So to ensure that you will be getting exactly what you had in mind, you should make sure to check paint samples in your bathroom, where you can see how the lighting present there will affect your possible paint color choices.

However, if you do have the capability and the time to do so, it’ll be much better for you to just do a test paint on a small portion of your bathroom cabinet surface, so you can actually see how the color will look once it is painted there.

3. Follow A General Theme

Another thing that will make your task of deciding on a paint color significantly easier would be to follow a general theme.

If you have an ongoing theme currently in your bathroom, it will be much better for you if you just follow that theme.

With following a general theme in mind, you are entailed to a set of colors you should use in order to successfully achieve that certain theme – thus, you won’t have to start from scratch and look for a paint color to use!

Now all you have to do is make sure that set of colors that you have in hand goes well with the present lighting in your bathroom, and that they go well with the colors already present in your bathroom, and you’re off to a great painting project!

4. Don’t Incorporate Too Many Colors

Lastly, when you are choosing a paint color for your bathroom cabinets, you should remember to not get too carried away and choose too many colors.

As a general rule, you should have two colors at maximum; your main color and the other one as your accent color.

Anything beyond that number is just considered too much and might be too overwhelming, running the risk of your bathroom cabinets ending up looking like a mishmash of too many colors.


If you need professional help with your interior painting project, Eason Painting can help.

Our home interior painting services are available in Washington Township, Rochester, Romeo, Shelby Township, Harrison Township, and Clinton Township, MI.

Call us today at 586-465-5081 for a FREE painting estimate.

Related: Guide To Choosing A Paint Color For Your Home Office in Richmond, MI

Budget Dining Room Painting Tips In Romeo, MI

Read more
2023-02-25 Eason Painting Rochester MI Tips On Incorporating Viva Magenta Into Your Home Interior

Tips On Incorporating Viva Magenta Into Your Home Interior in Rochester, MI

Tips On Incorporating Viva Magenta Into Your Home Interior in Rochester, MI

With a brand new year, comes another brand new color to define the year ahead of us: Pantone names Viva Magenta as 2023’s Color of the Year!

So, if you have been looking for ways to update your home interior with this new gorgeous color, here’s something you can read to get some new ideas.

Here are Tips On Incorporating Viva Magenta Into Your Home Interior.

1. Repaint Your Walls With Viva Magenta

One of the first options you will want to explore when you are finding ways to incorporate viva magenta into your home interior would be to repaint your walls with the color.

Repainting your walls with viva magenta would be the most straightforward way that you can incorporate the color into your home interior while treating your walls to a fresh coat of paint and keeping up to date!

However, you should take note that viva magenta is a rather strong color, and will be very overwhelming when painted onto your home interior, so you will want to maintain reservations and a level of taste here.

You might want to ask a paint professional about the best shade of viva magenta to use for your project, in order to achieve an overall aesthetically appealing home interior.

2. Paint An Accent Wall

If you have been thinking of painting the gorgeous color of viva magenta on your home interior, but is finding the chore of committing to a full-blown painting project tedious and too much, then you might want to settle with painting an accent wall in your home interior.

Painting an accent wall will be perfect for you if you happen to love Pantone’s color of the year, but is too busy to commit to a full-blown painting project because painting an accent wall is relatively easier than the latter.

Another great thing with an accent wall is that it can take on so many design variations; you can opt for a single-colored viva magenta wall, a two-toned wall and pair your viva magenta with another color, or even a patterned viva magenta accent wall – the design possibilities are almost limitless!

Additionally, accent walls can also go beyond the conventions of flat paint – you can get a textured accent wall such as a viva magenta-colored fur accent wall, a viva magenta-colored suede wall, a leather wall of the same color, and so many other cool design variations!

An accent wall is just so flexible design-wise, all you have to do is let your creativity run totally wild, and you’re off to a fun project!

3. Get Viva Magenta-Colored Decorations

If a painting project doesn’t sound appealing and exciting to you, you can still opt to incorporate viva magenta into your home interior by getting viva magenta-colored decorations.

You can get artworks, appliances, furnishings, and various decorations dipped in this luxurious color so you can add touches of viva magenta to your home interior.

However, if getting viva magenta-colored decorations for your interior is out of your budget, then you can opt to do a mini painting project and repaint your existing decorations with viva magenta!

This will be the perfect way for you to do a great impact with minimal spending!

4. Get A Viva Magenta Kitchen

Lastly, if you have been noticing that your kitchen is in bad shape lately, then it might be in need of some remodeling and repainting – and guess what would be the perfect color to use for your upcoming painting project this year: Viva Magenta!

In doing this, you will also want to keep your taste level and not incorporate too much viva magenta into the space, because you don’t want your kitchen to look like it’s drowning in the color – you can ask a paint professional how to do this best.

Just a few touches of viva magenta here and there, and you’re in for a great kitchen experience this year!


If you need professional help with your interior painting project, Eason Painting can help.

Our home interior painting services are available in Washington Township, Rochester, Romeo, Shelby Township, Harrison Township, and Clinton Township, MI.

Call us today at 586-465-5081 for a FREE painting estimate.

Related: Budget Dining Room Painting Tips In Romeo, MI

Guide On Choosing A Paint Color For Your Living Room in Rochester, MI

Read more
2023-02-18 Eason Painting Washington MI Why You Should Hire Paint Professionals For Your Painting Pr

Why You Should Hire Paint Professionals For Your Painting Project in Washington, MI

Why You Should Hire Paint Professionals For Your Painting Project in Washington, MI

When you are doing a paint project, a decision that could upgrade your results from good to best would be deciding to hire paint professionals to do the job for you.

While yes, hiring paint professionals can be expensive, you are also getting value for your money – rest assured that this won’t be a big purchase you’ll regret later on.

But, if you’re still weighing the pros and cons of doing such, here’s something to help you as you decide on it.

Here’s Why You Should Hire Paint Professionals For Your Painting Project.

1. They Have The Expertise and Experience

One great thing about hiring paint professionals is the fact that they have the expertise and experience to conveniently back them up.

Paint professionals are called professionals for a reason: they have studied the art of painting extensively, and have years of experience on the job that has only honed them to be an even better painting professional.

With this considered, you can expect that these professionals will definitely produce quality results that are a testament to their fine skills and competency as paint professionals.

While yes, there are thousands of paint blogs and how-to tutorials out there on the internet, which you can quickly skim and read to gain more insights and tips you can use for your painting project, there is still a very obvious difference between the fine craftsmanship of a paint professional and the work of an amateur.

2. They Are Color Experts

A very important and rather difficult decision that you’ll have to make when you are doing a painting project would be choosing a paint color for your project.

While choosing a paint color when you’re shopping for materials can easily be perceived as a fun activity, it can also quickly be stressful, with the number of colors and shades available on the market – one can get easily confused and flushed!

However, this is a task the average paint professional won’t even break a sweat out of, since they are color experts.

Paint professionals have the trained eye to know which paint color will go best with which, and can tell you what’s the best color to use for your paint project on a whim.

This will be a task that will be an easy breezy for the average paint professional!

3. They Know How To Use Most Painting Materials

Because these professionals have tons of experience and expertise under their belt, they will definitely know their way around most painting materials needed to complete a certain painting project.

It will be such a hassle to also figure out how to use certain painting materials on top of also worrying whether your painting project will go smoothly and whether it will yield satisfactory results.

So, to relieve you of this pressure, you can just leave this work to people who certainly know what they are doing: our dear paint professionals.

4. They Will Be Able To Work At A Faster Rate

Another great advantage to hiring paint professionals for your painting project would be the fact that paint professionals will be able to work at a faster rate.

All thanks to their years of experience and expertise, professionals already know the ins and outs of a painting project, and how to go through with it the best and fastest way possible.

They are certain to get the job done without stopping to figure out what to do next because this is something they have already done thousands of times over and over!

5. They’ll Do The Grunt Work For You

Lastly, the best advantage you can get out of hiring paint professionals to do your project for you would be the simple fact that they’ll be doing all the grunt work for you.

With paint professionals on your project, you get to sit back, relax, and be the boss in your project – all with the assurance of a quality painting project in the end!


If you need professional help with your interior painting project, Eason Painting can help.

Our home interior painting services are available in Washington Township, Rochester, Romeo, Shelby Township, Harrison Township, and Clinton Township, MI.

Call us today at 586-465-5081 for a FREE painting estimate.

Related: Budget Dining Room Painting Tips In Romeo, MI

Painting and Decorating Your Kitchen on a Budget in Washington, MI

Read more
2023-02-11 Eason Painting Romeo MI Tips For Repainting Your Bathroom Cabinets

Tips For Repainting Your Bathroom Cabinets in Romeo, MI

Tips For Repainting Your Bathroom Cabinets in Romeo, MI

Our bathroom cabinets are more than just storage solutions in our bathroom – they actually contribute to the area’s overall appeal, and really tie up your whole bathroom.

So it is important that we maintain its appearance and treat it to a fresh coat of paint from time to time.

So if you are currently planning to repaint your bathroom cabinets, here’s something to help you with your latest painting project.

Without further ado, here are Tips For Repainting Your Bathroom Cabinets.

1. Clear Your Bathroom Cabinets First

In repainting your bathroom cabinets, you should ensure to clear them first.

Because your bathroom cabinets will be used as storage, you will want to remove anything there, as part of your preparation for painting your cabinets.

It should go without further explanation that it will be hard for you to paint your bathroom cabinets if it still has your bathroom essentials in them, such as your towels, your shampoos, your soaps, and many other things that you might have in your cabinet, so make sure to remove them first.

2. Do Proper Surface Preparation

In repainting your bathroom cabinets, one of the most important things that you have to do would be proper surface preparation.

Over time, your bathroom cabinets will have accumulated a thin layer of muck, slime, and grime, among many others that you should be removing prior to painting your bathroom cabinets.

In doing proper surface preparation, you should also be inspecting your bathroom cabinets for any signs of molds and mildew.

While mold and mildew growth can be pretty common in places like your bathroom, they should not be treated with less urgency – they pose some health risks if left untreated, aside from being overall unsanitary,

Lastly, an important part of your bathroom cabinet surface preparation process would be inspecting your cabinets for any signs of physical damage, which you will have to patch up first if there are any.

It is important that you get these damages patched up first because no amount of paint nor primer will ever have the capability to conceal physical damages on their own.

So, if you want to ensure a clean and smooth paint finish, inspect your cabinets first for signs of damage and patch them up accordingly.

3. Dry Your Bathroom Floors

An important aspect of painting your bathroom cabinets would be to make sure that your bathroom floors are dry first.

It is common knowledge that wet floors can be slippery, and this could be a problem especially when you are doing a painting project.

Just imagine the mess that could result from suddenly slipping over a wet bathroom floor as you are transporting cans of paint – it’s just a hassle that you don’t want to be caught up in!

4. Choose A Paint Color Properly

Repainting your bathroom cabinets, you have two options in regards to paint color: you can either choose to repaint your cabinets using the same color or use another color entirely.

By repainting your bathroom cabinets the same color as they are, you can rejuvenate your bathroom’s overall appeal, giving your cabinets a refreshed look.

However, if you are opting to repaint your bathroom cabinets in a different color, there are some factors that you should take into consideration when deciding on a paint color.

First, you should consider the present colors in your bathroom because you will want to end up with the paint color that goes well with the rest of your bathroom, allowing for an overall cohesive appeal.

Then, you should also look into the lighting present in your bathroom because it will have a significant effect on how your paint color will eventually look.


If you need professional help with your interior painting project, Eason Painting can help.

Our home interior painting services are available in Washington Township, Rochester, Romeo, Shelby Township, Harrison Township, and Clinton Township, MI.

Call us today at 586-465-5081 for a FREE painting estimate.

Related: Signs It’s Time To Repaint Your Bathroom Cabinets in Washington, MI

 Bathroom Painting Tips For Less Mess in Romeo, MI

Read more
2023-02-04 Eason Painting Richmond MI Signs That You Should Repaint Your Guest Bedroom

Signs That You Should Repaint Your Guest Bedroom in Richmond, MI

Signs That You Should Repaint Your Guest Bedroom in Richmond, MI

Our guest bedrooms are important areas in our homes – it hosts our visitors, making them feel comfortable and right at home even when they are far away from their homes.

So, it is important that we maintain our guest bedroom’s overall appeal, and one of the best ways to do this would be through a painting project.

But, how do we know that it is due time that we treat our guest bedroom to a fresh coat of paint?

What are signs that we should be looking out for?

To help you with this, here are Signs That You Should Repaint Your Guest Bedroom.

1. Paint Fading

If you have been noticing that your guest bedroom seems dull and drab lately, then its coat of paint might have faded already – which is a classic sign that you should repaint your guest bedroom.

Paint fading happens due to a number of reasons, such as:

  1. Using low-quality paint
  2. A lack of proper surface preparation beforehand
  3. Lack of primer usage
  4. Failure to follow proper painting protocols

Additionally, paint can also naturally fade over time, when it has reached its peak – which just means that it has been so long since you’ve last painted the area and it might be way overdue for a fresh coat of paint.

In repainting your guest bedroom, you should ensure to avoid repeating the said reasons above, so you can ensure that your paint won’t be fading again anytime soon.

2. Paint Peeling

Another classic sign that you need to repaint your guest bedroom would be if you’re already seeing paint peeling all over its interior.

Paint peeling, just like paint fading, is also another type of paint problem, which can be extremely unsightly and messy (since the peelings might scatter all over your floor).

Your coat of paint can peel due to a number of reasons, which are the following:

  1. A lack of proper surface preparation
  2. Failure to apply primer
  3. Reapplying coats of paint way too fast, not letting the initial coat dry first
  4. Failure to follow proper painting protocols

Paint peeling is an urgent sign to repaint your guest bedroom’s interior because ignoring this might make the peeling situation an even bigger problem than it initially was.

Again, just keep in mind to not repeat the said reasons listed above when you’re repainting your peeling guest bedroom, and you’re off to a great start at your repainting project!

3. Hard To Remove Stains

Over time, our guest bedroom interior might acquire some stains, may it be in the form of moving furniture around and the surface grinding to your walls (scuff marks), from our pets, down to a child armored with a permanent marker.

While some stains can easily be ignored or covered by furniture and decorations, some stains might not be as easy to ignore.

Your first instinct might be to simply wipe and brush them away – and to some extent, this might work, but on the unfortunate instance that they won’t, you’re just going to be wasting your time and energy scrubbing at your walls.

In this case, you will want to just get it over it and cover them up with a brand-new coat of paint.

4. Physical Damage On Your Surface

Another classic sign for you to repaint your guest bedroom would be if the area has physical damage on its surface.

Having physical damage on your guest bedroom is a rather urgent sign that you need to repaint the area because, just like paint peeling, if left unattended, it might escalate to a much bigger problem.

When you have physical damage on a surface, the coat of paint on it will also be affected, so it’s just appropriate to just apply a new coat of paint over it.

However, in doing this, you should get the physical damage fixed first before applying a coat of paint, because a coat of paint won’t suffice for covering up physical damage on a surface.


If you need professional help with your interior painting project, Eason Painting can help.

Our home interior painting services are available in Washington Township, Rochester, Romeo, Shelby Township, Harrison Township, and Clinton Township, MI.

Call us today at 586-465-5081 for a FREE painting estimate.

Related: Tips For Preparing To Paint Your Dining Room in Washington, MI

Home Office Painting Preparation in Romeo, MI

Read more
2023-01-25 Eason Painting Washington MI Game Room Painting Tips To Keep In Mind

Game Room Painting Tips To Keep In Mind in Washington, MI

Game Room Painting Tips To Keep In Mind in Washington, MI

For people who like to escape the real world and immerse themselves in the virtual gaming world, building their own gaming room will be their priority and an important project for them.

Having a room dedicated to your gaming hobby will not only give you a peaceful space where you can immerse in these virtual worlds but can also help in elevating your gaming experience.

So, if you are currently planning a gaming room project, here’s something to help you when you are finally going to paint the place.

Here are Game Room Painting Tips To Keep In Mind.

1. Carefully Choose A Paint Color

One of the most crucial choices you’ll have to make when painting your gaming room is deciding on which paint color you’re going to use, and there are a few things to bear in mind while making this choice.

When selecting a paint color for your gaming room, you need to also take into account the lighting you will use in the room.

Since this is a gaming room, you should definitely include some mood lighting, such as RGB LED light strips.

With that being said, you should test your paint color under these lighting conditions to see how it will seem and how it will work with any mood lighting you intend to use in your gaming area.

While this is a very important factor to take into account, also keep in mind that this is a gaming room, so don’t be afraid to mix and experiment with stronger colors to create your ideal gaming haven.

2. Paint An Accent Wall

You may also think about painting an accent wall in your gaming room to further boost its overall appeal.

A focal point will bring excitement and pleasure to the space, and an accent wall will be the ideal method to truly liven up the overall look of your game room.

When doing this, you should place your accent wall in a location that will allow people to fully appreciate it; ideally, this location should be free of any pieces of furniture that can block the wall’s view.

3. Prepare Your Surface For Painting

To achieve a clean and smooth paint finish, you shouldn’t forget to properly prepare the surface before painting your gaming space.

In order to prepare a surface properly, you must first check it for any signs of damage and, if there are any, you should make the necessary repairs, and then lastly, you should make sure that the surface is clean, even, and smooth.

Proper surface preparation is important to ensure that your gaming room painting project will harbor a smoother and cleaner paint finish – which is a good indicator of a successful painting project!

4. Apply Primer

Primer is a necessary component for any painting project, but it is especially crucial for your gaming room painting project for several very good reasons.

When painting your game room, you want the colors to truly shine, and a coat of primer may help that happen.

Additionally, the primer will also ensure that your coat of paint will have better coverage, making your coat of paint look brighter and more colorful.

A coat of primer can also make sure that your painting job lasts a lot longer, sparing you the hassle of having to repaint the area sooner than you anticipated.

5. Start Painting At The Top

Last but not least, when all is done and all there’s left to do is for you to finally apply your coat of paint, a great piece of painting advice would be to start painting at the top.

This will be a great tip because painting from the top will cause your inevitable paint drips to flow down surfaces that you’ll essentially be painting over as you make your way down.

Painting from the bottom, on the other hand, will only result in these paint drips, damaging your freshly painted surface.


If you need professional help with your interior painting project, Eason Painting can help.

Our home interior painting services are available in Washington Township, Rochester, Romeo, Shelby Township, Harrison Township, and Clinton Township, MI.

Call us today at 586-465-5081 for a FREE painting estimate.

Related: Kitchen Painting Tips For Less Mess in Richmond, MI

Handy Tips For Choosing A Paint Color For Your Kid’s Bedroom in Rochester, MI

Read more
2023-01-18 Eason Painting Rochester MI How To Elevate Your Home Office

How To Elevate Your Home Office in Rochester, MI

How To Elevate Your Home Office in Rochester, MI

In the highly technological society we live in, one can now work in the comfort of their own homes and not be bridled to go out – which is why home offices are slowly becoming an essential part of our homes.

Home offices are a place of work, and it is important that we ensure to make it comfortable for us to be productive, but still elevated enough for it to look sleek, modern, and inviting.

So, if you have your current home office setup and would want to know some ways to elevate it, here’s something you’d want to read.

Here’s How To Elevate Your Home Office.

1. Make Sure To Allot Enough Space For It

In elevating your home office’s overall appeal, one of the most effective ways to do this would be to allot enough space for your home office.

In creating a home office that feels comfortable and elevated, making the area as spacious as possible would be the perfect first step towards achieving this.

Abolish the image in your head that first pops up when someone says office – which is a small, cramped desk filled with various paperwork and office files – and don’t let your home office end up with the same fate.

Allocating enough space for your home interior won’t only help you elevate its overall appeal, but could also do wonders for your productivity and motivation to work.

Having a home office where you could freely pace around to think and breathe will increase your productivity and motivation to work in the area – which is essentially the room’s purpose!

2. Paint The Area With A Color You Like

Another great way to elevate your home office’s overall appeal would be to paint your home office with a color you absolutely adore!

Painting your home office with a color that you like will help make the area to be a more comfortable place for you to work and be in, which will help you in your productivity.

This way, you won’t have any problems staying in the area for hours and hours of tiring work, since it is painted in a color that relaxes you or tickles your fancy!

3. Find A Great Desk

The next step towards elevating your home office’s overall interior would be to find a great desk to incorporate into the area.

Finding a great desk goes a long way in making your home office elevated, and for compelling reasons.

First of all, a desk is an essential element to your home office because this is where you will be putting your computer, laptop, or any technology that’s going to aid you in your work – and a great chair will help you in organizing these.

Wires tend to get messy in a desktop setup, but with a great desk, preferably with a dedicated wire organizer, you can conveniently arrange and conceal these wires and maintain a clean office desk!

A clean office desk will only be convenient, but it will also fuel your productivity – it’s just hard to stay on top of everything in a cluttered office desk, right?

Lastly, a great office desk with tons of storage space will help you arrange all your office essentials and tuck them away so they don’t look like clutter.

Here’s to a great home office setup!

4. Invest In A Great Office Chair

Aside from a great desk, you should also think about investing in a great office chair.

A great office chair will do wonders in both elevating your home office’s overall appeal and making your working experience in the area a lot more comfortable!

I can just imagine that it’ll already be taxing enough dealing with your various work-related problems, why add to that stress by being seated in an uncomfortable chair?

5. Open More Windows

Lastly, a very simple but equally transformative way to elevate your home office’s overall appeal would be to just open more windows in the area.

This way, you get to let more light into the place, making your home office feel more active and lively – fueling your energy to work in the process!


If you need professional help with your interior painting project, Eason Painting can help.

Our home interior painting services are available in Washington Township, Rochester, Romeo, Shelby Township, Harrison Township, and Clinton Township, MI.

Call us today at 586-465-5081 for a FREE painting estimate.

Related: Handy Tips For Choosing A Paint Color For Your Kid’s Bedroom in Rochester, MI

Kitchen Painting Tips For Less Mess in Richmond, MI

Read more
2023-01-04 Eason Painting Romeo MI Budget Dining Room Painting Tips

Budget Dining Room Painting Tips In Romeo, MI

Budget Dining Room Painting Tips In Romeo, MI

In getting ready to improve the look of your dining room, if you are thinking about how much nicer it would be if you were to paint it you have to face the reality that it can get quite costly.

The good thing that you should know is that there are things that you can do to bring down the overall price of a painting project such as one of these, and this is a good thing.

Even better, many of these tips are going to bring down the cost of the painting project without making the dining room look less good — you can smile and look at your nice looking dining room and be happy that you saved money in painting it.

Let’s have a look at some budget dining room painting tips that you should know about before painting your dining room.

1. Looking For Sales

A fairly simple thing that people will not do sometimes is to make the time to look for sales when it comes to painting their dining room.

Whether it’s because they don’t think they have the time to look for these sales or whether they have convinced themselves that they just aren’t going to find them, it’s one good evidence that you shouldn’t rush into a painting project.

When you plan out a painting project better in advance, you’re going to be able to better be on the lookout for sales on things like the paint and primer that you need to paint the walls as well as the equipment that you will need to properly transport and apply the paint.

2. Borrowing The Equipment

Speaking of the equipment, you might think that your only option in terms of getting ready to take on a painting project is to purchase the equipment outright – there are other options.

Of course, it would make a lot more sense for you to buy the equipment if you have a few projects in the pipeline and each of them is going to require the same sort of equipment – the cost of the equipment would spread out over all of the projects including projects you may not even have planned out yet.

If you think that this is going to be your only painting project for the foreseeable future, however, it would be far better to just borrow the equipment from someone rather than spend the money on it and then just have it lay around your house untouched and unused.

3. Measuring Your Walls

As you are likely aware, one of the biggest costs of painting your walls comes in the form of the price of the paint and primer itself.

You can therefore also imagine that if you were to just buy paint and primer based on a guess of how much you need and you guess wrong and buy way too much, that would be a huge waste of money since you’re going to have paint and primer that you can’t use and likely not be able to return.

If you buy too little paint and primer, this too is a waste of money because you’re going to have to stop your painting in the middle or thereabouts and go to the store and buy some more — assuming that they still have some left, of course — and all the time and effort is going to just add to the cost of your painting project.

A far better thing to do instead is to measure the walls being painted so that you can figure out how much paint and primer you’re going to need.

If you need professional help with your interior painting project, Eason Painting can help.

Our home interior painting services are available in Washington Township, Rochester, Romeo, Shelby Township, Harrison Township, and Clinton Township, MI.

Call us today at 586-465-5081 for a FREE painting estimate.

Related: Handy Tips For Choosing A Paint Color For Your Kid’s Bedroom in Rochester, MI

Tips For Preparing To Paint Your Dining Room in Washington, MI

Read more
2022-12-25 Eason Painting Rochester MI Guide On Choosing A Paint Color For Your Living Room

Guide On Choosing A Paint Color For Your Living Room in Rochester, MI

Guide On Choosing A Paint Color For Your Living Room in Rochester, MI
In doing a living room painting project, one of the most important decisions that you’ll have to make would be choosing a paint color to use for the project.

In doing so, there are several factors that you must consider in your decision in order to arrive at the best possible choice.

But what are these factors exactly?

You’ve come just in time – to help you with your latest painting project, here are Guide On Choosing A Paint Color For Your Living Room.

1. See The Lighting Present In The Area

When you’re choosing a paint color to use for your living room painting project,  one of the first things that you’ll have to consider would be the lighting present in the area.

It is important that you see the lighting present in your living room area because it will have a significant effect on how your paint color will eventually look once you’ve finished painting it on the surface.

Your chosen paint color can either end up looking shades darker or lighter than it initially was, paler or deeper in color or even reveal some undertones that you did not initially see when you were first checking out the color – and this all depends on the lighting it is put under.

So, a great workaround for this would be to check paint samples under the lighting of the area you’re planning to paint – and in this case, you should make sure that you check paint samples in your living room, so you can actually see how the lighting influences your color choices.

2. Consider The Colors Already In The Space

Additionally, it is also important that you consider the colors that are already in your living room space when you’re choosing a paint color for the area.

This is important because essentially, you’ll want to end up with a paint color that goes well with the colors already in the area, for an overall cohesive appeal.

To do this, you can refer to color palettes just available online, so you can have an idea of which colors goes best with which.

Or, if you can do so, consult with a paint professional regarding this dilemma – they will be the best people qualified to help you with this query!

3. Light, Or Dark?

Light and dark colors each have a different effect when painted onto a room, so this is also a possible factor that you will want to consider in your choice.

When painted onto a room, light colors will help maximize a room’s space, since it reflects more light thus, creating an illusion of a larger space.

It also can make a room feel bright and airy, ushering in a more lively and homey environment.

On the other hand, dark colors can make a room feel more intimate, making it feel more mysterious and bold due to its darker hue.

It makes a room feel more confined and tightly knit, which can be a perfect vibe for family nights with your loved ones.

Your choice depends on essentially what you want, so take a long pause to think about this.

4. Consider A General Theme

Lastly, when you’re choosing a paint color for your living room, you should consider following a general theme.

Having a general theme will entail you to a set of colors that can help achieve that theme you have in mind, which will make your task of choosing a paint color relatively easier since your choices are now narrowed down for you!

All you need to do now is make sure that those sets of colors go well with the lighting and the colors present in your living room, and you’re off to a great start!


If you need professional help with your interior painting project, Eason Painting can help.

Our home interior painting services are available in Washington Township, Rochester, Romeo, Shelby Township, Harrison Township, and Clinton Township, MI.

Call us today at 586-465-5081 for a FREE painting estimate.

Related: Handy Tips For Choosing A Paint Color For Your Kid’s Bedroom in Rochester, MI

Tips For Preparing To Paint Your Dining Room in Washington, MI

Read more
2022-12-18 Eason Painting Washington MI Tips For Painting And Decorating A Small Living Room

Tips For Painting And Decorating A Small Living Room in Washington, MI

Tips For Painting And Decorating A Small Living Room in Washington, MI

It is indeed a challenge to be painting and decorating a small living room – there are just so many intricacies to this that you need to keep in mind or else, you’ll end up with a cramped and uncomfortable space.

So, if you are currently looking for tips on how to work with a small living room, here’s something you mind find useful.

Without further ado, here are Tips For Painting And Decorating A Small Living Room.

1. Choosing The Right Furniture

When you are working with a small living room, you should remember to also be mindful of the furniture you plan to incorporate in it – so, one of the first things that you should be doing would be choosing the right furniture.

Ideally, you would want your furniture to be compact, convenient, and space-saving.

Because you’re working with a rather small space, you should look into getting a couch or a sofa that also doubles as organizers where you can put various things in – a smart, two-in-one kind of furniture!

For more storage options and decorations, you should opt for hanging shelves over closed cabinets because the latter will just take up more space in your living room.

With hanging shelves, you get to save on floor space, but you also get a stylish and modern way to store and display your various living room essentials and furnishings!

Lastly, you should think about getting mirrors in your living room, since they will help in maximizing your living room space – mirrors help create the illusion of a larger space, which is essentially what you want to do with your living room!

2. Painting Using Lighter Colors

In painting a small living room, a tip that you must absolutely keep in mind would be to use lighter colors, because you would benefit the most from this.

When you’re working with a smaller space and would naturally want to maximize it, the best course of action would be to paint it using lighter colors – even paint professionals would tell you to do so!

This is because lighter colors reflect more light, thus, will help create the illusion of a larger space – which is what you want in your small living room.

Additionally, it could also help usher a bright and airy vibe, to make your small living room feel more open, and roomy and to make it feel more elevated in terms of overall aesthetic appeal!

Shades of creams, eggshell whites, and neutrals such as light beige will be great candidates for your choice of paint colors, so keep this in mind!

3. Opening More Windows

In your quest of maximizing your small living room’s space, a very simple but effective tip you should keep in mind would be to just open more windows.

Opening more windows in your living room will let more light in, thus, helping establish not only a larger, but also a livelier and brighter living room interior.

You would benefit the most from opening more of your windows if you also decided to paint your living room with a lighter color – imagine letting all that gorgeous natural lighting in with your light-colored living room interior, it’ll be such a sight!

Additionally, if you have the time and the capability to do so, you should think about putting up a skylight in your living room.

Doing this will not only benefit you by maximizing your living room space, but you could also save up on electricity, since you won’t be needing that much artificial light.

Cost-effective green solutions at their finest!

4. Less, Is More!

Lastly, when you are working with a small living room, you should remember that less, is more, and always better.

You should be mindful of elements that you’re putting in the already small space, because it will be very easy to make it feel cramped.

Additionally, it would help if you only painted the space with a single color, with one or two accents, to keep it cohesive and really tied up!


If you need professional help with your interior painting project, Eason Painting can help.

Our home interior painting services are available in Washington Township, Rochester, Romeo, Shelby Township, Harrison Township, and Clinton Township, MI.

Call us today at 586-465-5081 for a FREE painting estimate.

Related: Living Room Repainting Tips To Remember in Romeo, MI

Interior Painting Richmond, MI: Paint Color Ideas for Small Spaces

Read more
2022-12-11 Eason Painting Richmond MI Kitchen Painting Tips For Less Mess

Kitchen Painting Tips For Less Mess in Richmond, MI

Kitchen Painting Tips For Less Mess in Richmond, MI

Mess will always be present in any painting project – it comes in the form of paint drips, spills, and splatters, among other things that’ll potentially be messy in your project.

But, this is not to say that mess is completely unavoidable in all circumstances.

With the right tips and tricks at hand, one can lessen, if not completely avoid, the occurrence of mess in their painting project.

So, if you’re currently planning your kitchen painting project and would want to ensure that it goes as mess-free as possible, here’s something you’ll want to read.

Here are Kitchen Painting Tips For Less Mess.

1. Clean Your Kitchen First

One of the first things you’ll want to do to ensure that you’ll avoid a mess in painting your kitchen would be to do proper surface preparation – in simpler terms, you’ll want to clean your kitchen first.

Over time, your kitchen will naturally have all kinds of dirt on its surface – may it be grease, oil, some food bits stuck on there, and dust that might have settled over time, which you will want to remove off your kitchen surface prior to applying a coat of paint on it.

It is important for you to do this so you can avoid getting a messy paint finish, one you will definitely have to redo and revisit – in short, a failed painting project.

In doing proper surface preparation, you will want to scrub the area clean with the help of a detergent, rinse properly, and make sure that you allot enough time for your surface to dry.

Additionally, you should also inspect your kitchen surface for signs of damage or cracks, and get them fixed accordingly before adding a coat of paint on them – painting on a damaged surface will, again, result in a messy paint finish.

2. Make Sure To Clear Your Kitchen Area

Another tip to keep in mind in order to avoid mess when you are painting your kitchen would be to clear your kitchen area, to allow more space to freely move when you’re painting.

There is a lot of movement involved in a painting project, and it would benefit you the most to free up as much space as possible to avoid the unfortunate instance of suddenly tripping or running over some clutter in your floor – which will just potentially create the mess you’re trying to avoid, especially that you’re handling paint.

In doing this, you should clear out all your kitchen appliances, furniture, cutlery, and other essentials, to ensure that they won’t disturb you or be in your way while you continue with your project.

3. Put A Dropcloth On Necessary Areas

When you’re clearing your kitchen area, you will find that some of your kitchen appliances and furniture, such as your stove, your oven, or even your cabinets you cannot temporarily remove.

For these kitchen fixtures, you will want to put a dropcloth on them instead, to ensure that you won’t be getting paint drips or spills all over them.

This is especially important since drips and spills are very inevitable in a painting project, so you should make sure to cover these fixtures to avoid getting messy.

4. Preparation Is A Must

In a painting project, one of the most important elements that determine its success would be the preparation involved prior to it.\

Ensuring that you have your project sorted out from start to finish will be a great way to ensure that you won’t be making a mess along the way, as you progress with your project.

Preparing for your painting project includes gathering all the materials you’ll need to use for the project, knowing what paint color you’ll use for it, and knowing whether you’ll need to employ additional help for your project or not.

If you fail to plan, you’re planning to fail – and failure typically involves mess, which is exactly what you are avoiding in the first place.


If you need professional help with your interior painting project, Eason Painting can help.

Our home interior painting services are available in Washington Township, Rochester, Romeo, Shelby Township, Harrison Township, and Clinton Township, MI.

Call us today at 586-465-5081 for a FREE painting estimate.

Related: Tips For Preparing To Paint Your Roof in Richmond, MI

Tips For Preparing To Paint Your Dining Room in Washington, MI

Read more
2022-12-04 Eason Painting Romeo MI Choosing A Paint Color For Your Dining Room

Choosing A Paint Color For Your Dining Room in Romeo, MI

Choosing A Paint Color For Your Dining Room in Romeo, MI

When you’re planning a dining room painting project, one of the most important things that you’ll have to decide on would be the paint color you’re going to use for the project.

In doing so, there are several factors that you’ll have to take into consideration in deciding on a paint color, so you end up with the best possible choice.

So, if you want to know how to properly choose a paint color for your dining room painting project, here’s something you’ll find useful.

Here’s an article about Choosing A Paint Color For Your Dining Room.

1. Look At The Lighting Present

When you’re choosing a paint color for your dining room, one of the first things that you should be considering would be the lighting present in your dining room.

It is important that you consider the lighting present in your dining room space because this has a significant effect on how your paint color will eventually look once it is painted on your surface.

Depending on the lighting present, your coat of paint can end up looking darker or lighter, paler or deeper, or even show some undertones that you may have not seen when you were initially checking out the color!

So, a workaround for this would be to check paint samples under your dining room lighting, so you can actually see how the paint color will look once it is painted there.

Or, even better, you should do a test paint on a small portion of your dining room, so you can actually see how your chosen paint color will look once it is actually painted there.

2. Observe The Colors Present Around The Space

Another important factor that you should be taking into consideration when you are choosing a paint color for your dining room would be the colors present around your dining room space.

It is important that you consider the colors already present in your dining room space so you can end up with a paint color that goes well with them, to secure an overall aesthetically appealing and cohesive paint finish.

If you have no idea which colors go best with which, you can take a look at color palettes fully available online for reference.

But, if you do have the capability, it would be better to consult with a paint professional – they know colors best, and will lead you to your best choices.

3. Formulate A General Theme

A helpful tip when you’re choosing a paint color for your dining room would be to formulate a general theme.

Having a general theme for your painting project makes the task of choosing a paint color relatively easier for you, since, with a theme, you will have to narrow down your color choices to a specific set of colors that’ll help achieve the certain theme you have in mind!

4. Lesser Is Better

Another important tip to keep in mind when you’re choosing a paint color for your dining room painting project is the lesser, the better. 

You don’t want to incorporate too many colors in your dining room, or it’ll look like a mishmash of colors that are just too much for the eyes.

A general rule would be 2-3 colors, consisting of one main paint color and one/two colors for your accent colors – go beyond that and you might be incorporating way too many colors.

5. Make Sure That The Color Is Your Personal Choice

Lastly, when you are choosing a paint color for your dining room painting project, one of the most important things that you should be evaluating in your decision would be if your choice is a personal one, or driven by external influences.

You want to end up with a paint color that you like, and not just because you’re following trends or acting upon someone else’s influence.

This will also ensure that you will like your dining room’s paint color for a long time, and won’t be needing to repaint it anytime soon!


If you need professional help with your interior painting project, Eason Painting can help.

Our home interior painting services are available in Washington Township, Rochester, Romeo, Shelby Township, Harrison Township, and Clinton Township, MI.

Call us today at 586-465-5081 for a FREE painting estimate.

Related: Tips For Preparing To Paint Your Dining Room in Washington, MI

Signs It’s Time To Repaint Your Bathroom Cabinets in Washington, MI

Read more
2022-11-25 Eason Painting Rochester MI Handy Tips For Choosing A Paint Color For Your Kid's Bedroom

Handy Tips For Choosing A Paint Color For Your Kid’s Bedroom in Rochester, MI
Handy Tips For Choosing A Paint Color For Your Kid’s Bedroom in Rochester, MI

We all want the best for our kids – so, in building them their first bedroom, we as parents would like to see that it is a space that they would really feel comfortable to be in.

One of the most crucial decisions that you’ll have to make in painting your kid’s bedroom would be the paint color you’re going to use for it.

In doing so, there are several factors that you’ll have to keep in mind in order to arrive at the best possible decision.

So, if you’re here as a concerned parent building your kid’s dream bedroom, here’s something to help you realize that vision.

Here are Handy Tips For Choosing A Paint Color For Your Kid’s Bedroom.

1. See The Lighting Present In The Space

When you’re choosing a color to use for your kid’s bedroom, one of the most important factors that you should be taking into consideration would be the lighting present in the space you’re planning to build the bedroom.

Lighting is an important factor when you’re deciding on a paint color to use for this project, because it eventually will influence the way your paint color will eventually look once you’ve painted it on the surface.

Depending on the lighting present, your coat of paint can end up looking in varying shades; it can look either shades darker or lighter than it initially was, it can look deeper or paler, or even reveal some undertones that you didn’t initially see when you first checked out the color!

So, to make sure that you’re getting exactly what you want, a workaround would be to check paint samples under the lighting of the space/room you’re planning to paint, so you can actually see how the lighting will affect your paint color choices.

Moreover, if you only have the capability to do so, you should do a test paint on a small portion of your kid’s bedroom so you can actually see how it will look when it is painted there!

2. Examine The Colors You’re Going To Incorporate In The Space

Another thing that you should be keeping in mind when you’re choosing a color for your kid’s bedroom would be to examine the colors you’re planning to incorporate in the space.

This includes the furniture, furnishings, toys, and appliances you’re planning to put in the area.

It is important that you end up with a paint color that does not only go well with the lighting in the area, but also with the colors you’re going to put in the space.

You’ll want the bedroom to look like it’s well put together and cohesive, rather than a jumbled mess of colors that do not match – your kid will definitely not be happy with that!

3. Think Of An Overall Theme

When you’re choosing a color for your kid’s bedroom, it would be beneficial for you to think of an overall theme.

Having an overall theme for your project narrows down your choices, since in order for you to achieve a specific theme, you’ll need to stick with a specific set of colors or palette – which makes the decision easier for you!

There are lots of themes available – if you’re not sure which one to go with, just look up design inspirations for kid bedrooms online, until you find one that you and your kid both like!

4. Include Your Kid In The Process

Lastly, in the quest of choosing a paint color for your kid’s bedroom, you should not do all the decisions by yourself, but you should also include your kid in the process.

It is important that you also include your kid in your decision of choosing a paint color because essentially, the bedroom is for them.

Not only are you helping them develop their cognitive, decision-making, and other essential skills, but you are also strengthening your bond with them!

If this is not good and effective parenting, I don’t know what else is!


If you need professional help with your interior painting project, Eason Painting can help.

Our home interior painting services are available in Washington Township, Rochester, Romeo, Shelby Township, Harrison Township, and Clinton Township, MI.

Call us today at 586-465-5081 for a FREE painting estimate.

Related: Tips For Preparing To Paint Your Dining Room in Washington, MI

6 Tips in Painting A Teenager’s Bedroom in Richmond, MI

Read more
2022-11-11 Eason Painting Romeo MI How To Choose A Paint Color For Your Kitchen

How To Choose A Paint Color For Your Kitchen in Romeo, MI

How To Choose A Paint Color For Your Kitchen in Romeo, MI

In doing a kitchen painting project, choosing a paint color is one of the most important decisions that you’ll have to do.

And in doing so, you’ll want to consider some factors that will help lead you to your best choice – it is important to have the right choice of paint color to ensure that you’ll be satisfied with the outcome of your project.

So, if you’re here because you want to know how to arrive at the best possible decision when choosing a paint color for your kitchen painting project, here’s something you will find helpful.

Here’s How To Choose A Paint Color For Your Kitchen.

1. Consider The Lighting Present In The Room

When you are choosing a paint color for your kitchen, one of the first things that you should consider would be the kind of lighting that your kitchen space receives or has.

Lighting is an important factor in a painting project because it significantly affects the way your paint color will eventually look once you have finished painting it on the surface.

Depending on the lighting present in the space you’re planning to paint, your finished coat of paint can either look shades darker or lighter, richer/fuller or paler, or even show some undertones that weren’t there when you first saw the color!

So, to ensure that you won’t end up with results different from your expectations, it would be beneficial for you to check paint samples under the lighting of the space you’re planning to paint – and in this case, that space would be your kitchen.

This is to ensure that you will actually see how the lighting in your kitchen will affect your choice of paint color, so you can decide accordingly.

But, if you have the time and the means to do so, it would be much better for you to just do an actual test paint – to do this, paint a small portion of your kitchen with your chosen paint color so you can actually see how it will look once it is painted there!

2. Look At The Existing Colors Present

In choosing a paint color for your kitchen painting project, another factor that you should also take into consideration would be the existing colors present.

It is important to keep this in mind when you are choosing a paint color to use for your project because essentially, you’d want to end up with a paint color that would match and go well with the present colors already in your kitchen.

Doing this would be much easier than the other way around, where you would need to buy new furniture and kitchen materials to match the color you chose for your kitchen (which can be done if you’re working with a new kitchen and are just getting appliances for it).

If you don’t have an idea of which colors go well with which, you can refer to color palettes and design inspirations just available online.

However, if you have the means to contact a paint professional, it would be much better to do so.

3. Find A Theme To Follow

Another tip that could significantly lighten your burden in choosing a paint color for your kitchen painting project would be to set a theme to follow.

Having a theme in mind gets you to have a specific set of colors to use to achieve that theme, which then narrows down your paint color choices – ultimately saving you of time and hassle of picking and skimming through a thousand paint color variations!

All you have to do now is just make sure that this specific set of colors goes well with the lighting present in your kitchen, and you’re good to go.

4. Make Sure That You Like The Color

Lastly, in choosing a paint color for your kitchen, you should ensure that this is a color that you actually like.

A kitchen painting project is no joke – it is expensive, it takes commitment, and it takes time.

So, it would be for the best that you choose a color that you will actually like in the long run, so you won’t have to feel the need to do a repainting project anytime soon.


If you need professional help with your interior painting project, Eason Painting can help.

Our home interior painting services are available in Washington Township, Rochester, Romeo, Shelby Township, Harrison Township, and Clinton Township, MI.

Call us today at 586-465-5081 for a FREE painting estimate.

Related: Signs To Repaint Your Kitchen Cabinets in Richmond, MI

Signs That You Should Repaint Your Kitchen Interior in Washington, MI

Read more
2022-10-25 Eason Painting Romeo MI Reasons Why You Should Paint Your Floor With Epoxy

Reasons Why You Should Paint Your Floor With Epoxy in Romeo, MI

Reasons Why You Should Paint Your Floor With Epoxy in Romeo, MI

If you have been noticing that your floors seem to be in bad shape lately, then maybe it is time that you rejuvenate them into something more beautiful and exciting – perhaps, an epoxy flooring?

Painting your floors with epoxy comes with a lot of benefits, and if you’re currently still debating whether or not painting your floor with epoxy will be the right way to go in renovating your floors, here’s something to help you in your decision.

Here are the Reasons Why You Should Paint Your Floor With Epoxy.

1. Epoxy Floors Have A Glossy Finish

Epoxy gives your floor a gorgeous glossy surface that may quickly transform the interior of your house into a stunning, magnificent space.

To paint your floor, you may select from a variety of hues, textures, and architectural styles.

(Personal preference: I would want to paint my flooring the prettiest color of white with a glittering, shimmer finish, to give off an air of ethereality and heavenly vibes!)

Epoxy floor paint may also be used to cover up defects or filth that were embedded in your previous floor, doing it not just quickly but also elegantly.

In having epoxy floors, you can transform your plain flooring into a sparkling, crystal-like surface that appears to have come right out of a dream by choosing to paint them with epoxy!

2. Epoxy Floors Are Sturdy And Long-Lasting

Epoxy flooring is not just stunning in appearance; they are also sturdy, and extremely long-lasting!

With the right maintenance and proper care, your epoxy floors could last you up to 10 years!

Additionally, you won’t need to be concerned about cracks or chips anytime soon because epoxy flooring is meant to be durable and resistant to oil, heat, and water.

Epoxy floors can also readily withstand stress, impact, and weight, and they will maintain their brand-new appearance for a very long period.

If you just give them a sweep and a swipe from time to time, you can keep its beauty and shine for such a long time!

3. Epoxy Floors Are Cheaper

Not only do you benefit from having fantastic flooring when you paint your floor with epoxy, but you also save money.

This is because simply painting your floor with epoxy is less expensive than ripping up your old floor and renovating them completely, which will inevitably be pricey if you include the cost of materials and labor.

Epoxy flooring, in this case, is the simplest and cheapest option for renovating your flooring.

Also, if you think about it, you also get to save money each year since you won’t have to redo painting your epoxy flooring since it is indeed durable and long-lasting.

To top it off, you even get to save on upkeeping since epoxy flooring will be so easy to clean, you can just do it yourself!

4. Epoxy Floors Are Extremely Low-Maintenance

Another benefit that you can get out of deciding to paint your floors with epoxy will be the fact that epoxy floors are extremely low-maintenance.

It will be much easier to clean any dust or dirt that may be present on your floors since a sweep will be enough to retain their glassy-like appearance.

In retrospect, maintaining epoxy floors is extremely easy, you won’t even have to go through the hassle of worrying about cleaning day or getting professionals to clean your floors!

Epoxy flooring is also resistant to bacteria and germs, making them simple to clean and sanitize.

5. Epoxy Floors Are Environmentally Friendly

Epoxy is a substance that requires few resources to create, which makes them environmentally friendly and helps save precious resources.

Your epoxy floor won’t corrode, emit toxins into the air, or disintegrate once it has dried up.

Additionally, it requires the least amount of materials are needed and epoxy flooring lasts the longest, which ultimately saves money and time.

What more could one ask for? It is inexpensive, easy to use, lasts a long time, and is environmentally friendly!


If you need professional help with your interior painting project, Eason Painting can help.

Our home interior painting services are available in Washington Township, Rochester, Romeo, Shelby Township, Harrison Township, and Clinton Township, MI.

Call us today at 586-465-5081 for a FREE painting estimate.

Related: 4 Tips for Maintaining Your Epoxy Flooring

Ravenclaw: Painting Your Room As A Harry Potter House in Washington, MI

Read more
2022-10-11 Eason Painting Washington MI Signs It's Time To Repaint Your Bathroom Cabinets

Signs It’s Time To Repaint Your Bathroom Cabinets in Washington, MI

Signs It’s Time To Repaint Your Bathroom Cabinets in Washington, MI

Bathroom cabinets are not merely storage options for our bathroom, but they also tie up the overall appeal of our bathrooms.

So, it is important that we maintain them from time to time.

However, how do we really know that it is due time that we treat our bathroom cabinets to a fresh coat of paint?

To help you with this, here are Signs It’s Time To Repaint Your Bathroom Cabinets.

1. Fading Paint

If you have been seeing that your bathroom cabinets look dull and overall faded lately, chances are that your coat of paint might have faded already – which is a telltale sign that you will need to repaint your bathroom cabinets.

There are many reasons why your coat of paint will fade; it may be due to a lack of proper surface preparation, failure to follow standard painting protocols, or due to using low-quality paint.

But sometimes, our coat of paint just naturally fades over time, and faded paint can be quite sad and unsightly.

So, to bring back its old luster and shine, you will need to treat them to a fresh coat of paint.

However, do make sure that you invest in high-quality paint, so your coat of paint won’t be fading or showing signs of any painting problem anytime soon.

2. Mold Presence

Because our bathroom cabinets are essentially located in a place that receives so much moisture and less light, mold growth can be pretty common – and their presence is yet another sign that you will need to repaint your bathroom cabinets.

If you see any signs of mold in inspecting your bathroom cabinets, you should take action immediately – molds are very unsanitary and could pose to be a risk to your overall health.

In taking care of mold, you will want to scrape the paint off of your bathroom cabinets, clean the affected area and apply an anti-mold solution to it, and then ensure to repaint your cabinets with a mold-inhibiting paint so the problem won’t be persisting after repainting.

However, if you do realize that the mold problem you have at home is bigger than what you think you can handle by yourself, it would be best to call a professional to get help and do the job for you.

3. Peeling Paint

If you have been noticing that some parts of your bathroom cabinet’s coat of paint are peeling, then this is another sign that you will need to repaint them.

Paint peeling can happen due to a number of reasons, such as:

  1. An overall bad painting job
  2. Failure to follow proper painting procedure
  3. Applying coats of paint too fast
  4. Your coat of paint has just reached the end of its peak and is showing signs of wear and tear

But, no matter what the reason is, you still cannot take away the fact that paint peeling can be rather unsightly, and it is important to take action as soon as possible to prevent making the problem worse than it already is.

There are thousands of paint blogs online that can help you in solving this exact kind of paint problem, so just give it a quick search!

4. Water Damage

Because your bathroom cabinets are essentially in your bathrooms, which is a place that is very near to water, water damage can be common – and if you are seeing signs of water damage, then it may be the time that you repaint your bathroom cabinets.

It is important that you take action when you see signs of water damage on your bathroom cabinets because not only are they unsightly, but they can lead to mold and bacterial growth, which can be detrimental to your overall health.

Just make sure that you find the source of the water damage first, to ensure that the problem won’t persist after you’ve finished repainting.


If you need professional help with your interior painting project, Eason Painting can help.

Our home interior painting services are available in Washington Township, Rochester, Romeo, Shelby Township, Harrison Township, and Clinton Township, MI.

Call us today at 586-465-5081 for a FREE painting estimate.

Related: 7 Tricks To Make Bathroom Cabinet Painting Easier in Rochester, MI
 Repainting Your Bathroom: Handy Tips To Keep in Mind in Romeo, MI

Read more
2022-10-04 Eason Painting Richmond MI How To Choose A Paint Color For Your Bedroom

How To Choose A Paint Color For Your Bedroom in Richmond, MI

How To Choose A Paint Color For Your Bedroom in Richmond, MI

In painting your bedroom, one of the first things that you should be thinking about would be the paint color you’ll be using for the project.

This decision is very important because you want to ensure that you do end up with a paint color that is not only your choice, but also the best choice for your bedroom.

So, if you’d like to know how to do this, here’s something that will definitely help you in your decision.

Here’s How To Choose A Paint Color For Your Bedroom.

1. Consider The Lighting Present In The Space

When you’re choosing a paint color for your bedroom, one of the first things that you should consider would be the lighting present in your bedroom space.

This is because the lighting present in a space significantly affects the way you will perceive a certain paint color or just basically how a paint color will end up looking once it is painted and dry on the surface.

The same shade of paint color can look either shades darker or lighter, paler or deeper, and many other possible variations depending on the lighting in which it is illuminated.

So, to ensure that you will end up with a paint color that will go nicely with the certain lighting present in your bedroom, you should ensure to check paint samples in your bedroom – this will make you actually see how the lighting affects your paint color choices.

But, to be even more sure, you can do a test paint on a small portion of your bedroom surface, so you can actually see how your chosen paint color will look once it is painted there!

2. See The Colors Present In The Space

Aside from the lighting present in your bedroom, you should also consider the present colors in your bedroom space when you’re choosing a paint color to use in your bedroom painting project.

This is to ensure that whatever color you do end up choosing will go nicely with the colors already present in your bedroom – which will then create a sense of balance and cohesion in your bedroom’s overall appeal, which is essentially what you want out of a bedroom painting project.

You certainly don’t want to end up with a bedroom that looks off-putting and mismatching, because that’ll just defeat the purpose of your bedroom: which is to make you comfortable and at ease.

To help you with this, you can refer to color palettes or design inspirations available online – they can provide you with some ideas on which colors will work best with a certain set of colors, so you won’t have to figure it out all on your own.

However, the best course of action for this would still be to consult with a paint professional, since they will definitely know which colors work best with which.

3. Think Of An Overall Theme

To help you narrow down your choices, you will want to think of an overall theme when you’re choosing a paint color for your bedroom.

This will be helpful because if you have a theme in mind, then you will already have a set of colors to choose from, depending on whatever theme you do end up deciding to go with.

If you’re not sure of which theme you can go with, then you can again refer to design inspirations and mood boards just readily available online – just keep on scrolling until you end up with one that fits right with your taste!

4. Ensure That It’s Your Personal Taste

Lastly, in choosing a paint color for your bedroom, after considering all the tips above, you will want to lastly consider whether your choice is really your personal taste, or you’re being influenced into choosing that.

This is important because you will want to end up with a color that you will continue to love for a long time, which will not happen if you’re only following fleeting trends or being influenced by someone or something else.


If you need professional help with your interior painting project, Eason Painting can help.

Our home interior painting services are available in Washington Township, Rochester, Romeo, Shelby Township, Harrison Township, and Clinton Township, MI.

Call us today at 586-465-5081 for a FREE painting estimate.

Related: Bedroom Repainting Tips That Will Come Handy in Romeo, MI

 Painting and Decorating Tips To Make Your Bedroom Cozier in Richmond, MI

Read more
2022-09-25 Eason Painting Romeo MI Home Office Painting Preparation

Home Office Painting Preparation in Romeo, MI

Home Office Painting Preparation in Romeo, MI

With everything getting digitalized nowadays, it is becoming easier to ditch going out and working at the comfort of our own homes.

With that being said, home offices are slowly becoming a staple in modern home living – so, if you’re currently thinking of getting one for yourself, here’s something that will help you as you prepare for it.

Here’s a guide on Home Office Painting Preparation.

1. Choose A Suitable Office Space

First things first, when you’re preparing for a home office painting project, the first thing that you should be thinking about would be choosing a space that would be suitable to make as a home office.

Ideally, you would want your home office to be as spacious as needed, so it can cater to all your office needs and serve its purpose well.

Just because the first image that pops into your mind when someone says “office” is a small, cramped space full of paperwork doesn’t mean that your home office has to suffer the same fate.

It would be much better for you to have an appropriately-sized home office where you don’t have to feel restricted and uncomfortable due to the small and limited space, so you can easily get motivated to be productive.

2. Clear The Space

When you have chosen a space to transform and make as your home office, the next preparation tip you should keep in mind would be to clear the space.

You should clear any obstacles or furniture present in the area so you can allow as much space to freely move into as you make your way in painting your home office, which is basically the most convenient and hassle-free way for you to paint.

Additionally, in doing this, you can avoid tripping or falling over obstacles present in the area as you’re painting, which will be beneficial since you are reducing your chances of creating unnecessary mess in your area, which will be tedious to clean up, especially that you’re working with paint.

3. Choose A Color Carefully

In preparing to paint your home office, you should also keep in mind to choose a paint color carefully.

Ideally, you would want to pick a paint color that fits right with your tastes, so you can ensure that you will really like working in your home office and maximize your productivity.

If you’re not sure yet or simply have no idea or visualization of what you want for your home office, fret not – there are so many home office design inspirations you can refer to online.

In retrospect, if you’re finding that you’re practically dragging yourself into your home office because you’re not entirely liking its color, then the room is literally defeating its purpose: to get you productive and motivated working at the comfort of your own home.

So, to avoid this from happening, remember to choose a paint color carefully.

4. Estimate How Much Paint You’ll Need

Lastly, a helpful tip you can keep in mind when you’re painting your home office is to know how much paint you’ll need to complete your project.

This is an important preparation tip to not only keep in mind but also to ensure to really follow because this will save you so from so much hassle.

For instance, it’ll be hard to pause in the middle of your project because you’ve suddenly run out of paint, or to find out that you have bought way too much paint in the first place, which just wastes your money.

To do this, there are tons of paint calculators available online to help you figure out how much paint you’ll be needing, or if you have the capability to do so, consult a paint professional to provide an estimate for you.


If you need professional help with your interior painting project, Eason Painting can help.

Our home interior painting services are available in Washington Township, Rochester, Romeo, Shelby Township, Harrison Township, and Clinton Township, MI.

Call us today at 586-465-5081 for a FREE painting estimate.

Related: Why Choose Us to Paint Your Home or Office in Richmond, MI

Interior Painting Richmond, MI: Choosing Paint Color for Your Home office

Read more
2022-09-18 Eason Painting Washington MI Painting and Decorating Tips For Nature Lovers

Painting and Decorating Tips For Nature Lovers in Washington, MI

Painting and Decorating Tips For Nature Lovers in Washington, MI

Nature is indeed beautiful, and it is very easy to fall in love with its sheer beauty – many people love being one with nature, and going out because of this.

If you’re one of those people who likes to be with nature and would want to bring that into the comfort of your own homes, well, here’s something you would definitely like!

Here are Painting and Decorating Tips For Nature Lovers.

1. Greens With Neutrals Is The Heavenly Combo

In your quest towards bringing the outdoors into your humble abode, a great tip to keep in mind would be to mix your green colors with neutral shades, to emulate the feel of being at one with nature.

Lush greens paired with earthy neutrals will be the heavenly combination to satisfy the nature lover inside you!

You can start by painting your home interior with this color combination, or if you do not want to go through the hassle of a painting project, you can simply get various furniture and furnishings that will match this color palette.

To let you even have a clearer idea of how to pair your greens with neutrals, you can refer to color palettes and design inspirations just available online.

2. Nature’s Accent Wall

If you are feeling artsy and want to express your love for nature through art, then maybe you would fare better by doing nature’s accent wall – a nature-themed accent wall.

A nature-inspired accent wall will be perfect for the trends right now since plants have been a staple in everyone’s homes (and hearts) since the pandemic, as plants have been their outlet for comfort from all the anxiety brought about by the pandemic.

In doing a nature-inspired accent wall, you could go absolutely creative with it – you can go for a cool palm leaves design against a bright, clean background, or paint a flowery accent wall, or even go beyond the conventions of paint and get yourself an actual greenery wall with living plants in them!

3. Get More Woodsy Accents and Elements

Another tip in building the perfect nature-themed home would be to get more woodsy accents and elements into your home interior, just to even maximize getting that great outdoorsy feel.

You could do this by getting wooden furniture like rattan tables and chairs, or you could hang wooden shelves for more storage or decorate with art, coasters, or some of your favorite records you want to show off.

Adding wood accents and features to your home interior would be the perfect step to get you closer to your dream nature-themed home, and it would look clean, minimalist, and classy in the process!

4. Let More Light In

You could also do good by letting more natural light into your home, which is another way of letting nature in.

You can do this by opening more windows or by putting thin, sheer lace curtains in your windows so that a soft breeze can also come in.

If you’re feeling more adventurous and have the money, you can even install a skylight inside your home to really let nature take its course and fill your home with that beautiful natural lighting.

5. Get More Plants and Flowers!

Lastly, in building the perfect nature-inspired home interior, the most important thing that you will want to incorporate into your home interior are plants and flowers.

Of course, in bringing nature into your home interior, nothing will beat having plants and flowers into your home interior – and not only do you get a beautiful decor for your interior, but you can also benefit from having fresher, cleaner air in your home.

Just make sure that you put them in places where they can still get enough sunlight and do not forget to water them as needed, and your nature-inspired home is almost complete!


If you need professional help with your interior painting project, Eason Painting can help.

Our home interior painting services are available in Washington Township, Rochester, Romeo, Shelby Township, Harrison Township, and Clinton Township, MI.

Call us today at 586-465-5081 for a FREE painting estimate.

Related: Bathroom Painting Tips For Less Mess in Romeo, MI

Should You Use a Dark Colored Paint in Rochester MI? The Pros and Cons

Read more
2022-09-11 Eason Painting Richmond, MI Slytherin_ Painting Your Room As A Harry Potter House

Slytherin: Painting Your Room As A Harry Potter House in Richmond, MI

Slytherin: Painting Your Room As A Harry Potter House in Richmond, MI

Amidst the fact that so many years have passed since the bold and adventurous tale of Harry Potter has last played on our cinema screens, the love and loyalty fans have for the series is still evident today.

One of the most recognizable references from the series are the houses – Gryffindor, Hufflepuff, Ravenclaw, and Slytherin – and each of these houses represents a specific set of character traits that you can be categorized.

So, if you are a true Slytherin by heart and mind, here’s something that you will probably be excited to read.

 Here’s Slytherin: Painting Your Room As A Harry Potter House.

1. Find The Most Elegant Shade Of Green

As your first step in painting your very own Slytherin-inspired room, one of the things that you will want to do is to find the most elegant shade of green.

The powerful and influential house of Slytherin is represented by two colors: green as the primary color with black to provide a nice contrast and accent to it, so to make your room as Slytherin-esque as possible, you should get these two colors.

However, you should be careful in picking out a shade of green, because this can be a tricky color to use in painting – with colors such as apple green and neon green that are rather generally unpleasant to the eyes, you will want to remember to veer off of these and stick with darker, neutral greens, to truly capture that Slytherin vibe.

Mysterious and powerful, you will truly have loads of fun combining the colors of black and green in building your perfect Slytherin haven!

2. Get A Slytherin-Inspired Accent Wall

If you think that painting the entirety of your room seems like a tedious task for you, worry not – you can still achieve the Slytherin room of your dreams by opting to paint a Slytherin-inspired accent wall!

Since an accent wall can take on so many design routes and styles, you actually have so many options and creative freedom in this: you could opt for a simple, two-toned accent wall bearing the colors of Slytherin, or paint a gorgeous Slytherin symbol in your room, or even go as far as painting a Slytherin mural/accent wall into your room!

There are just so many routes that you can go with an accent wall – just make sure that you do choose a wall to paint it on thoughtfully, and you’re good to go!

3. Decorate With More Furnishings

If you want to take your love for the house of Slytherin to another level, then you will want to decorate your room with more furnishings!

This could be in the form of various decorations and furnishings that are reminiscent of the true Slytherin essence, such as various snake-inspired decor or artworks (as the house of Slytherin is represented by a snake), metallic and dark decor, or even get a smooth and silky snakeskin-patterned bedsheets and covers.

Anything that feels like it would make sense to be in a Slytherin common room would do!

4. Display Your Beloved Merch And Memorabilia

Of course, to express your love for the franchise, you would also want to display some of your beloved merch and memorabilia.

You could put your various Slytherin trinkets and merchandise all over your room just to make it feel more homey and complete, and even display your Harry Potter books near your bedside table!

You are a Potterhead at heart, so don’t let that get taken away from you – be a proud Slytherin by heart and mind!

5. Finish Off With Drapes And Additional Lighting

Lastly, to truly finish off and tie up your Slytherin-themed bedroom nicely, you will want to get matching curtains and the proper lighting to set that final Slytherin touches.

Since the Slytherin common room is known for being dark and cozy, you will want to choose a curtain that blocks out light.

You’d also want to get some mood lighting, such as a warm lamp to get the feel of a cozy fireplace, or colorful LED light strips that you can turn green so you can bask your room in that authentic, Slytherin glow.


If you need professional help with your interior painting project, Eason Painting can help.

Our home interior painting services are available in Washington Township, Rochester, Romeo, Shelby Township, Harrison Township, and Clinton Township, MI.

Call us today at 586-465-5081 for a FREE painting estimate.

Related: Gryffindor: Painting Your Room As A Harry Potter House in Rochester, MI
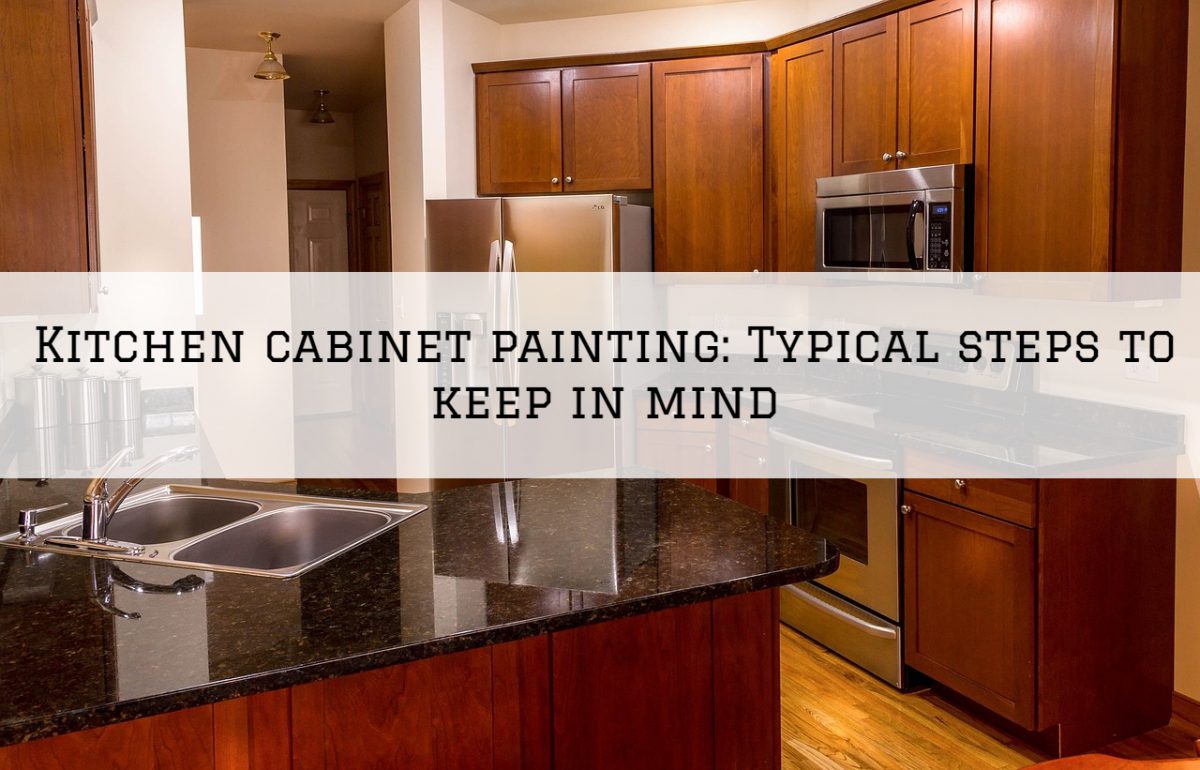
Hufflepuff: Painting Your Room As Your Harry Potter House in Romeo, MI

Read more
2022-09-04 Eason Painting Romeo, MI Living Room Repainting Tips To Remember

Living Room Repainting Tips To Remember in Romeo, MI

Living Room Repainting Tips To Remember in Romeo, MI

Our living room is essentially the central part of our home – it is where we hold and entertain guests or where we just simply lounge around to relax.

So, it is important that we maintain its overall appeal – and one of the best things to do that would be to repaint it from time to time.

If you’re planning to repaint your living room, here’s something to help you along the way.

Here is Living Room Repainting Tips To Remember.

1. Clear Your Living Room Space First

In repainting your living room, one of the first things that you should do is to clear your living room space first.

This is important because you want to clear as much space as possible before you actually proceed to paint your living room, so you will have a lot more space to freely move about as you make your way in painting.

Additionally, getting this done greatly reduces your risk of slipping or tripping over something, which will create a mess that’ll be a hassle to clean up after.

Also, by getting all your living room furniture and essentials out of the way, you do not only benefit from having a freer space to move into, but you also get to avoid getting paint splatters and drips all over them, which tend to be inevitable, especially in a painting project.

For immovable fixtures, such as hanging cabinets or television sets mounted to the wall, you will want to cover them with a drop cloth to protect them as you’re painting your living room.

2. Do Proper Surface Preparation

After making sure that everything is out of the way, the next step to take would be to do proper surface preparation.

Proper surface preparation is important because it will ensure that the surface you’re going to be painting on will hold and retain the paint well.

One of the reasons paint projects fail is due to a lack of proper surface preparation, which could be seen through a nasty paint finish, uneven paint coverage, or an overall bad painting job.

To properly prepare your living room for painting, you will want to inspect your walls first for any signs of damage, then patch them up accordingly – this is important because paint alone won’t completely cover up the present imperfections on your surface.

Then, if all is clear, make sure that your living room walls are clean, to ensure a seamless paint finish in the end.

3. Apply A Coat Of Primer

If you are done properly preparing your living room surface for painting, you can now apply a coat of primer to your walls.

In any painting project, you should not forget to apply a coat of primer or two, because this will ensure that your paint will adhere better to your surface, will make it considerably stronger and more durable, and will provide better coverage for your paint.

4. Start Painting From The Top

After applying your coat (or coats) of primer, you can now start applying your coat of paint!

But a word of advice: you should start painting from the top.

Why?

This is because painting from the top will make it easier for you to cover up the inevitable paint drips that will trickle down as you paint, since you’ll technically be painting over them as you make your way down.

Additionally, painting from the top first gets you to have gravity as your ally, which is very important!

5. Choose Your Paint Color Wisely

Lastly, a great tip to keep in mind when repainting your living room would be to choose a paint color wisely.

Factors such as the lighting present in your living room, the colors currently present in your living room, or the theme or vibe you’re going for are just some of the factors that you need to consider in choosing a paint color.

You must do this methodically or thoughtfully because this is your living room that you’re going to paint, and who doesn’t want to be in a living room that looks and feels good, right?


If you need professional help with your interior painting project, Eason Painting can help.

Our home interior painting services are available in Washington Township, Rochester, Romeo, Shelby Township, Harrison Township, and Clinton Township, MI.

Call us today at 586-465-5081 for a FREE painting estimate.

Related: 7 Mistakes To Avoid When Painting Your Living Room in Rochester, MI

7 Tricks To Renovating Your Living Room On A Budget in Romeo, MI

Read more
2022-08-18 Eason Painting Washington MI Ravenclaw_ Painting Your Room As A Harry Potter House

Ravenclaw: Painting Your Room As A Harry Potter House in Washington, MI
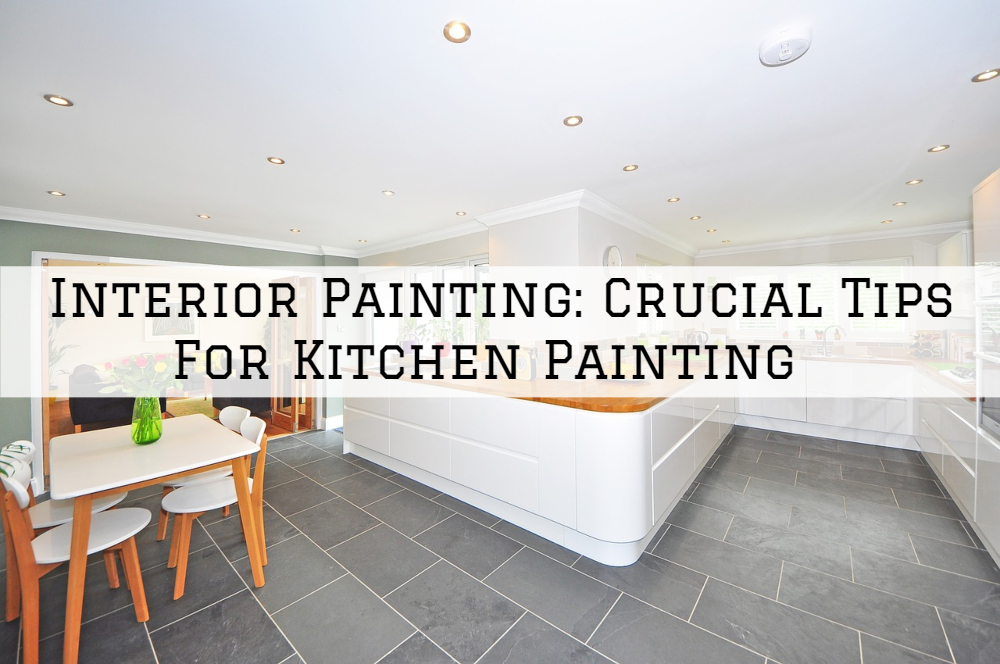
Ravenclaw: Painting Your Room As A Harry Potter House in Washington, MI
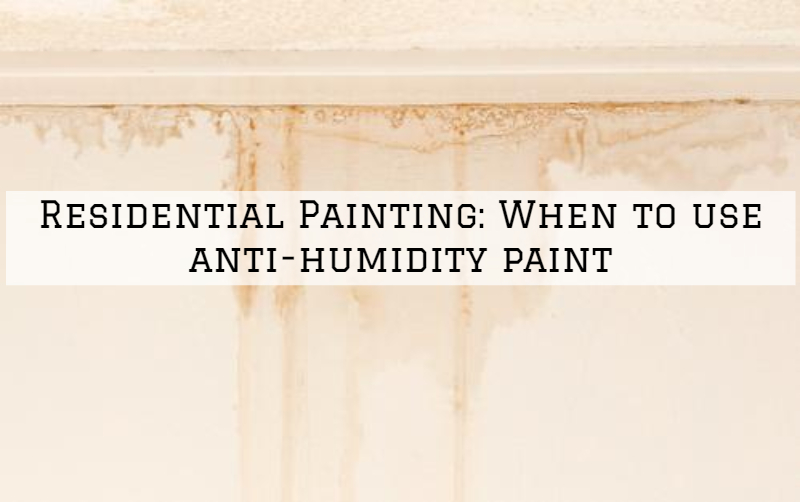
So many years have passed, and yet, the influence and impact of Harry Potter still live among us – the old and young generation alike.

One of the most memorable references to come out of the mega-successful series would be the Hogwarts Houses – namely, Gryffindor, Hufflepuff, Slytherin, and Ravenclaw – and each of these houses represent a whole unique set of character traits that you can be categorized in.

So, if you’re an undeniable Ravenclaw and are proudly unapologetic for it, here’s something you will find incredibly enticing.

To help you build your dream Ravenclaw fortress, here’s Ravenclaw: Painting Your Room As A Harry Potter House.

1. Look For A Dreamy Shade Of Blue

The first thing you could do to make your room reflect your inner and true Ravenclaw would be to paint your walls with a dreamy shade of blue or purple.

Proudly represented by the colors of blue paired with accents and touches of gold, painting your room with this color combination will slowly get you to realize the Ravenclaw room of your dreams.

To start, you will want to look for the right shade of blue to paint your bedroom.

There are so many shades of blue available on the market, and ideally, if you want your room to look as accurate as the house of Ravenclaw, you would benefit the most in choosing a deep shade of blue and pairing it accordingly with touches of gold.

There are so many design inspirations and color palettes available online for this, so you can give it a quick search so you can see which shade will work best with you.

2. Unleash Your Creativity With An Accent Wall

If you find that merely painting your room with the colors of Ravenclaw seems too basic and predictable for you, you can take a more creative route and paint a Ravenclaw-inspired accent wall in your room!

Since an accent wall could essentially take on any form you like in terms of design and creativity, you have many design options and possibilities for doing an accent wall.

First off, you could opt for a simple, single-colored accent wall to add that nice contrast to your bedroom (maybe painting your walls with a deep shade of blue and adding a golden accent wall?)

But you could also opt for a more creative and detailed route, like perhaps a divine Ravenclaw logo accent wall, if you’re more on the artsy side and up to the task of doing one!

You can absolutely let your creativity flow and unleash with this one – just make sure that you do choose the right wall to paint it on (ideally without any furniture obstructing it and receiving good light) and you’re good to go!

3. Display Your Ravenclaw-Inspired Furnishings

You will also want to show off your Ravenclaw-inspired furnishings in your room just to add a nice touch to your Ravenclaw haven.

Ravenclaws are deemed to be curious, logical, and wise beyond their years, so to match this vibe, you can look for brass lamps, telescopes, globes, old maps, or a tapestry of astrology or astronomy to decorate your room.

Lastly, a Ravenclaw room will not be complete without books – a classic Ravenclaw staple – so you can do so by putting books at your bedside, or adding a cute hanging bookshelf near your study table.

4. Cover Your Floors With A Gorgeous Carpet

To add more coziness to your room – which the Ravenclaw common room has – you can cover your floors with a gorgeous carpet.

Aesthetic-wise, it would be much better for you to opt for a vintage carpet that faintly resembles the Ravenclaw house as a whole, but anything that you think fits with the whole aesthetic of your room will be fine – it is completely up to your creative vision!

If you need professional help with your interior painting project, Eason Painting can help.

Our home interior painting services are available in Washington Township, Rochester, Romeo, Shelby Township, Harrison Township, and Clinton Township, MI.

Call us today at 586-465-5081 for a FREE painting estimate.

Related: Hufflepuff: Painting Your Room As Your Harry Potter House in Romeo, MI

 Handy Tips To Keep in Mind When Painting By Yourself in Washington, MI

Read more
2022-08-11 Eason Painting Richmond MI Signs To Repaint Your Kitchen Cabinets

Signs To Repaint Your Kitchen Cabinets in Richmond, MI

Signs To Repaint Your Kitchen Cabinets in Richmond, MI

Your kitchen cabinets are one of the most essential fixtures in your kitchen – aside from the fact that they give you tons of storage options, they also contribute to the overall appeal of your kitchen.

With this in mind, it is important that you maintain their overall appeal and what better way to do this than to treat them to a fresh coat of paint?

However, it is no secret that a painting project can be expensive, and as much as possible, we’d only like to do it when it is really necessary.

But how do we really know that your kitchen cabinets are showing signs that it is time to repaint them?

To help you determine whether or not your kitchen cabinets are in bad need of a fresh coat of paint, here are Signs To Repaint Your Kitchen Cabinets.

1. If Your Paint Is Already Peeling

If you have been noticing that your kitchen cabinet’s paint is already peeling, then this is a telltale sign that you need to repaint them.

Paint peeling may be a product of improper surface preparation prior to painting, an overall lousy painting job, or just that your coat of paint has reached the end of its life – in which you will definitely want these fixed and repainted.

To do this, you will want to scrape off the peeling coat of paint, prepare the surface accordingly, then add a coat of primer before adding that brand new layer of paint.

Additionally, to ensure that you won’t be having this problem again anytime soon, you should invest in high-quality paint – while they can be relatively pricey, they also give you the value for your money, which will be a better investment than opting for cheap, low-quality paint.

2. If It Has Unremovable Stains

Your kitchen cabinets are used daily, and this continued usage can result in your cabinets showing wear and tear over time, such as unremovable stains – which can be another sign that you need to repaint your kitchen cabinets.

Stains may appear on your kitchen cabinet’s surface for many reasons, such as juices splattering all over them as you prepare to cook, sauces that have dried and left a permanent mark, or grease stains that have been left for too long.

While it is true that you can still opt to just give your kitchen cabinets a classic scrub and wash, sometimes even that isn’t enough to bring back the luster and shine it once had – which a brand new coat of paint will definitely give you.

3. If It Has Water Damage

Because of your kitchen cabinet’s proximity to water, it can easily manifest signs of water damage – which can be an eyesore and something you can fix with a brand new coat of paint.

It is important to take action once you’ve seen your kitchen cabinets show signs of water damage because it can lead to a variety of problems if left untreated, such as mold growth and furniture damage, among other things.

Additionally, it is not enough to just put a new coat of paint over your kitchen cabinets once it has shown signs of water damage – you will also want to determine the source of the water damage itself, may it be a faulty tube, a leaky roof, or a hole in your ceiling, so you can ensure that the problem won’t persist after repainting your kitchen cabinets.

4. If The Color Is Already Fading

As time passes, your coat of paint will naturally fade – so if you’re noticing that your kitchen cabinets have been looking a bit pale lately, then it might be that your paint is already fading, and a clear sign that your kitchen cabinets are in bad need of a fresh coat of paint.

While paint fading can also occur due to a lot of other reasons, such as a lack of primer usage or using low-quality paint, most of the time, your paint just naturally fades over time.

In repainting your kitchen cabinets, you will want to ensure to follow all standard painting protocols and invest in high-quality paint to ensure that your kitchen cabinets won’t be showing any signs of paint fading and other problems anytime soon.


If you need professional help with your interior painting project, Eason Painting can help.

Our home interior painting services are available in Washington Township, Rochester, Romeo, Shelby Township, Harrison Township, and Clinton Township, MI.

Call us today at 586-465-5081 for a FREE painting estimate.

Related: Painting and Decorating Your Kitchen on a Budget in Washington, MI

Repainting Your Kitchen: Great Tips To Keep in Mind in Richmond, MI

Read more
2022-07-25 Eason Painting Rochester MI Gryffindor_ Painting Your Room As A Harry Potter House

Gryffindor: Painting Your Room As A Harry Potter House in Rochester, MI

Gryffindor: Painting Your Room As A Harry Potter House in Rochester, MI

Even after all the years that have passed, the brave and heroic adventures of Harry Potter still resonate across generations – may it be children or adults alike.

One of the most notable references you can get out of the series would be the Hogwarts Houses, namely: Slytherin, Hufflepuff, Ravenclaw, and Gryffindor – and each of these houses represent a unique set of traits that you can be categorized.

So, if you identify as a bold, fearless, and valiant Gryffindor, and want that to reflect in your personal space (your room), here’s something you’ll find extra magical.

Here’s Gryffindor: Painting Your Room As A Harry Potter House.

1. Opt To Paint Your Walls A Rich Shade Of Red

In making your room feel more like the great and brave Gryffindor, a good way to start will be to paint your walls with a rich and powerful shade of red, the color of Gryffindor’s courage and bravery, so you can begin crafting your Gryffindor-inspired room.

Gryffindors are known for their bravery, which is best represented by the fiery and bold shade of red, so it will be an excellent start to paint your walls a shade of red to give your space a Gryffindor-like feel.

However, you should also keep in mind that red can be a powerful tint, and it can easily be too bright and overwhelming for the eyes.

To aid this, it would be much better for you to stick to more subdued tones of red, like burgundy or rosewood, for the best results.

2. Get A Gryffindor Inspired Accent Wall

While it can be fun to repaint your room with a whole new color to fully transform it into a theme you’re aiming for, that painting job can be exhausting and will require a greater commitment.

So, if you’re not fully up to that task, you can still bask your room in that Gryffindor flair by adding a Gryffindor-inspired accent wall into your room’s interior.

It’s important to remember that the Gryffindor house colors are red and gold, which stand for both bravery and loyalty respectively, so if you’re painting an accent wall, don’t forget to incorporate these two colors.

However, it’s not just colors that you can play around with when you’re painting your accent wall; you can also get creative by painting a Gryffindor emblem in it or even getting a Gryffindor mural to truly feel like you’re living in the actual Gryffindor tower!

3. Pair With Matching Burgundy Sheets and Pillowcases

To make your room feel exquisitely and blatantly Gryffindor even more, you can opt to pair your Gryffindor walls with matching burgundy sheets and pillows!

As a personal suggestion, burgundy sheets would be best paired with gold pillowcases to make it feel like you’re actually in the Gryffindor common room – you’ll definitely fall in love the moment you set your eyes on it!

Just make sure you get the appropriate size and proportions of your sheets and pillowcases when you do buy one because there are so many variations available in both local and online stores, to ensure that you will have a perfect and snug fit.

4. Incorporate A Vintage Rug In Your Room

To add more embellishments to your Gryffindor-themed room, putting a vintage rug in the middle of the space will be a great idea.

This will give your room the same cozy, homey feel as the Gryffindor common room.

To stick with the theme, you should get a rug that bears the colors of burgundy and gold, and ideally, it should be big enough to cover the center of your room.

There are so many options online and at your local thrift store, so check them out and don’t be afraid to ask for discounts to get the best deals!


If you need professional help with your interior painting project, Eason Painting can help.

Our home interior painting services are available in Washington Township, Rochester, Romeo, Shelby Township, Harrison Township, and Clinton Township, MI.

Call us today at 586-465-5081 for a FREE painting estimate.

Related: Hufflepuff: Painting Your Room As Your Harry Potter House in Romeo, MI

Painting and Decorating Your Bedroom on a Budget in Richmond, MI

Read more
2022-07-18 Eason Painting Washington MI Signs That You Should Repaint Your Kitchen Interior

Signs That You Should Repaint Your Kitchen Interior in Washington, MI

Signs That You Should Repaint Your Kitchen Interior in Washington, MI

It does give us great pleasure to prepare and cook our food in a kitchen that feels comfortable because it is aesthetically pleasing.

After all, who would want to be in a kitchen that looks unappealing, right?

So, to maintain that level of comfort, it is important that you maintain the upkeep of your kitchen – and one of the best ways to do that would be to repaint your kitchen from time to time.

However, how do we exactly know that it’s time to repaint our kitchen?

What are the signs that we should be looking out for?

To help you in your painting project, here are Signs That You Should Repaint Your Kitchen Interior

1. Your Kitchen Is In Dire Condition

If you’re noticing that your kitchen takes too much of your time and effort to fully clean because of its overall dire condition, then this might be a sign that you need to finally treat it to a fresh coat of paint.

It will be time to repaint your kitchen if you’re still not satisfied with the overall appeal of your kitchen even after you’ve done a thorough and deep cleaning on it.

It will be much better to just treat your kitchen to a fresh coat of paint to fully revamp and rejuvenate its overall appeal than spend endless hours cleaning and scrubbing it only to be left somewhat unsatisfied after.

2. Your Kitchen Is Suffering From Tons Of Paint Problems

If you’re seeing that some parts of your kitchen have paint peeling or flaking in it, or just simply noticing that your kitchen paint looks drab and mundane lately – a sign that your paint might be fading – then this might be the clear sign to repaint your kitchen.

Paint problems are usually rooted in a poor painting job, such as lack of proper surface preparation or failure to follow the proper painting procedure and techniques, but it could also be that your coat of paint has reached the end of its life.

To solve this, you will want to identify what specific paint problem you are facing so you can fix them accordingly – you can either do this yourself by researching through tons of how-to and tutorials on the internet or call a paint professional to do the job for you.

3. Your Kitchen Is Showing Signs of Water Damage

Water damage can be very common in our kitchens – and it can be extremely unsightly!

So, if you’re seeing extensive water damage in your kitchen, it might be the time you do a kitchen repainting project.

You must fix any signs of water damage in your kitchen because aside from the fact that it is unsightly, leaking water may lead you to other problems such as mold growth, bacteria formation, and other things that may jeopardize your safety and health.

Additionally, before you repaint your kitchen, it is important that you determine where the water damage originated first to ensure that the problem won’t persist even after applying your new coat of paint.

4. You Don’t Like The Color Anymore

Lastly, another subtle sign that you need to treat your kitchen to a fresh coat of paint would be if you realize that you don’t like its current color anymore.

It is very natural to acquire different tastes and likes over time, so if you’re finding that you’re just not a fan of the current paint color of your kitchen anymore, then it might be the right time to repaint it.

However, when you’re finding a paint color to repaint your kitchen, make sure that it’s something that you absolutely like, so you can ensure that you won’t be repainting again anytime soon.


If you need professional help with your interior painting project, Eason Painting can help.

Our home interior painting services are available in Washington Township, Rochester, Romeo, Shelby Township, Harrison Township, and Clinton Township, MI.

Call us today at 586-465-5081 for a FREE painting estimate.

Related: 7 Kitchen Painting Mistakes To Avoid in Romeo, MI

7 Tips For Renovating Your Kitchen On A Budget In Rochester, MI

Read more
2022-07-04 Eason Painting Romeo MI Bedroom Repainting Tips That Will Come Handy

Bedroom Repainting Tips That Will Come Handy in Romeo, MI

Bedroom Repainting Tips That Will Come Handy in Romeo, MI

It does give us great pleasure to be in a bedroom that makes us comfortable and cozy, one that will provide us with the much-needed relaxation and rest that we need in our daily lives.

To create that kind of vibe in a bedroom, you must maintain its overall appeal – and one of the best ways to do this would be to repaint your bedroom.

So, if you’re currently looking to repaint your bedroom and would want some tips and tricks to help you along the way, here’s something for you.

Here are Bedroom Repainting Tips That Will Come Handy in Romeo, MI.

1. Choose A Color That You Like

The first thing you’ll want to consider in repainting your bedroom would be to choose a color to paint it with.

With this, it is best to go with a color you like.

This is important because you want your bedroom to be as personal as possible and feel authentic, so what better and foolproof way to do this than repainting your bedroom with your favorite color?

However, just make sure that you choose the right shade when shopping for paint.

Some colors are available in so many shades that it’s extremely easy to get confused, so take your time choosing a color to go with, so you can end up with the best possible result.

Also, a common rule of thumb for painting is that two to three colors are the ideal number, and any more than that can be too much.

2. Don’t Forget Your Primer

Before repainting your bedroom, you must first apply a layer of primer on your bedroom walls.

Primer guarantees that your paint adheres better, lasts longer and results in brighter, more vivid colors, so make sure that you don’t skip this step if you want quality results for your painting project.

Most individuals will normally avoid this stage because they believe it would take up more of their time and effort, but by skipping this step, you may be setting yourself up for results that fall short of your expectations.

3. Put Painter’s Tape On Your Edges and Trims

Painter’s tape is vital for ensuring that all of your paint is in the correct places and achieving a more clean and smooth paint finish.

It also eliminates the inconvenience of unsightly smudge stains on unnecessary surfaces, which may be a pain to remove once they happen.

However, while using painter’s tape, be sure not to keep it on the surface for too long.

If left for too long, the tape’s adhesive may tear away part of the new layer of paint, tearing and destroying your fresh coat of paint.

4. Check Paint Samples Under The Right Light

Another common painting mistake that most people commit is checking paint samples under the wrong lighting.

Most people would check paint samples in their local paint stores, find a color they like, and finally buy the amount of paint needed to complete their bedroom repainting project.

But then they will later find out that the color painted onto their walls seems kind of different from how they initially saw it, and end up dissatisfied.

Why is this?

This is because lighting plays a huge role in making your paint color appear – the same paint color can look shades lighter or darker when put under different lighting.

So, to actually see how your chosen paint color will look in your bedroom, make sure that you check paint samples under the lighting present in your bedroom.

5. Invest In High-Quality Materials

Lastly, it would be much better to invest in high-quality painting materials to repaint your bedroom.

This is to assure the quality of your project, particularly because inexpensive materials show indications of wear and tear sooner than you think.

Purchasing high-quality materials may be costly, but you are only ensuring that you will not have to redo and repaint your bedroom for a longer period of time.


If you need professional help with your interior painting project, Eason Painting can help.

Our home interior painting services are available in Washington Township, Rochester, Romeo, Shelby Township, Harrison Township, and Clinton Township, MI.

Call us today at 586-465-5081 for a FREE painting estimate.

Related: Hufflepuff: Painting Your Room As Your Harry Potter House in Romeo, MI

5 Ideas for Painting a Feminine Bedroom in Rochester, MI

Read more
2022-06-25 Eason Painting Washington MI How To Incorporate Black Into Your Home Interior

How To Incorporate Black Into Your Home Interior in Washington, MI

How To Incorporate Black Into Your Home Interior in Washington, MI

Thinking of ways how to incorporate black into your home interior?

Indeed, black is one of the sleekest and most striking colors that you can add to your home interior – it just adds that sense of modernity into your home interior that is just so fresh and inviting.

So, if you’re here to learn how to incorporate black into your home interior, you’re in the right place.

Here’s How To Incorporate Black Into Your Home Interior in Washington, MI.

1. Make A Statement With A Black Accent Wall

The first thing you could do to incorporate black into your home interior would be to paint your home interior with a black accent wall.

This would be perfect for elevating your home interior’s overall appeal and successfully incorporating black into your home interior.

Because accent walls are extremely striking and beautiful, one can immediately make a bold statement with an accent wall and pair it with an even more dramatic and striking color such as black – you are creating a design centerpiece that will immediately draw the attention of anyone that stumbles upon it.

While yes, this could be a hit-or-miss situation with many because not everyone will like accent walls or black in your home interior (or even both), you could not deny the sheer impact it has – one that will leave a lasting impression on anyone that will see your black accent wall.

Additionally, black is an excellent background for your various home furnishings – you can even make your black accent wall a space to hang your artworks and frames!

2. Drape Your Windows With Dramatic Black Curtains

If you’re looking for a more subtle but equally striking way to incorporate black into your home interior, you can opt to drape your windows with dramatic black curtains.

Your choice of curtains is crucial in establishing your home interior’s whole feel and vibe.

By bringing dramatic black curtains into your home interior, you can successfully bring about that fresh and sleek vibe of black.

Just make sure that you measure your curtains properly to get the appropriate size for your specific window at home, and you’re good to go!

3. Pair Your Blacks With Whites

To get a nice contrast with your black, you can opt to pair your black with white accents.

A black home interior paired with various white accents will be the perfect way to create that contrast between the colors and make it more sleek and modern.

Additionally, getting that white accent paired with black will be a great way to achieve minimalism – this will make your home interior look clean and simple but still incredibly striking and beautiful.

You can opt to get black and white pillowcases or pair your white walls with black trims and corners, or the other way around – the creative possibilities are endless with this one, so get your creative juices flowing to get the best black-and-white ideas!

4. Get A Striking Black Carpet

If you do not want to go through the hassle of painting or getting a whole lot of new stuff to incorporate black into your home interior, you can opt to get a striking black carpet for your home interior.

Getting a carpet is a very simple but striking and extremely transformative way to incorporate black into your home interior – imagine being greeted by a sleek and beautiful black carpet as you come inside your home.

As a personal choice, a black fur carpet will definitely add that class and sophistication to your home interior and make a lasting statement – but there are so many design options out there; make sure to give them a quick look and scan!


If you need professional help with your interior painting project, Eason Painting can help.

Our home interior painting services are available in Washington Township, Rochester, Romeo, Shelby Township, Harrison Township, and Clinton Township, MI.

Call us today at 586-465-5081 for a FREE painting estimate.

Related: 5 Color Ideas for Painting a Masculine Bedroom in Romeo, MI

6 Paint Problems and How to Solve Them in Washington, MI

Read more
2022-06-18 Eason Painting Richmond MI Painting and Decorating Tips To Make Your Bedroom Cozier

Painting and Decorating Tips To Make Your Bedroom Cozier in Richmond, MI

Painting and Decorating Tips To Make Your Bedroom Cozier in Richmond, MI

Our bedroom is that space in our house where we seek rest, relaxation, and just overall serenity – a safe haven where we can seek refuge after a long, tiring day.

With that in mind, a thing we would like to achieve with our bedrooms is to make them as cozy as possible because nothing feels better than relaxing and resting in a cozy bedroom.

If you’re currently looking for tips on how to amp up the coziness of your bedroom, well, here’s something you will like.

Here are Painting and Decorating Tips To Make Your Bedroom Cozier in Richmond, MI.

1. Paint Your Bedroom With Neutral Colors

In making your bedroom cozier, you would benefit from painting your bedroom with neutral colors.

Neutral colors will be best in making your bedroom cozier as these colors are usually calming and do not pop right into your eyes.

Colors such as beige, eggshell white, cream, and tan would be perfect for making your bedroom cozier.

Imagine waking up in a caramel-colored bedroom, with the morning sun hitting all the right spots in your bedroom, creating this surreal and dreamy glow – nothing would be more perfect and relaxing than that.

However, you must make sure that you end up with colors that complement together and test the colors on your bedroom walls first to see how they will look under the lighting present in your bedroom.

2. Add Some Wood Accents

To complement your creamy neutrals, you will want to pair it with some wood accents to create that nice blend into your bedroom’s overall appeal.

You can add a few rattan chairs into the corners of your bedroom or install multifunctional but equally beautiful wooden shelves into your walls where you can store your various personal stuff to make your room homier.

Wood accents just go really well with neutral colors; however, just make sure that you don’t go overboard with it – or else you just crowd your room in tons of wooden elements, making it feel rowdy instead of cozy.

3. Put A Warm Lamp In Your Room

Nothing sets that intimate and cozy mood better than a warm lamp – so to make your bedroom cozier, make sure to put a warm lamp somewhere in your room.

Having warm lamps in your bedroom just sets the mood right, and it basks your space into this illuminating and gorgeous honey glow, which is extremely comfortable and cozy – just like you’re right in front of a crackling fire in the middle of a cold Christmas night.

Additionally, having a warm lamp in your room would be really helpful if you’re staying up late reading or reviewing for a test – it makes you feel less alone and more comfortable as you take on the long, tedious night.

4. Get Matching Curtains

In making your bedroom cozier, you will want to get matching curtains to really tie up the look of your bedroom.

Curtains are an important element in making your bedroom cozier because they drape your windows and control the natural light that goes into your bedroom.

In this case, it would be better for you to get blackout curtains so you can have the option to either completely block out the light or open it a bit more just to get some more of that natural light into your room.

Just make sure that you get ones that complement the overall neutral theme of your cozy bedroom, and you’re good to go!

5. Repaint Your Furniture With Neutral Colors

Lastly, to really tie up the overall appeal of your cozy bedroom, you have the option to repaint your furniture with neutral colors.

Painting your furniture with neutral colors ensures that your bedroom will be cohesive, and it adds to the overall aesthetic appeal of your bedroom.

Make sure that you paint your furniture with variations of neutral shades – to ensure that you end up with colors that blend well together, look up neutral color palettes and design inspirations online, so you’ll have an idea of which shades work best together.


If you need professional help with your interior painting project, Eason Painting can help.

Our home interior painting services are available in Washington Township, Rochester, Romeo, Shelby Township, Harrison Township, and Clinton Township, MI.

Call us today at 586-465-5081 for a FREE painting estimate.

Related: 6 Tips in Painting A Teenager’s Bedroom in Richmond, MI

6 Signs That You Should Repaint Your Bedroom in Romeo, MI

Read more
2022-06-04 Eason Painting Washington MI Painting and Decorating Your Kitchen on a Budget

Painting and Decorating Your Kitchen on a Budget in Washington, MI

Painting and Decorating Your Kitchen on a Budget in Washington, MI

When it comes to painting your kitchen, one issue that may be a concern, if not the most significant one, is the cost.

The expense of a painting project can sometimes deter people from doing it.

However, it’s a good thing that despite this fact, there are still some tips and hacks people can follow so they can continue with their painting project and get their dream kitchen.

So, if you’re planning to get your kitchen redone and would want to know how to do it on a budget, here’s something for you.

Here is Painting and Decorating Your Kitchen on a Budget in Washington, MI.

1. Borrow Your Painting Materials

When it comes to painting your kitchen, the hardware, such as paintbrushes, rollers, and paint trays, is one of the most expensive items you’ll need to buy.

Of course, if you want to paint more than one room or if you have any future painting ambitions, it may be worthwhile to invest in your own painting equipment.

If you don’t have any such plans, any purchase will be a waste of money, which you can prevent if you know someone who has such painting equipment or has access to a hardware library.

You can borrow the equipment in any instance, and it will almost always be of higher quality if you borrow it from friends or a hardware library.

This will get you to save so much in painting – just give it a quick clean, and they’re good as new!

2. Browsing For Good Paint Deals

Another thing to consider if you’re painting on a budget is getting reasonably priced paint rather than cheaper paint.

This is a good idea because it is based on the idea that if you want to paint on a budget, you need to consider how much it will cost you upfront and how much it will cost you over time.

Painting using less expensive paint won’t help you much if you have to return a few years later to repaint because the paint is peeling away or showing signs of wear and tear quickly.

In saving money to paint your kitchen, it would be better to browse for good deals and invest in quality paint because you’ll definitely need paint that can endure so many external factors – molds, moisture, grease, etc.

3. Planning Ahead

A well-planned painting project will cost you less than one that isn’t so well-planned.

This is because planning your paintwork includes taking measurements and making judgments based on them, which can lead you to only buy exactly and precisely only the materials you’ll need for the project – which can significantly lower your expenses.

You’re not going to have to guess and splurge on paint since now you have an exact estimate of how much paint you’ll need!

4. Shelves!

While cabinetry is beautiful, it can sometimes restrict a smaller area and make the kitchen appear old, and changing the hardware isn’t an option when you’re on a budget.

Pull down your upper cabinets and install shelves, or remove the doors for a less expensive alternative to give your kitchen a more open feel while also allowing you to showcase your dishes and drinkware for easy access.

5. Paint With The Same Color

In painting your kitchen on a budget, one of the most transformative but cheap ways to elevate it would be to paint your kitchen with the same color.

You get to treat your kitchen to a fresh coat of paint and renew and rejuvenate its overall appeal without breaking the bank.

Since you’re only painting with the same color, you won’t need as many painting materials as you would do when painting with a different color.

But, do keep in mind to still do a proper surface preparation before painting your walls, as your kitchen is prone to moisture and grease – this will be a nuisance to you when left on the surface and will leave a nasty, ugly paint finish.

As long as you have the exact paint color, you’re good to go!


If you need professional help with your interior painting project, Eason Painting can help.

Our home interior painting services are available in Washington Township, Rochester, Romeo, Shelby Township, Harrison Township, and Clinton Township, MI.

Call us today at 586-465-5081 for a FREE painting estimate.

Related: 7 Tips For Painting Your Kitchen in Washington, MI

7 Tips For Refacing Your Kitchen Cabinets in Rochester, MI.

Read more
2022-05-25 Eason Painting Richmond MI Repainting Your Kitchen_ Great Tips To Keep in Mind

Repainting Your Kitchen: Great Tips To Keep in Mind in Richmond, MI

Repainting Your Kitchen: Great Tips To Keep in Mind in Richmond, MI.

Our kitchens are subjected to tons of factors daily since this is a place that we use daily to prepare and cook our food.

So, it naturally will, in time, need to have a fresh coat of paint.

Repainting your kitchen is important not only because of its aesthetic appeal but also because you want to cook and be in a kitchen that feels clean and is actually clean.

So, if you’re currently planning to repaint your kitchen and looking for tips on doing it, here’s something to help you along the way.

To guide you in your painting project here’s Repainting Your Kitchen: Great Tips To Keep in Mind in Richmond, MI.

1. Clean Your Kitchen First

In repainting your kitchen, you need to keep in mind to give your kitchen a thorough cleaning first.

Because of our kitchen’s proximity to grease, moisture, water, and many other gunks that may stick to it and make it dirty, you will want to get them removed first before you apply any coat of paint to your kitchen walls.

You can opt to use your old handy brush and some kind of detergent to scrub and wash down your walls; however, just make sure that you dry off your walls completely before applying any painting materials to them.

This is important because doing surface preparation is vital to your painting project’s success, and keep in mind that most paint problems that arise later on stem from a lack of or poor surface preparation.

So, if you don’t want to revisit your kitchen repainting project anytime soon, do the right thing and clean your kitchen walls first.

2. Free Your Kitchen Of All Appliances and Furniture

Your kitchen will definitely be jam-packed with various appliances and furniture, and you’d want to get them removed from your kitchen temporarily so you won’t have any distractions or blockages as you paint.

In a painting project, it would be much better to have as much space to freely move as possible because you are handling paint, and paint drips and spills are very much of a risk – and this risk increases if you have any appliances and furniture blocking your way.

Aside from the paint spills risk, you also put your appliance and furniture at risk of getting splattered with paint – which will be tiring to fix later on.

For any fixed appliances or furniture, such as your cabinets and other kitchen essentials, you’ll want to cover them up with a drop cloth so you don’t get any paint drips on them as you paint your walls.

3. Make Sure To Inspect Your Kitchen Walls’ Surface First

Before painting your kitchen, do not forget to inspect your kitchen walls’ surface first.

Because your kitchen walls will be subjected to tons of factors that might break or tear them down, such as moisture, grease, and grime, you’ll want to inspect your walls first for any sign of cracks, molds, and holes, and patch them up accordingly.

It is important that you get them fixed first because no paint nor primer will ever have the ability to cover them up alone, and while painting over them will make them less noticeable, it is not the definitive solution for them.

4. Get The Best Paint Color

In painting your kitchen, you have to keep in mind to consider the present colors in your kitchen when choosing a paint color to use.

It is important that you consider the present colors in your kitchen because you want to have a cohesive appeal and finish to your kitchen.

You do not want to end up with a kitchen that feels like a weird mish-mash of colors that do not match and blend well, so make sure to get the best paint color for your kitchen.

To have an idea of which colors work best, you’d want to check color palettes and design inspirations available online.

5. Have a Backup Kitchen

By having a painting project in your kitchen, it renders your kitchen off-limits temporarily – and for a room that receives so much traffic daily, it would be a big disadvantage.

So, in painting your kitchen, you’ll want to have a backup kitchen where you can temporarily cook and prepare your food.

This is important because you’ll need to use your kitchen for your various needs daily, so you’ll want to have a temporary space that can act as your kitchen to continue doing your daily kitchen tasks there.


If you need professional help with your interior painting project, Eason Painting can help.

Our home interior painting services are available in Washington Township, Rochester, Romeo, Shelby Township, Harrison Township, and Clinton Township, MI.

Call us today at 586-465-5081 for a FREE painting estimate.

Related: 7 Kitchen Painting Mistakes To Avoid in Romeo, MI

7 Tips For Renovating Your Kitchen On A Budget In Rochester, MI

Read more
2022-05-18 Eason Painting Romeo MI Repainting Your Bathroom_ Handy Tips To Keep in Mind

Repainting Your Bathroom: Handy Tips To Keep in Mind in Romeo, MI

Repainting Your Bathroom: Handy Tips To Keep in Mind in Romeo, MI

Nothing beats the feeling of using a bathroom that is clean and aesthetically appealing – it just makes you more comfortable.

So, if you’re thinking of giving your bathroom a well-deserved makeover and repainting it, here’s something to help you along the way.

To provide you with some handy tips as you repaint your bathroom, here’s Repainting Your Bathroom: Handy Tips To Keep in Mind in Romeo, MI.

1. Make Sure To Clean Before Anything Else

Though you should clean before beginning any painting project, it’s especially crucial when it comes to a bathroom painting project.

A bathroom may get pretty unclean, especially the surfaces of the walls, since they are more prone to mildew and mold, two of the worst things you will ever see on a surface to be painted.

If you don’t take the time to clean the walls before painting, the mold and mildew will most likely return soon after you’ve finished.

Additionally, a lack of proper surface preparation is the root of most paint problems that might manifest later; painting on an unclean surface just leaves a nasty and poor finish.

While molds and mildew will not necessarily hinder you from painting your bathroom walls, they will most certainly ruin your paint in the long run – which you will need to revisit and fix, causing you to double your effort and expense.

2. Tape Your Light Switches and Plates

In the quest to repainting your bathroom, you should keep in mind to prioritize your safety and tape your light switches and plates.

A painting project tends to get inevitably messy, and paint drips and spills can happen anytime, so to ensure that you do not get any unnecessary paint splatters on your light switches and plates, you should cover them up with painter’s tape.

Additionally, an unprotected light switch or any electrical device for the matter is a hazard to your safety, so it will be better to get them away from your way as you repaint your bathroom.

However, if you’re not entirely sure how to do it yourself, you should not hesitate to ask for assistance and ask a professional to do the job for you.

3. Don’t Forget To Use Primer

When you’re repainting your bathroom or doing any painting project, you should not forget to use primer before applying your first coat of paint.

While many will deem primer application as merely extra and inconsequential, this is not the case at all – applying a coat of primer ensures the success and longevity of your painting project in the long run.

Primer ensures that your coat of paint will adhere to the surface better, that the paint will look more vibrant and brighter, and that it will yield a seamless and smooth finish.

4. Use The Appropriate Paint

Because of your bathroom’s proximity to moisture and water (or really any bathroom at all), it would be recommended for you to use paint intended solely for bathrooms.

Ideally, you’d want paint that will resist moisture, molds, mildew, and any other moisture-related problems in your bathroom.

If you’re not entirely sure which kind of paint to get (and we do not blame you, there are a thousand variations of paint out there), just do not be shy to ask your local paint specialist so they can give you the best options.

5. Cover Up And Protect

Lastly, you should cover up and protect anything that you cannot remove from your bathroom so that it will be splatter and drip-free when you finish.

These include your floor, bathtub, toilet, and sink – anything that you cannot physically remove from your bathroom, you’d want to cover up with some kind of cloth.


If you need professional help with your interior painting project, Eason Painting can help.

Our home interior painting services are available in Washington Township, Rochester, Romeo, Shelby Township, Harrison Township, and Clinton Township, MI.

Call us today at 586-465-5081 for a FREE painting estimate.

Related: 7 Tricks To Make Bathroom Cabinet Painting Easier in Rochester, MI

7 Tips For Choosing Paint For Your Bathroom in Washington, MI

Read more
2022-05-11 Eason Painting Washington MI Pros and Cons of Painting Your Kitchen Cabinets

Pros and Cons of Painting Your Kitchen Cabinets in Washington, MI

Pros and Cons of Painting Your Kitchen Cabinets in Washington, MI.

One of the main elements of our kitchens would be our kitchen cabinets – they hold and store most of our kitchen essentials and are extremely helpful in keeping our kitchen tidy and organized.

But, over time, our kitchen cabinets may show signs of wear and tear, which significantly affect the overall appearance and appeal of our kitchen cabinets.

So, if you have noticed that your kitchen cabinets have been looking drab and dull lately and are currently deciding whether or not to give them a fresh coat of paint, here’s something to help you decide.

Without further ado, here are the Pros and Cons of Painting Your Kitchen Cabinets in Washington, MI.

Pros:

1. Can Immediately Elevate Your Whole Kitchen’s Aesthetics

If you’ve wanted to revamp and refresh your kitchen cabinets at home, repainting them will be an immediate and instant solution for your aesthetic-related problem.

Repainting your kitchen cabinets will instantly enhance their appearance and, in the long term, elevate and improve the aesthetics of your kitchen.

A fresh coat of paint can instantly transform the look of your kitchen cabinets, especially if you’ve noticed that they’ve been looking drab and dull recently.

You may restore its original luster and shine by painting a fresh coat of the same paint color, or you can choose a different color entirely.

Just make sure that while choosing a paint color, you take into account the present colors in your kitchen so that it doesn’t look too out of place.

2. Easier and Cheaper Than Replacing Them

Repainting your kitchen cabinets will surely be less expensive than replacing them totally, which will likely significantly increase your cost and labor.

While repainting is still an expensive and time-consuming project, it is still far cheaper and quicker than getting them replaced entirely, which is a rather invasive procedure and takes double the cost and effort.

If appearances and aesthetics are your only concern, consider repainting your kitchen cabinets rather than replacing them, which is more expensive and time-consuming.

3. Gives Your Cabinets An Extra Layer of Protection

Repainting your kitchen cabinets will significantly extend their longevity and durability.

A fresh coat of paint can add an extra layer of protection against any exterior issues, including mildew, dirt, muck, and other pollutants that can cause long-term damage.

Just make sure you get the correct paint for your kitchen cabinets, one that will resist bacteria, moisture, mildew, and other elements that might cause it to degrade.

However, if you’re still confused and unsure, fret not – it’s nothing that a hearty conversation with your local paint specialist can’t fix!

Repainting your kitchen cabinets isn’t only for mere looks and aesthetic appeal; it can also help maintain and increase your cabinet’s lifespan and durability!

Cons:

1. It May Not Be Applicable To All Cabinets

Repainting your kitchen cabinets has one disadvantage: it does not apply to every cabinet.

While repainting your kitchen cabinets might help them look better, it will not be enough if they are in horrible shape.

Your kitchen cabinets’ dents, holes, and other problems will not be covered by a fresh coat of paint alone, no matter what the label or the brand says.

In planning to repaint your kitchen cabinets, you may need to inspect them for damage and dents beyond the repair of paint – and if they do have these, then it might be better for you to opt for another route.

2. Takes Too Long To Finish

Since your kitchen cabinets are located in an area in your house that receives high traffic daily, it might not be convenient for you to do a painting project in your kitchen.

Unless you have a spare space where you can cook and prepare your food temporarily, it’s just not a very viable option – doing a painting project while having food prepared and cooked simultaneously is not really sanitary nor convenient.


If you need professional help with your interior painting project, Eason Painting can help.

Our home interior painting services are available in Washington Township, Rochester, Romeo, Shelby Township, Harrison Township, and Clinton Township, MI.

Call us today at 586-465-5081 for a FREE painting estimate.

Related: 7 Tips For Renovating Your Kitchen On A Budget In Rochester, MI

7 Kitchen Painting Mistakes To Avoid in Romeo, MI

Transforming Melamine Kitchen Cabinets in Richmond, MI

Read more
2022-05-04 Eason Painting Richmond MI Painting and Decorating Your Bedroom on a Budget

Painting and Decorating Your Bedroom on a Budget in Richmond, MI

Painting and Decorating Your Bedroom on a Budget in Richmond, MI.

Painting and decorating your bedroom is one of the most exciting projects you can ever do – by just imagining all the endless creative possibilities just at arm’s reach, you just can’t resist getting giddy!

However, it is no secret that such a project gets relatively expensive, which might be hard to do if you’re on a tight budget.

But, just because it is hard doesn’t mean that it is impossible – we have made a list of some tips and tricks that might help you revamp and rejuvenate your bedroom on a budget.

So, without further ado, here’s Painting and Decorating Your Bedroom on a Budget in Richmond, MI.

1. Repaint Your Walls With a Similar Color

If you’re planning to revamp your bedroom but you’re constrained by your budget, one painting tip that would benefit you the most would be to paint your bedroom with the same or similar color to the one it already has.

By painting your bedroom with the same or similar color it already has, you do not only give your bedroom interior a rejuvenated and fresh look, but you can also save on painting materials because essentially, you won’t be needing primer in doing so.

However, skipping primer is still a risk in itself, so before you decide to go forward with this plan, have a chat with a local paint specialist about your plan and ask them if this is the best way to go with your budget.

2. Consider Wallpaper

If you don’t want to take on the task of repainting, you can opt for putting up wallpaper in your bedroom.

Because there are many design options to pick from, redecorating your bedroom with wallpaper will be a quick, affordable, yet incredibly transformational approach to revamp its overall appeal.

Just make sure that the style you choose fits well with your present furnishings and decor to give your bedroom a more cohesive look.

3. Improve The Lighting In Your Room

Increasing the amount of light in your bedroom may also improve its overall appeal; you can start by opening your curtains and windows throughout the day to let that lovely, natural light in.

Other choices include finding a lamp with a warm bulb to bask your bedroom in that pale, soft, caramel-colored light, which may make it feel cozier and more comfortable.

You may even buy those trendy RGB LED light strips (which are also extremely inexpensive) and put them to the corners of your bedroom to turn it into a fun neon paradise.

4. Get Fresh Sheets and Pillowcases

Changing your bedding and pillows is another easy yet transforming option to redecorate and revamp your bedroom, and it may cost you very little to nearly nothing!

Since your bed is the focal point of your room, updating its appearance with new sheets and pillowcases will be a simple and easy method to refresh the aesthetics of your space.

You may either use your old sheets and pillows or shop for new ones online or at your local markets – don’t be afraid to use your charm and ask for any discounts or deals to get you the best prices!

5. Paint Your Furniture

If your bedroom’s issue is mismatched cabinets and furnishings, you may do a little painting project and proceed to repaint them accordingly.

To make the best paint color choice, you’ll want to look at color palettes online first to determine which colors will match and complement the existing colors present in your bedroom.

Just get primer and estimate how much paint you’ll need first, so you don’t wind up buying too much or too little paint, which will cost you twice as much.

6. Rearrange Your Bedroom

Lastly, the one option you can choose that will literally cost you nothing in redecorating your bedroom would be rearranging it.

This is ideal for individuals who are happy with the way their bedroom looks but want to add some variety and freshen it up.

Simply try moving things about and making new arrangements, and you might be surprised to find that it’s the perfect remedy you never imagined would work!


If you need professional help with your interior painting project, Eason Painting can help.

Our home interior painting services are available in Washington Township, Rochester, Romeo, Shelby Township, Harrison Township, and Clinton Township, MI.

Call us today at 586-465-5081 for a FREE painting estimate.

Related: 6 Signs That You Should Repaint Your Bedroom in Romeo, MI

Painting and Decoration Ideas for Your Bedroom in Washington, MI

Read more
2022-04-25 Eason Painting Romeo, MI Hufflepuff_ Painting Your Room As Your Harry Potter House

Hufflepuff: Painting Your Room As Your Harry Potter House in Romeo, MI

Hufflepuff: Painting Your Room As Your Harry Potter House in Romeo, MI

Since it got published back in the late 90s and got a movie adaptation in the early 00s, Harry Potter had taken everyone on a binding spell, making us fall in love with its magical world and the brave young people in it – even today’s generation of children will get to hear the story of Harry Potter.

One of the most remarkable references out of the franchise would be the houses: Gryffindor, Ravenclaw, Slytherin, and Hufflepuff – and each of these houses possess a distinct set of traits and characteristics that you could be categorized in.

So, if you have taken the famous Sorting Hat test and found out that you’re a Hufflepuff at heart, well, we might have something that will make you spellbound with delight.

Here’s Hufflepuff: Painting Your Room As Your Harry Potter House in Romeo, MI.

1. Opt To Paint Your Room a Shade of Gold

Because the Hufflepuff house is recognized for its gold/yellow house color, you can create a Hufflepuff-inspired bedroom by painting your walls a magnificent gold shade.

Nothing shouts carefree and cheerful like gold/yellow, and these are two of the most noticeable characteristics of a Hufflepuff, so bathe and wrap your bedroom in the most beautiful shade of gold or yellow you can find.

However, keep in mind that gold/yellow can be powerful colors that can easily be too strong for the eyes – so carefully select a shade that will suit the lighting in your bedroom and looks great on the surface.

2. Add a Mural or Accent Wall

You could even go extremely creative and paint a Hufflepuff mural or accent wall in your Hufflepuff-inspired bedroom.

There are a lot of designs to choose from, such as having a simple black and gold accent wall to represent the Hufflepuff colors, painting the Hufflepuff sigil as your accent wall, or creating a majestic and intricate mural of the Hufflepuff house – the creative possibilities for your accent wall is just limitless, as long as you put your happy Hufflepuff heart into it.

Just make sure you carefully select which wall you paint it on, one that is not obscured by any tall furniture that may prevent you from enjoying it in all of its glory.

3. Play With Rustic Accents and Elements

Because Hufflepuffs are primarily portrayed as carefree, joyful, and comfortable people, you might want to enhance and kind of modernize your Hufflepuff-inspired dream bedroom by incorporating some rustic touches and elements in it.

You could put a wooden bookshelf next to your bed, install hanging wooden shelves for additional storage, or even decorate your table with a wooden, warm-lighted lamp and some decors for an aesthetically appealing touch.

Rustic features and pieces will merge beautifully with the black/gold colors, creating an ideal and perfect Hufflepuff sanctuary.

4. Find Black Bedsheets and Pillowcases

To complement the yellow/gold colors in your Hufflepuff-inspired bedroom, you might want to get black bedsheets and pillowcases to get that sleek and laid-back style.

A set of silky, black bedsheets and pillowcases will look fantastic against a yellow/gold wall, yet it will remain to look distinctly Hufflepuff, so it’ll be the perfect creative decision for you.

There are many different styles of bedsheets and pillowcases available online and in your local stores, so make sure you know the precise measurements of your bed so you can get the correct size.

5. Get Matching Curtains

Curtains are sometimes overlooked in interior design, but without them, a space could easily appear drab and mundane – which is why, when designing your Hufflepuff-inspired bedroom, you should pair it with matching curtains.

To keep with the Hufflepuff house’s motif, you may pick for gold/black curtains, but if you happen to discover another one that matches with your bedroom design and looks nice when set there, you can also go with it – the alternatives are endless with this one!

6. Finish It Off With Hufflepuff Items and Merchandise

Finally, to add the last touches of that Hufflepuff spirit, seek for Hufflepuff-inspired furniture to place throughout your bedroom.

Art pieces, framed quotations, Harry Potter products such as scarves and souvenirs, and many more will be suitable for decorating your bedroom – as long as they complement the rest of the theme, it’ll be a great addition.


If you need professional help with your interior painting project, Eason Painting can help.

Our home interior painting services are available in Washington Township, Rochester, Romeo, Shelby Township, Harrison Township, and Clinton Township, MI.

Call us today at 586-465-5081 for a FREE painting estimate.

Related: 5 Color Ideas for Painting a Masculine Bedroom in Romeo, MI

6 Tips in Painting A Teenager’s Bedroom in Richmond, MI

Read more
2022-04-18 Eason Painting Washington MI Guide to Painting a Lighter Color Over a Dark Wall

Guide to Painting a Lighter Color Over a Dark Wall in Washington, MI

Guide to Painting a Lighter Color Over a Dark Wall in Washington, MI

Painting a light color over a dark surface is one of the most tedious and tricky painting jobs you can do.

The darker color’s strong tint is just difficult to conceal and paint over with a lighter color.

If not done correctly, it can mix with the darker paint, making the lighter color a shade darker than it was intended to be.

But difficult doesn’t have to imply impossible; with the correct supplies, and a can-do attitude, even something as difficult as painting a lighter color over dark walls can be an easy brisk walk in the park.

So, without further ado, here’s a Guide to Painting a Lighter Color Over a Dark Wall in Washington, MI.

1. Start By Getting The Right Materials

If you’re doing something as rigorous and tedious as painting over a dark wall, it is important that you are geared with the right and appropriate materials to ensure that your painting project will be a success.

To do this, you can start with knowing what paint roller you’ll need for the project.

The paint roller you’ll need will depend on the type of surface you’re painting on: if you’re painting on a rougher surface, it is recommended that you get a thicker roller since it can hold more paint and can easily fill through the tiny crevices and gaps in your surface.

If you’re painting on a smoother, more even surface, it would be best for you to go with a thinner paint roller or foam roll, as this will give you better, smoother coverage and is ideally recommended for the indoor interior.

Lastly, make sure that you stray away from cheap materials and invest in high-quality ones since this will ensure the quality of your project.

2. Prepare The Surface

Prior to painting, you should make sure that your wall is clean and free of any dirt and grime first.

It is basically a general rule in painting to do proper surface preparation first prior to painting, as it ensures that your paint job will have a smoother, cleaner finish.

Most painting problems also arise from a lack of proper surface preparation, so to avoid the hassle of getting them fixed, it is vital for you to do a surface preparation prior to painting.

Additionally, you should also start to put up painter’s tape on areas and crevices that you don’t want to include painting, and drape your floors and surrounding areas with drop cloths or newspapers to avoid getting paint drips and spills all over them.

3. Invest in a Quality Primer

Investing in a good primer is the key to painting a light color over a dark wall successfully.

Primer will offer greater coverage on the surface you’re painting on, resulting in a brighter and more vivid paint finish on the surface you’ll paint on.

Additionally, primer now comes in a variety of shades depending on what you’ll use it on; when moving from dark to light, you’ll want to use a white primer, and when going from light to dark, you’ll want to use a gray primer.


4. Apply Multiple Coats of Primer

Normally, a single coat of primer would suffice to prepare the surface for painting, but when painting over a dark color, experts recommend using two or more coats to guarantee more comprehensive and complete coverage.

Applying two coats of primer also creates an additional layer between the darker and lighter colors, minimizing the likelihood of the darker color leaking through the lighter coat of paint.

Just make sure the primer is totally dry before painting over it, to avoid paint problems such as blisters and peeling, and you’re all set!

5. Don’t Be Shy To Go Thick!

When you’re done ensuring that the darker color is covered with thick coats of primer and it is now dry, you can now apply a coat of paint to the wall, with the general rule being that the thicker the coat, the better.

Since you’re painting over a dark wall, you’ll need more than one coat of paint to completely cover the prior hue.

Normally, this is not recommended, but in this case, thicker coats of paint would be preferable to guarantee that the darker color is entirely covered.

Additionally, since you’re painting thicker layers, painting in an M or W pattern rather than an up-down motion will allow the paint more time to dry rather than covering it up again right away.


If you need professional help with your interior painting project, Eason Painting can help.

Our home interior painting services are available in Washington Township, Rochester, Romeo, Shelby Township, Harrison Township, and Clinton Township, MI.

Call us today at 586-465-5081 for a FREE painting estimate.

Related: Should You Use a Dark Colored Paint in Rochester MI? The Pros and Cons

7 Interior Colors To Consider For Selling Your Home in Romeo, MI

Read more
2022-04-11 Eason Painting Richmond MI Advantages of Painting Your Living Room White

Advantages of Painting Your Living Room White in Richmond, MI

Advantages of Painting Your Living Room White in Richmond, MI

While it is fun to play with fun colors and explore other shades and accents in painting your living room, painting it white still remains one of the standards in interior design – white is flexible, buildable, and versatile.

If you do it tastefully, white can be anything but mundane – it can be homey, clean, minimalistic, sleek, chic, and so many other vibes that white can achieve (a testament to its versatility).

Trends will come and go, but classics will never go out of style – and white is definitely a timeless classic.

So, if you’re currently planning to paint your living room, here’s something that might help you decide which color to paint it with.

Without further ado, here are the Advantages of Painting Your Living Room White in Richmond, MI.

1. It Will Maximize Your Space

Painting your living room white can really open up the area and make it seem larger than it is.

Painting your living room white will be a great solution if you have a rather small living room area since lighter colors are known to aid smaller-sized rooms by making them seem larger than it is since lighter colors reflect more light, thus, giving it the illusion that the space is quite larger than it actually is – and after all, what’s lighter than white, right?

If your living room isn’t quite as large as you’d want it to be, you’ll find that painting it white will get you to have your dreams of a spacious living room coming true.

2. Easier To Pair With Furniture

Since white is essentially the base color for every known color on the spectrum, it will be simple to mix and match with furniture of all colors, shades, and styles.

Having your living room white will provide you with a great blank canvass to build on; you can try a lot of different accents and styles to mix and match with.

Just make sure that when you’re doing this, you are taking the colors into consideration and whether they are a good match together or not – refer to color palettes and design inspirations online, so you’ll know which colors work together!

3. Can Make Your Furnishings Stand Out

Because white will provide you with a blank canvass, having white walls in your living room will make your furnishings stand out even more.

White is a very clean and minimalistic color that does not draw too much attention to itself, making it the ideal backdrop against which to showcase the various pieces of furniture you have in your living room.

If you possess many artistic decor and striking furnishings in your home, you’ll find that white will be a great backdrop for them so that they can shine in their own right and be adored as they should.

4. Has A Bright and Airy Vibe

A white living room will give you that bright and airy atmosphere, and it will look stunning in a space with plenty of windows to let natural light in.

Because it lets so much light in and quickly produces that pleasant and light mood, a white living room will seem effortlessly stylish and classic.

If your living room has been looking drab and gloomy recently, give it a new coat of white paint and watch it turn into an impeccably beautiful, bright, and airy haven!

5. Looks Effortlessly Clean and Minimal

Painting your living room white will provide you with a generally clean and minimalistic vibe since white is essentially the color of purity.

When done tastefully, white can be anything but boring; it can easily look clean and homey when paired with warm accents and rustic elements, or it can feel laid back, cool, and sleek when paired with neutrals and other minimalistic elements.

In retrospect, white is classically elegant; while it may not be as dramatic as the other colors in the spectrum, no other color can achieve the chicness, and minimalism white can effortlessly provide in a space.


If you need professional help with your interior painting project, Eason Painting can help.

Our home interior painting services are available in Washington Township, Rochester, Romeo, Shelby Township, Harrison Township, and Clinton Township, MI.

Call us today at 586-465-5081 for a FREE painting estimate.

Related: 7 Tips For Painting Your Living Room in Rochester, MI

7 Mistakes To Avoid When Painting Your Living Room in Rochester, MI.

Read more
2022-03-25 Eason Painting Washington MI Handy Tips to Keep in Mind When Painting By Yourself

Handy Tips To Keep in Mind When Painting By Yourself in Washington, MI

Handy Tips To Keep in Mind When Painting By Yourself in Washington, MI

A painting project is usually done by a group of people or a team since this will make the whole process easier and faster – but when you’re painting by yourself, it can be challenging, especially without the proper guidance and knowledge.

It is easy to commit rookie mistakes when you’re painting by yourself since no one will be there to check on you, and without researching first, you are merely setting yourself up for failure.

However, just because it is difficult doesn’t mean that it is impossible – when geared with the right tips and tricks, one can paint alone and have a result that seems like it was made by a whole group of people!

So, if you’re currently planning to paint on your own and researching handy tips and tricks to keep in mind, well, you’re in the right place.

Without further ado, here are Handy Tips To Keep in Mind When Painting By Yourself in Washington, MI.

1. Prepare Ahead Of Time

In painting all by yourself, you’d definitely need to prepare ahead of time to ensure that everything goes smoothly and seamlessly and avoid any problems you cannot handle all on your own.

You’ll need to have all the materials you’ll need for the painting project sorted, know how much paint you’ll need, and make sure that all your needs will fit within your given budget, so you don’t spend too much.

You will benefit from doing this, especially if you’re painting on your own, since this will make your painting process more smooth-sailing, and you won’t have to worry about any unnecessary problems coming on your way.

2. Consider Using A Bigger Paint Roller

Since you’ll be painting on your own, you’d probably want to consider using a bigger paint roller so you can cover more areas in a shorter time.

Using a bigger paint roller will get you to hasten the time you’ll spend painting your surface, and you’ll also be able to reach higher areas more efficiently and effortlessly.

3. Mix Paint In A Big Container

A pro-tip in painting would be mixing your cans of paint in a big container, or what experts call “boxing” the paint.

This ensures that you will have an even and consistent shade of paint all over your surface since painting from can to can will give you some slight difference in the shade because of the different consistencies in each can.

This is recommendable because you can’t just leave your project in the middle of painting to get more paint because then you’ll later see the slight difference in color and shade when you have applied the new coat of paint to the previously dried coat layer.

4. Never Leave Your Painter’s Tape Too Long

A good tip to keep in mind when painting on your own would be to never leave your painter’s tape too long on the surface.

When you leave painter’s tape on your newly painted surface for too long, it might peel off some of your fresh coat of paint when you finally decide to remove it, which is a whole new inconvenience in itself.

It will be easier for you to commit this mistake when you’re alone since no one will be around to remind you of the time, so you can probably set an alarm or timer for this.

5. Always Use Primer

Another thing to keep in mind when you’re painting all by yourself would be to always use a primer.

Most people make the mistake of skipping primer when painting all on their own.

Primer is necessary because it primes and prepares the surface for painting; it offers overall coverage for the paint and makes sure that your paint will come out vivid and bright.

So, while painting on your own, remember to apply a layer of primer first before adding paint.

6. Cover Up With Drop Cloths

Lastly, when painting all on your own, make sure to cover the surrounding ground and floor with drop cloths.

Paint drips and spills will be inevitable in a painting project; it is essentially a part of the process; however, this doesn’t mean that you cannot prevent the mess it’ll bring to your floors – which you’ll eventually have to clean up after painting.

To avoid the lengthy and tiresome job of cleaning up paint spills and drips on your floor, make sure that you cover up the nearest ground or floors with drop cloths, and preferably, a canvas dropcloth, so the paint doesn’t seep through the fabric.


If you need professional help with your interior painting project, Eason Painting can help.

Our home interior painting services are available in Washington Township, Rochester, Romeo, Shelby Township, Harrison Township, and Clinton Township, MI.

Call us today at 586-465-5081 for a FREE painting estimate.

Related: Exterior Home Painting Clinton Township, MI: DIY or Pro?

6 Paint Problems and How to Solve Them in Washington, MI

7 Misconceptions You Should Not Believe About Interior Painting in Romeo, MI

Read more
2022-03-18 Eason Painting Richmond MI Questions to Ask Yourself When Choosing Color for Living Room

Questions To Ask Yourself First Before Choosing a Paint Color for Your Living Room in Richmond, MI

Questions To Ask Yourself First Before Choosing a Paint Color for Your Living Room in Richmond, MI

Choosing a paint color for your living room is one of the most important decisions you have to make in the process of painting it – the paint color of your living room is very telling of the entire vibe and feel you’re trying to go with your living room.

So, choosing a paint color for your living room requires a quite comprehensive and rigorous deliberation because you must ensure that whatever color you end up with will be the best fit for your living room.

If you’re currently deciding which paint color to choose for your living room and looking for tips and ways on how to do arrive at the best decision, well, you’ve come to the right place.

Without further ado, here are Questions To Ask Yourself First Before Choosing a Paint Color for Your Living Room in Richmond, MI.

1. Will It Go Well With The Present Colors?

In choosing a paint color for your living room, you must factor in the colors already present in your living room because this determines which set or shade of color you should ultimately end up with.

Ideally, it would be best if you ended up with a paint color that will blend and complement the present colors around your living room, so you can end up with an aesthetically cohesive result.

To help you do this, you can refer to thousands of color palettes and design inspirations readily available online, so you can know which colors work best together.

2. What Specific Vibe Do I Want?

Each color will give off a unique vibe when painted onto a room – terracotta will give you that rustic and bright vibe, lavender will help establish that dreamy and cool vibe, and eggshell white will help you make a room feel brighter and airy – so your paint color really depends on what vibe you ultimately feel like putting into your living room.

Think about what vibe you’d like to put into your living room, and pick a color that will help you further establish that – same with the tip above, you can consult to design inspirations and mood boards available online so you can know which colors will go with your chosen vibe in mind.

3. Do I Want To Maximize The Space or Make It Intimate?

Depending on what you want to do with your living room space, whether make it intimate or maximize your space, your choice of paint color will also change with that.

Typically, one’s living room must feel as spacious and bright as possible, to which lighter colors will be the best candidate for this: nothing makes a space feel more spacious and airy than light colors do.

However, if you’d like your living room to feel intimate and more close-knit, dark colors would be the best choice for you – this will be best paired with a cozy, warm lamp or a sexy, roaring fireplace for a maximized intimate vibe.

4. Which Paint Color Will Look Good With The Present Lighting?

Another factor you have to consider when choosing a paint color for your living room would be the present lighting, which you need to ask yourself: which paint color will look good with the present lighting?

Lighting plays a huge role in making different colors appear – a certain shade of paint may look either shades warmer or cooler under different lighting, so you have to consider this when painting your living room.

To ensure that you end up with results that will satisfy your initial expectations, refrain from checking paint samples under lighting other than your living room’s – this way, you’ll be certain which color will look good with the lighting present.

Additionally, you could also benefit from doing a test paint, just to be certain that the paint color will look good in your living room.

5. What Paint Finish Do I Want?

Lastly, you will want to ask yourself what paint finish you want.

Determining what paint finish you want is important because it also plays a role in making your paint color appear – glossy finishes tend to reflect more light, making your paint color look brighter, and a matte finish makes your paint color feel deeper and rich.

Essentially, you have to make sure that whatever paint finish you want, it’ll look good when paired with the color you’ll ultimately end up with.


If you need professional help with your interior painting project, Eason Painting can help.

Our home interior painting services are available in Washington Township, Rochester, Romeo, Shelby Township, Harrison Township, and Clinton Township, MI.

Call us today at 586-465-5081 for a FREE painting estimate.

Related: 7 Tips For Painting Your Living Room in Rochester, MI

7 Tricks To Renovating Your Living Room On A Budget in Romeo, MI

7 Mistakes To Avoid When Painting Your Living Room in Rochester, MI.

Read more
2021-11-04 Eason Painting Rochester MI Bathroom Cabinet Painting Tricks

7 Tricks To Make Bathroom Cabinet Painting Easier in Rochester, MI

7 Tricks To Make Bathroom Cabinet Painting Easier in Rochester, MI

In terms of home improvement, you’re going to do well for yourself if you take the time to see what can be done for any given room.

In a bathroom, for example, you have a bathroom cabinet and there are actually things you can do to help you paint your bathroom cabinet more easily.

Let’s now look at and consider seven tricks to make bathroom cabinet painting easier in Rochester, MI

1. Making Time To Plan

When you are looking into any painting project, one of the things that are going to make a significant difference between a project that goes well and one that goes less well is the extent to which you plan it in advance.

When you plan your project in advance, you do things like figuring out how much paint you are going to need to use (as well as a primer) and make a good schedule for when you will be actively painting versus when you’re allowing surfaces to dry.

You can certainly go about it the other way but by making a plan, you’ll save time and money over the course of the painting project.

2. Protecting Your Floor

If there’s one thing that can be almost guaranteed during any given painting process, it’s that there’s going to be some paint that drips along the way — the question is where that paint will end up going.

If you take the time to protect the floor before you start painting your cabinets, the paint will likely end up on the drop cloth that you use to protect it — and if you don’t, you’ll end up with paint on the floor, which is a bit harder to remove.

3. Removing Doors And Drawers

In painting your bathroom cabinets, you may want to get the work done as quickly as you can but there are some key preparation steps that you should follow including removing the doors and the drawers of the cabinet.

By doing both of these things, you will help in that it’s easier to paint them when they are removed and it’s also easier to paint the cabinets with them out of the way.

4. Labeling What You Remove

Though it might not seem all that important, it’s actually considered good practice to label the doors and drawers that you remove from your cabinets.

This is because you ideally want to put them back in the same spots from where you got them, and by labeling them it will be a lot easier to do so.

5. Considering New Hardware

Since you’re going to be painting your cabinets and thus will be removing the hardware (it’s a lot easier to paint the cabinets with the hardware removed) you may want to appreciate the time that you can now take to consider new hardware.

Of course, this doesn’t mean that you necessarily have to buy all new hardware — rather, you can even look into thrift stores and antique stores for good hardware that is going to look good with your cabinets.

6. Deciding What Colors Will Work

It’s important to take the time to think about what colors are going to work well with your cabinets (or just the one color if you want to go that way.)

You should take into consideration the things that surround the cabinets as well as the colors of the walls and the floor and even things like how much light your bathroom gets when you’re considering the color or colors for the bathroom.

7. Sanding Before You Paint

Lastly, remember to sand the surface of the cabinets before you paint — it’s a good part of the painting process and will help you achieve a smooth surface that will help paint adhere better.

It’s not something that’s going to take you that much time since you’re gently sanding but it will pay off well.

If you need professional help with your interior painting project, Eason Painting can help.

Our home interior painting services are available in Washington Township, Rochester, Romeo, Shelby Township, Harrison Township, and Clinton Township, MI.

Call us today at 586-465-5081 for a FREE painting estimate.

Related: 7 Ways To Paint Your Kid’s Bedroom in Washington, MI

7 Ways To Update The Look Of Your Home’s Interior On A Budget in Romeo, MI

Read more
25-05-2021 Eason Painting Rochester MI mistakes to avoid when painting your living room

7 Mistakes To Avoid When Painting Your Living Room in Rochester, MI.

7 Mistakes To Avoid When Painting Your Living Room in Rochester, MI.

Your living room inside your home is an area for you and your family to relax, have quality time, and even entertain your guests.

Applying a fresh coat of paint to your living room’s walls and ceiling will surely give it a fresh new look.

However, there are some mistakes that you should know before you start painting your living room.

Here are 7 mistakes to avoid when painting your living room in Rochester, MI.

1. Using Paintbrush and Roller That Are of Low Quality

There’s nothing wrong with finding a cheaper option, however, it is not recommended when it comes to painting.

If you go for a cheaper option, your paintbrush and roller will surely be of low quality, and you might end up buying these things again after a short period of time.

For this reason, when you’re buying a paintbrush and roller, always opt for the high-quality ones since they will definitely last longer.

2. Painting With The Lights Turned Off

Painting with the lights turned off can affect the quality of your living room painting project.

The first time you look at it, it may seem perfect for you, however, after turning the lights on, you can see all the imperfections that you have made.

Don’t forget to turn your lights on always before you start painting any room inside your home.

By doing this, you won’t overlook any flaws from your paint job making it look perfect.

3. Not Using Painter’s Tape

Many people have no idea what a painter’s tape is, especially the first-timers when it comes to DIY painting projects.

If you have no idea what a painter’s tape is, then you won’t even bother using it at all.

A painter’s tape is very important when painting your walls, especially if you want to achieve perfect edges and well-finished walls.

When you’re done painting, make sure to remove the painter’s tape you applied before your new paint dries out.

4. Too Much Brushing

It is very important to paint the walls of your living room with the right amount of paint to get the best possible results.

However, too much brushing can potentially ruin the overall look of your walls since it can leave brush marks on them.

For this reason, avoid brushing too much when you’re painting the walls of your living room to avoid any flaws from your paint job.

5. Not Enough Surface Preparations

It is always a good idea to do some prep works before you proceed with your living room painting project.

If the surface of your wall is dirty, it will definitely cause difficulties for you since painting on it will probably get so messy.

What you got to do is to scrape your old paint, clean the walls properly, and remove any dust or small particles with the use of a vacuum cleaner.

6. Ignoring The Overall Color Palette

Even though there are many paint colors that you can choose from, deciding what’s best for your living room is not that simple.

If you choose your favorite color and you find it not suitable after applying it, it will be quite troublesome for you.

The reason for this is that your favorite color didn’t pair well with the color palette of the interior of your home.

It’s always a good idea to have some paint samples and imagine how they will appear when applied.

7. Your Important Things Are Uncovered

Lastly, don’t forget to cover the important things in your living room such as the furniture, and of course, the floor.

Also, you have to cover all the important things that you don’t want to get caught up in your painting job.

If possible, transfer them to a safer place.

You also need to remove the light switch and outlet covers before you start painting your home’s living room.

If you need professional help with your interior painting project, Eason Painting can help.

Our home interior painting services are available in Washington Township, Rochester, Romeo, Shelby Township, Harrison Township, and Clinton Township, MI.

Call us today at 586-465-5081 for a FREE painting estimate.

Related: 7 Misconceptions You Should Not Believe About Interior Painting in Romeo, MI

7 Tricks To Renovating Your Living Room On A Budget in Romeo, MI

Read more
18-03-2021 Eason Painting Washington MI Ways To Incorporate Yellow In Interior Design

Do You Like Yellow? 7 Ways To Incorporate Yellow in Interior Design in Washington, MI

Do You Like Yellow? 7 Ways To Incorporate Yellow in Interior Design in Washington, MI

The yellow color represents happiness and its vibrancy is almost the same as the color of the sun which brings warmth to your home.

You can use this color as your theme for your interior design to add brightness to your room, or even as an accent color.

Even a splash of yellow can be powerful enough to transform and give life to your room.

Here are 7 ways to incorporate yellow in interior design in Washington, MI.

1. Yellow Walls

Whether you use yellow for all four walls of your room, or simply for an accent wall, this color will surely add a cozy and happy feeling to your space.

There are various shades of yellow you can choose from; each one has a different vibe when added to your room, so it is important to choose the perfect shade that will suit your taste.

Mustard is one of our favorite shades of yellow that we suggest using for your walls; it’s earthy and contrasts very well with blues and greens.

2. Balance With Simple Furniture

Yellow is a vibrant color; sometimes, too much brightness coming from this color can cause anxiety and discomfort for the eye.

Sleek and simple furniture adds balance to your yellow-themed interior design making your room look more pleasing. 

If you’re decorating a yellow room, make sure to keep this tip in mind; you don’t want to hurt your eyes with an extremely bright color.

3. Yellow Accent Wall

If you don’t want to paint all your walls at home with yellow color, then I suggest making a simple yellow accent wall.

A yellow accent wall won’t take too much space, but it will definitely give your home a nice point of view.

One way to add balance to your interior design is by pairing your yellow accent wall with an equally bright-colored rug.

4. Yellow Furniture and Decor

If yellow walls are not your thing, you can still have yellow as your predominant color in your interior design through your furniture and decor.

Consider using yellow furniture and decor in your living room, dining room, and even in your kitchen to add joy to your space.

A yellow-colored sofa, pillows, throws, vases, or even the flowers you pick are some ideas for your decoration to make it more vibrant even if your walls aren’t yellow.

5. Add Yellow To Balance With Blue Color

If you don’t want too many colors, but at the same time don’t want the blue to be the only color in your room, balance it out with yellow.

The combination of yellow and blue color is popular among beginners and will definitely give your room an amazing look.

The calmness of blue adds balance to the intense vibrancy of yellow, perfect if you’re looking for a soothing effect in your room.

6. Primary Color Palette 

The primary colors red, blue, and yellow is the classic color palette for people looking for an artistic look in their interior design.

Choosing the primary color palette doesn’t necessarily mean that you have to use the brightest shade of these colors.

Try using different shades of these three colors, blend them well and make sure that they balance each other out.

7. Incorporate Yellow Into Natural Textures

If you’re going to repaint a room with natural textures inside it, consider painting it with yellow color to add life to your space.

Incorporating yellow into natural textures can add vibrancy to your space and make it look more alive.

Yellow is a color found in nature, so adding it to natural textures gives a relaxing vibe to your home.

If you need professional help with your interior painting project, Eason Painting can help.

Our home interior painting services are available in Washington Township, Rochester, Romeo, Shelby Township, Harrison Township, and Clinton Township, MI.

Call us today at 586-465-5081 for a FREE painting estimate.

Related: Interior Décor Romeo, MI: How to Use Orange and Yellow?

Interior Painting, Richmond, MI: Color and Decoration Ideas for Each Room


Read more
2021-02-18 Eason Painting Washington MI Painting Ceiling Mistakes

7 Mistakes To Avoid While Painting Your Ceiling in Washington, MI

7 Mistakes To Avoid While Painting Your Ceiling in Washington, MI

When you have an interior painting project that you are considering, such as painting the walls of your living room, you may not even realize how long it has been since you have painted your ceiling.

Though it’s often a good idea to paint your ceiling around the same time, the issue is that making even one of a number of fundamental mistakes in the process can not only make it cost more but also delay is substantial.

With that being the case, let’s look at seven mistakes to avoid while painting your ceiling in Washington, MI.

1. Not Planning The Ceiling Painting

Quite possibly one of the biggest mistakes that you can make when you are getting ready to paint is to just dive right into it and start painting without taking the time to plan it out first.

There are many reasons you should plan out a painting project before you start it but one of the most important ones is that you will know how long it’s going to take to paint, which will mean that you can plan the time that you paint as well.

2. Using The Wrong Paint

A person might think that they could just walk into a paint store and get some paint and just start painting their ceiling, but some care has to be put into the selection.

If you choose a good paint that is flat, you will be much less likely to see major drips (but of course this does not mean that you shouldn’t protect your floors when using this kind of paint) and it’s going to look a lot better on your ceiling.

3. Not Sanding Before Painting

There are many ways that you can prepare your ceiling before you paint it but one important step that you should not skip is the sanding of the surface that is going to be painted.

The reason that this is the case is that sanding the surface that is to be painted gets it smoother and as such makes it easier to paint.

Instead of having a struggle getting the primer and the paint on the surface, you will have an easier time.

4. Not Letting Your Paint Dry

There are few things that are as dull as seeing paint dry — it is for this reason that you hear people talking about how dull it is to do so.

Nevertheless, it is something that needs to be done (even if you’re not watching) because if you don’t allow enough time for your paint to dry, you will find that bits of the paint picked up on the paintbrush when you go to paint another coat.

This can also be the case when you apply the primer — you need to wait for the primer coat to dry before you apply paint.

5. Using Makeshift Scaffolding

In the course of painting your ceiling, you will have to make sure that you can access the ceiling — which means that you bring yourself up to the ceiling or somehow — and if you think this means that you just put a plank on a couple of large piles of bricks, you are mistaken.

Indeed, this is incredibly difficult to move around your space being painted and is a bit on the dangerous side compared to a portable ladder.

6. Being Stuck On Only One Color

There are many colors that you can find in the world of interior painting, and so many of them work well with painting your ceiling.

You don’t need to limit yourself to painting your ceiling only one color — white, that is.

7. Leaving The Lid Off The Paint Can

Lastly, there’s one mistake that people will often make in the process of painting their ceiling is to leave the lid off of their paint can.

This can cause numerous problems, including crust forming on your paint in the can as well as the distinct possibility that you might just step on the lid while you are painting.

If you need professional help with your interior painting project, Eason Painting can help.

Our home interior painting services are available in Washington Township, Rochester, Romeo, Shelby Township, Harrison Township, and Clinton Township, MI.

Call us today at 586-465-5081 for a FREE painting estimate.

Related: Interior Painting Shelby Township: Pro Ceiling Painting Tips
7 Tips For Inspecting Interior Paint Work in Romeo, MI
Interior Painting Washington, MI: How to Combine White with Other Colors

Read more
2021-02-11 Eason Painting Romeo MI Inspecting Interior Paint Work Tips

7 Tips For Inspecting Interior Paint Work in Romeo, MI

7 Tips For Inspecting Interior Paint Work in Romeo, MI

When you have just completed having interior paintwork done (whether you have done it or had someone do it for you) it is a good idea to inspect the completed interior paintwork.

This is something that can also come up if you move into a house – it’s good to check the interior paintwork before you fully move in to make sure that there aren’t things that need to be done to update the interior paintwork.

With this being the case, here are seven tips for inspecting interior paintwork in Romeo, MI

1. Move From One Side Of The Room To The Other

The first thing you are going to want to bear in mind when you are inspecting the interior paintwork in a room is that the best way to do it is to move from one side of the room to the other.

Though this seems like a fairly intuitive idea, it is not widely done and some might want to just go around the room in a semi-arbitrary manner checking things one at a time.

It’s a more time effective thing to start on one side of the room and move your way to the other, checking it all carefully.

2. Mark Things With Tape If The Painter Will Return

If you are working with a painter and want to more easily communicate with them when you’ve found something that needs correction, a bit of painter’s tape might be just the thing to do the job.

Rather than try to communicate with the painter what needs to be fixed, you mark off the sections with tape and then explain what the bits of tape all represent.

3. Check For Dents And Holes

An important part of the inspection of the paintwork is to see if there are any dents or holes that need to be addressed.

This is of course not to say that the dents were caused by the painting process, but rather that they were already there and they were overlooked in painting.

4. Inspect The Intersections

Another key thing to do when you are inspecting interior paintwork is to check out all of the various intersections where paint should end and either another color be present or just no longer be there.

These can be intersections like where the ceiling meets the walls and the like.

You aren’t going to want to see things like wall paint on the ceiling, or paint from the cabinets on the wall — rather the lines should be clean.

5. Window Caulking Should Be Properly Done

There are a number of ways that you can err when you are caulking a window — you might put on the caulking too thick, or not apply enough.

If you find that there are issues with any of these, it is likely that the caulking is just going to have to be redone or at least partially corrected.

6. How To Inspect Baseboards

The baseboards are a fairly important part of your interior, and after an interior paint job, you are going to want to check them out to make sure that all was done correctly with them.

Seeing nails popping out of the baseboards, for example, is a sign that errors were made with the interior paintwork — you should see just the baseboards, and to see them as being smoothly painted.

7. Smooth Is Important

Lastly, you should make sure that your paintwork is smooth — it will be an indication that the surfaces were properly prepared prior to the painting.

These things can be simple, like sanding before painting, or even the use of primer that also be used prior to painting.

If you need professional help with your bathroom repainting and refinishing project, our highly skilled and experienced team at Eason Painting can help.

We have years of experience offering residential painting services in Macomb Township, Washington Township, Ray Township, Rochester, Rochester Hills, Romeo, Armada, Troy, Shelby Township, Harrison Township, Chesterfield, and Clinton Township, MI.
Call us today at 586-465-5081 for a FREE painting estimate.

Related: Interior Painting, Richmond, MI: Color and Decoration Ideas for Each Room
Interior Painting Washington, MI: How to Combine White with Other Colors
Interior Painting Rochester, MI: Bathroom Paint Color Ideas

Read more
Eason Painting Richmond MI Bathroom Painting 2021

Bathroom Painting and Décor Richmond, MI: What to Expect in 2021

Bathroom Painting and Décor Richmond, MI: What to Expect in 2021

Whether it is to get ready in the morning before leaving for work or to treat yourself to a pleasant moment of relaxation, the bathroom is where you spend a considerable amount of time throughout the week.

This is why a bathroom that has been hit hard by the passage of time will quickly become problematic, for both functional and aesthetic reasons.

In this article, we share the latest bathroom decoration trends to expect in Richmond, MI in 2021.

Decorating ideas for the bathroom in 2021

Freestanding bathtubs

The freestanding bathtub will be in the spotlight this year. With its clean look, it fits perfectly into any decor.

For those who prefer a more vintage design, the clawfoot tub will be a perfect choice.

Is your decor more contemporary or modern? In this case, opt for a round, oval or square shape.

Due to the diversity of forms in which this type of bath is available, it is very difficult not to find a perfect fit for your space.

This type of design undeniably bringing a touch of elegance to the entire decor, we appreciate this type of bath for its ease of maintenance.

No need to worry about the wall that is nearby or the borders, only the interior will need to be cleaned.

Mixing materials to break up the monotony

Other trends that will shape the layout and design of our bathrooms in 2021 include the mix of materials.

A bathroom where several textures come together will naturally have character and personality.

This aesthetic choice, far from creating an eclectic or inconsistent decor, will rather have the effect of giving life to a breath-taking decor where monotony has no place.

Opt for the transparency of the glass, the raw finish of the wood, or the selection of frosted or embossed tiles, the possibilities are endless and the only limit is in your imagination.

Black and gold taps

While the faucet can easily be seen as a lesser aesthetic item, there is nothing further from the point.

The choice of a golden or black faucet can greatly help define the style of the bathroom, whether it is classic, modern or vintage.

Wood to provide a dose of warmth

Although this material is often associated with the rustic style, it brings warmth and softness wherever it is found.

This is why it will be in the spotlight this year in our bathrooms.

Let’s not forget to mention that this one can be integrated sparingly, for those who prefer to give it a more discreet presence.

Whether you add it to a section of the wall or opt for wooden furniture, the cozy and soothing atmosphere that this material brings can hardly displease.

A little greenery inside

The current context naturally pushes us to want to let a little of the outside world inside.

This trend will also be evident in our bathrooms, where plants and greenery will be in the spotlight.

On this point, let us specify that tropical plants need a large amount of humidity.

In doing so, the bathroom is, therefore, the ideal place to ensure their growth.

Terrazzo

Following its heyday in the 80s, terrazzo has gradually become the desired floor coverings.

Its unique look has never stopped impressing.

Surprisingly, it returns to the fore in 2021 by offering patterns as diverse as they are colorful.

For those who wish to bring an original bathroom decor to life and which will not leave anyone indifferent, terrazzo is certainly an option worth considering.

Need Help Repainting Your Bathroom?

If you need professional help with your bathroom repainting and refinishing project, our highly skilled and experienced team at Eason Painting can help.

We have years of experience offering residential painting services in Macomb Township, Washington Township, Ray Township, Rochester, Rochester Hills, Romeo, Armada, Troy, Shelby Township, Harrison Township, Chesterfield, and Clinton Township, MI.
Call us today at 586-465-5081 for a FREE painting estimate.


Read more
Interior Painting, Richmond, MI_ Color and Decoration Ideas for Each Room

Interior Painting, Richmond, MI: Color and Decoration Ideas for Each Room

Interior Painting, Richmond, MI: Color and Decoration Ideas for Each Room

Need help deciding paint colors for different rooms for your home in Richmond, MI?
Well, it’s time to spruce up, so let’s get right into it;

Dining room color ideas

Just think of all the colors on our plate that whet our appetites: red pepper, lime, sorbet yellow, eggplant or pumpkin … All these colors have their place in a dining room.

If you are not a fan of bright colors, the soft shades coming out of the spice cabinet should suit you: golden tones of cinnamon, rosemary, nutmeg … They create a pleasant and welcoming atmosphere, quick to bring together a family.

One more tip: create your own mix of warm and soft hues and let a bright color detail take care of bringing passion and energy into the room.
What would you think of pairing pastel yellow with a purple-pink, for example? Brown with aqua? Cream with red? Or sage with turquoise?

Living Room Color Ideas

Maybe you like the soft and natural shades, a bit nostalgic? Perhaps you prefer to play it grandiose by combining dark pink and sapphire?
Or perhaps you still want an intense color that creates depth?

If your living room is rather dark, light colors like light yellow and cream reflect the light and brighten the room.
Light blue or light green will brighten up your living room and make it look refreshing throughout the day.

If your living room is rather large, divide the space into several smaller areas, such as painting the inside of the shelving unit, providing a darker colored area behind the fireplace, or applying a light shade to the window frames…

Patterns also help brighten up space. Play with lines, tiles, original decoration, or areas of color.

Bedroom color ideas

Blue is arguably the most popular color in bedrooms. This is far from surprising because this color, which brings to mind the sea and a summer sky, has a soothing effect.
Green, which is also very relaxing, works very well here as well, while the soft, warm hues create a cozy and welcoming atmosphere.

Bright colors are not to be ignored, as long as they are correctly combined with natural shades.

Is your bedroom a little tight? Watch out for dark colors, which make the space smaller. Also, always aim for a good balance between warm colors and cool colors.
With a (warm) wooden floor, green is suitable, for example. With a tiled floor of cool color, prefer a warm shade.

Pro tip: apply your cool colors in an extra matte finish so that your walls appear a little warmer.

Bonus Tips: The Effect of Color on Your Interior

Colors have a kind of temperature; here is what it means.

Red – strength, passion, impulse.
Red is the ideal color to create an intimate, warm, and welcoming atmosphere, but beware: too much red can cause nervousness and fatigue.

Blue: serenity
Being an everyday color, blue creates a soothing and natural atmosphere in the bedroom.
Blue inspires and calms and is therefore perfect for places where you study, sleep, and read.

White: purity.

White is calm, refreshing, timeless, but also dynamic. It stimulates creativity and enlarges the space in combination with another color; white looks fresh and vivid.

Purple: intelligence and spirituality.

Purple is the perfect color for a meditation or study space and has even more effect mixed with earthy colors like dark green, blue-green, brown…

Brown: tranquility
Monotone? Not at all! Brown creates an atmosphere of security, solidity, stability, and comfort.

Pink: Calmness
Give pastel tones a modern touch by pairing them with a soft shade of brown.
If you choose pastel shades, consider bright colors: pale pink, yellow, cornflower.

Need Help With Interior Painting?
Interior painting and choosing paint color is not a complicated task, but if you don’t have the skills, training, and tools, you’re more likely to make one or more of the above mistakes.
Hiring a professional painting contractor is a sure way to pick the best colors and get a clean, flawless, and durable paint job.
If you need professional help with your interior painting project, Eason Painting can help.
Our home interior painting services are available in Washington Township, Rochester, Romeo, Shelby Township, Harrison Township, and Clinton Township, MI.

Call us today at 586-465-5081 for a FREE painting estimate.


Read more
Painting and Decoration Ideas for Your Bedroom in Washington, MI

Painting and Decoration Ideas for Your Bedroom in Washington, MI

Painting and Decoration Ideas for Your Bedroom in Washington, MI

Explore the colors that bring relaxation and sophistication to the bedroom with our professionals’ eye, who examine neutrals, patterns, and bold hues.

For the love of neutrals

In a bedroom, natural colored walls create a wonderful backdrop for creativity. To create a refined yet understated decor, consider classic Gray to increase the atmosphere of serenity.

A monochrome palette is made up of juxtaposed layers and textures.

Taking inspiration from the bedding, choose a solid pattern combined with different materials like a thick knit blanket. To ensure the color’s omnipresence, apply it on the walls and the moldings to create a uniform decoration that makes the room larger.

Generally, natural shades are an ideal backdrop for colorful furniture, canvases, and cushions, because they will give the bedroom an atmosphere of unity. They pair well with vibrant colors like lime green, raspberry, or cobalt blue.

Always ensure a good balance between hot and cold elements in the bedroom. If you have a wooden floor, which gives a warm feeling, you can perfectly use blue or green for the walls.

On the other hand, the floor is tiled with slabs of a cold shade. Warmer shades on the walls are recommended.

And one more tip: if you use cool colors in an extra matt paint quality, the walls will take on a slightly warmer, more caressing appearance on their own.

For the pattern buff

Prints and patterns serve as a starting point for choosing colors for a room.

Using at least one color of a print is a sure way to achieve harmonious decor. The combination of different patterns can be done in several ways, including using corresponding colors to unify the patterns or representing a larger or smaller scale part of the pattern or shape on another print.

Pair visibly different patterns, like a flower and a stripe, create spontaneous and deliberate decor.

To add texture and add dimension to the room, juxtapose an array of printed fabrics chosen according to the season: shantung, velvet, wool, cashmere, linen, or cotton.

Patterns add theatricality

Bold patterns in intense colors make a strong impression in a bedroom.

Please give them the backdrop they need by applying a complementary color.

While a neutral shade might seem like a logical choice to allow the pattern to stand out loud and clear, it is also possible to create a dramatic harmony by opting for a bright color of the bedding.

Consider using a combination of colors, such as dark crown molding and paler walls or vice versa, to compose a more refined palette for the room.

Overview: Color tips for the bedroom

  • Warm colors (red, yellow, orange) are invigorating and stimulating.
  • Cool shades (blue, green, and gray ) are soothing.
  • Dark saturated colors create an intimate ambiance.
  • Pale undertones give any room a feeling of freshness.

Keep in mind that the above guidelines may vary depending on the lighting. Obtain a test vial of the color you plan to use so that you can observe it in different light conditions – day and night and in artificial lighting – and get the results you expect.

Need Help With Interior Painting in Washington, MI?

Interior painting is a priceless, inexpensive, and effective way to add some color to your home, protect your property, and make your interior a little more interesting.

If you need professional help with your home interior repainting project, Eason Painting can help.

We have years of experience offering residential painting services in Macomb Township, Washington Township, Ray Township, Rochester, Rochester Hills, Romeo, Armada, Troy, Shelby Township, Harrison Township, Chesterfield, and Clinton Township, MI.

Call us today at 586-465-5081 for a FREE painting estimate.

Read more

Painting on PVC in Washington, MI: Which Paint? How to Proceed?

Painting on PVC in Washington, MI: Which Paint? How to Proceed?

Furniture, garden armchairs, trinkets, gate … you can repaint many objects with paint. All of your PVC items can be personalized, upgraded, refurbished, or saved from the trash with a fresh coat of paint.
Read on what to consider when painting plastic, and see which paint you can use to get the best result. Remember to keep general safety instructions in mind.

Not all plastics are the same. Some are not plastic (deformable). What all plastics have in common is that they are polymers.
Simply put, this means that plastic is a single, huge molecule made up of individual blocks, which are the monomers.
There are many different types of plastics, and if you are not a chemist, engineer, or anything else, you will only be able to tell them apart by labeling.
However, when painting plastic, it is important to know what type of plastic it is. This is the only way to choose the right paint and avoid unpleasant surprises when painting.
Make sure that the part you are about to paint is made of PVC. This facilitates the choice of paint and helps to identify or avoid possible hazardous substances and the health risks that may result.
How do you attractively transform any PVC object with a new coat of paint without spending too much money?

Which paint to paint on PVC?

PVC is notoriously difficult to paint with standard commercial paints such as acrylic, for example.
Ideally, there is only one method to paint PVC: to use specific paints designed for PVC and plastics.
These paints have a special formula that allows them to stick to PVC and other plastic products.
Most of the time, they are offered in an aerosol can. You can certainly try painting the PVC with other products, but the result will most likely lead to surfaces that chip or scratch easily.

How to paint on PVC?

Plastic furniture, window and door frames, trash cans, vases, etc., can be painted very well, provided you take the right precautions.
However, the plastic must be properly prepared before painting, i.e., cleaned, sanded if necessary, and/or given a special primer.
Damage and irregularities can be leveled. Since you know what material you are coating, you can specifically purchase the right plastic primer and optimal paint.
The best thing to do is choose a paint manufacturer and then buy all the paint system products in their line. So, you can be sure that all the products you use are compatible with each other.
There are some special paint colors for PVC.

Of course, it is not always a must to buy the whole range of products. Many PVC surfaces can be painted with paint without necessarily priming.
Additionally, not all surfaces need to be perfectly smooth or shiny, and not all PVC coverings need to be weatherproof, scratch, impact, etc.
And multiple application is not always necessary or desirable – often it is enough to clean the part to be painted with soapy water, sand it down, and then paint it in the desired color with the spray can.
Choose the color you want from the wide range offered and, if necessary, ask the specialist staff in store for advice.

In short, what you absolutely need to remember: As stated before, do not use the following paints to paint PVC products, as they will not adhere:
Latex paints
Water-based paints
Acrylic paints
Non-plastic epoxy-based paints

Request For a Free Painting Quote

If you need some help repainting your plastic items or even your home interior/exterior, the Eason Painting team can help.

Our home interior and exterior painting services are available in Macomb Township, Washington Township, Ray Township, Rochester, Rochester Hills, Romeo, Armada, Troy, Shelby Township, Harrison Township, Chesterfield, and Clinton Township, MI.

Call us today on 586-465-5081 for a FREE painting estimate

Read more
Interior Painting Washington, MI_ How to Combine White with Other Colors

Interior Painting Washington, MI: How to Combine White with Other Colors

Interior Painting Washington, MI: How to Combine White with Other Colors

For some, white is not even a color as it is obvious. It’s a neutral tone that’s neither calming nor exciting.
However, it gives its beauty to all the other colors. By its purity, it visually enlarges the space and gives an impression of depth to small surfaces.

It is a timeless color that, if you look closely, is used in any interior. White has powerful symbolism. It is associated with light because it reflects it, where the other colors will absorb it.

Needless to say that all colors go really well with white because white is neutral. All the colors you can think of: blue, red, yellow, orange, purple, etc. This article aims to show you ways in which you can perfectly combine white with other colors.

Consider white for what it is – a blank page, a pristine backdrop, a blank surface.
No matter what color you pair it with, it creates contrast.

White-Color Combinations for Endless Possibilities

White, paired with another color, is anything but boring. It is a vibrant and luminous color that offers endless decoration possibilities.
You can pair it with natural shades, neutral colors, or bright shades; it is never cold. Take inspiration from the colors below.

Candy Pink

Candy pink is a color full of energy. This is not the most discreet color; however, combining white with candy pink is no problem.
It is a perfect combination for a child’s bedroom or a playroom. It is a combination that would be very suitable for a creative workshop or a DIY workshop.
It’s light, bright, and almost fun at the same time. And then, if you add copper or gold tints to it, it’s even prettier.

Flashy Orange

On a related note, you can opt for vibrant orange. It is a vivacious and cheerful color to associate with your white.
Both original and full of personality, this color duo is perfect for the kitchen. Or you can, like the candy pink, reserve it for the game room.

Sky blue

Blue, in decoration as elsewhere, is one of the most popular colors, whatever its shade. It’s relaxing and versatile, and when it comes to a sky hue, pairing it with white will make it pop and shine.
Think of the combinations in nature: a pretty blue sky and a few white clouds, beautiful turquoise waves caressing the white sand. These two colors form a harmonious couple that reminds us of a soothing paradise and relaxing nature.

Raspberry red

It’s an intense, lively, and luminous color. Paired with white, it offers a remarkable style. It’s a daring mix. Since it instantly attracts attention, it should be used sparingly. Harmony and elegance are the keys to highlighting this color duo.

Shades of beige

White, combined with different shades of beige, brings a lot of softness to an interior.
For a living room or a bedroom, this association transforms them into a peaceful cocoon.
If you want to play the card of subtlety and sophistication, this might be a good choice.

Navy blue
Do you want a refreshing atmosphere? Whatever your room, pair white with navy blue for a sophisticated edge. It may sound traditional, nautical, aquatic, or déjà vu. However, this combination is constantly reinventing itself due to the new shades of blue.

Chocolate Brown

For a neutral yet stylish choice, try contrasting white with a pretty chocolate brown. It’s pretty classic but less expected than the combination of black and white.
Think of it as an industrial type decoration because the brown of the leather softens the rest of the decoration.
And the white walls light up the chocolate brown furniture.

Need Help With Interior Painting?

Interior painting and choosing paint color is not a complicated task, but if you don’t have the skills, training, and tools, you’re more likely to make one or more of the above mistakes.
Hiring a professional painting contractor is a sure way to pick the best colors and get a clean, flawless, and durable paint job.
If you need professional help with your interior painting project, Eason Painting can help.
Our home interior painting services are available in Washington Township, Rochester, Romeo, Shelby Township, Harrison Township, and Clinton Township, MI.

Call us today at 586-465-5081 for a FREE painting estimate.


Read more
Choosing Wall-Covering for Your House in Harrison Twp.

Choosing Wall-Covering for Your House in Harrison Twp.

Choosing Wall-Covering for Your House in Harrison Twp.

Is your wall covering no longer up to date? Do you want to give your decor a facelift? When you decide to renovate your home, replacing the wall coverings is usually part of the most popular projects.

To help you make the best choice, we have listed the main coatings and wall coverings available on the market and their characteristics.

Also, find out which coatings to put on your walls depending on the rooms to be renovated.

Wall Coverings: a Plethora of Options 

Wall tile

Traditionally used in damp rooms, wall tiles can easily find their place in a living room or hallway.

Among the most common wall tiles include;

  • Porcelain stoneware: appreciated for its robustness and ease of maintenance, porcelain stoneware wall tiles were first designed to cover floors. It’s available in many finishes and colors, and it can imitate a large number of materials (wood, natural stone, concrete, leather, etc.).
  • Earthenware: commonly used to cover the walls of a bathroom or the splashback of a kitchen. It’s is a ceramic wall covering offering a wide choice of patterns and colors. Avoid entry-level tiles, which are generally not very resistant to impact.
  • Cement tiles: very aesthetic, cement tiles are acclaimed for their retro side and their strength. After receiving water and oil repellent treatment (often carried out in the factory), they can be installed on any interior wall (dry or wet room).
  • Natural stone: a weighty material that must receive an anti-humidity and anti-stain treatment during its manufacture. Whether it is granite, marble, travertine, or slate, the handling and installation of natural stone wall tiles require special know-how.

Paint

Paint is undoubtedly one of the stars of the wall covering. It’s available in an infinity of colors, and it can be endowed with properties allowing it to adapt to all types of rooms and surfaces. There are two main types of paints:

  • Water-based paints: Less odorous and less harmful than their oil-based cousins, water-based paints also offer faster drying time. However, their maintenance is more delicate, and they are more difficult to apply.
  • Oil paints: these organic solvent-based paints are popular for their taut appearance and ease of maintenance. They nevertheless emit a strong odor (which may persist for several weeks after application). Among the most common oil paints, glycerol paint is the most widely used.

Wallpaper

Wallpaper is modernized and is now available in many patterns, colors, and materials to meet the needs and desires of all homeowners.

There are three categories of wallpapers:

  • Traditional wallpaper: relatively fragile and inexpensive, traditional wallpaper consists of one or more sheets of paper. It exists in a “simplex” (a single sheet of paper) or “duplex” (sheet of paper and underlay) version, the latter being preferred for easier installation and better resistance. Traditional wallpaper is not suitable for damp rooms.
  • Vinyl wallpaper: made of a sheet of paper covered with a layer of PVC, vinyl wallpaper is particularly resistant. It’s waterproof, easy to maintain, and installed in all types of rooms, including wet rooms.

Decorative plasters

The decorative coatings are used to create a unique atmosphere and are generally more resistant than conventional paint. Some examples of coatings commonly used in decoration include:

  • Lime plaster: It’s appreciated for its ability to regulate humidity and its antibacterial properties – lime plaster creates an authentic, even rustic, atmosphere in your interior.
  • Stucco: mainly intended to imitate the appearance of marble, stucco is a decorative plaster based on lime, glue, and marble dust. Other materials such as quartz, brick, or slate powder can replace marble dust to create different mottling shades.
  • Waxed concrete effect coating: It’s a mixture of sand, lime, and clay. The “waxed concrete” aspect of this coating is obtained after polishing the wall and applying a varnish layer. Wall waxed concrete is available in many colors.

The Bottom Line 

Choosing wall covering can be fun and exciting, but it can also be a little intimidating. Use the above tips to make sure that you don’t end up with any unpleasant surprises.

If you need professional help with your home repainting project, Eason Painting can help.

We have years of experience offering residential painting services in Macomb Township, Washington Township, Ray Township, Rochester, Rochester Hills, Romeo, Armada, Troy, Shelby Township, Harrison Township, Chesterfield, and Clinton Township, MI.

Call us today at 586-465-5081 for a FREE painting estimate.


Read more
Interior Painting and Décor Harrison Twp. MI: Industrial Décor Style Guide

Interior Painting and Décor Harrison Twp. MI: Industrial Décor Style Guide

Interior Painting and Décor Harrison Twp. MI: Industrial Décor Style Guide

The industrial style is suitable for people who are looking for a decor concept that is not pretentious.
The industrial style’s visual appeal and charm lie in its ability to combine utilitarian surfaces, stripped-down architecture, and salvaged objects.
If you’re looking to celebrate humble materials, this style of decor is worth considering.

One of the advantageous aspects of industrial decor is that the materials used can be as affordable as you want!
Since industrial-style decor is meant to be as clean as possible, it doesn’t necessarily cost a fortune.
This article will describe the main characteristics of this type of decor while giving you tips for creating an indoor environment that is simple, comfortable, and elegant.

The furniture incorporated into industrial decor is minimalist and no fluff. There are strong and clear lines, without excess ornamentation.
A good way to get the industrial style is to mix new pieces with recycled items.
You can convert materials like wooden crates, old ladders, or concrete blocks back into shelves, tables, or individual items.

Furniture that is too ornate or too cozy is not suited to the industrial style.
Any furniture dedicated to comfort (armchair, bed) should be neutral in color, with natural textures.
If you are using cushions or rugs, choose neutral and nuanced hues; think of woven wool, which adds a lot of texture.
Furniture should be designed with a minimalist design (think of a wrought iron bed base or a simple and elegant armchair).

Industrial Theme

If you consider an industrial color scheme, monochrome is in the spotlight, although colors with cool undertones are also welcome.
Consider neutral grays or blues for the walls, but for accent colors, you can dare tangerine and fuchsia, or their darker cousins, plum and burnt orange.
Moss and indigo greens, on the other hand, stand out well in kitchens or bathrooms.

If you stick with neutral tones, we suggest choosing from various shades to prevent the space from taking on a one-dimensional appearance.
This type of decor is focused on “industrial” textures such as concrete and metals; the variations already present generally allow working with a monochrome palette.
If you’re painting the walls and find the rooms in your home lacking in visual impact, consider adding an element that acts as a focal point or a texture that adds depth.

You Need the Audacity

To adopt the industrial style well, you have to differentiate between treasures and less interesting objects.
Remember that showing some signs of wear adds character to the object. If you find an accessory or piece of furniture that might look out of place in a traditional setting, there’s a good chance it fits into an industrial setting!
Found objects or suitable works of art, such as “mix media” sculptures or large abstract works of art, are favored.

As mentioned, metals are a key part of industrial styling, so consider incorporating tin, steel, iron, and aluminum into your space.
The metal will add style and elegance to highlight elements such as piping, aluminum counters, and steel stairs.

On the other hand, avoid warmer metals such as gold or brass, and choose cool metals with a matte finish.
Stone is another exciting way to cut through the monotony and add depth and character to these industrial spaces.

Need Help With Interior Painting in Richmond, MI?

Interior painting is a priceless, inexpensive, and effective way to add some color into your home, add an industrial theme into your interior, and make it a little more interesting.

If you need professional help with your home interior repainting project, Eason Painting can help.

We have years of experience offering residential painting services in Macomb Township, Washington Township, Ray Township, Rochester, Rochester Hills, Romeo, Armada, Troy, Shelby Township, Harrison Township, Chesterfield, and Clinton Township, MI.

Call us today at 586-465-5081 for a FREE painting estimate.

Read more
Bedroom Renovation in Romeo, MI_ The Checklist

Bedroom Renovation in Romeo, MI: The Checklist

Bedroom Renovation in Romeo, MI: The Checklist

The bedrooms are, so to speak, fundamental rooms of your home. Therefore, rearranging and personalizing them will allow you to develop in your home fully.

To help you in your current project, we have decided to create a guide where all the main information will be gathered, with a cheat sheet that you can use to follow the work’s progress.

The Keywords of Bedroom Renovation

Comfortable

Knowing how much most people do not get enough sleep and that several factors associated with their environment can impact sleep cycles, a bedroom layout should be designed to promote comfort and rest.

Welcoming

A comfortable room is good, but it also has to be welcoming. A beautiful layout, with quality furniture and decorative elements that give character to the room, this is the magic recipe to create the room of your dreams.

Personalized

Finally, since the bedroom is one of the most intimate spaces in a house, it’s the best place to have fun with decorating.

If the room is shared between several people, we can harmonize the styles and preferences of each or create delimited areas for the occupants to find their account.

Determine Your Needs

If you have decided to renovate a bedroom, it is because it does not suit your needs or those who occupy the room (children, friends, roommates).

It is not difficult to come up with ideas for the room’s decoration and arrangement, but before starting the work, you should make sure that the needs that were not met initially will be taken care of during this project.

You can spend hours browsing Pinterest, the IKEA catalog, home decor magazines, and so on.

However, avoid focusing only on the aesthetic aspect of the room. The layout must also be practical and ergonomic.

To ensure that the room meets the needs of the person who will occupy it, here are some criteria to consider:

  • How much it invites to sleep and rest;
  • The durability of materials;
  • The amount of storage;
  • The decoration creates a beautiful, personalized space.
  • Bedroom decor design

Questions To Ask When Planning A Bedroom Renovation Project

Where is the room located?

Is the room located in a small space, at the end of a hallway, at the top of a difficult staircase, or does the room has an unconventional shape?

Note the aspects that characterize the space, as this will impact the types of furniture and materials you are going to be able to use.

Was the room already used as a bedroom?

The level of transformation would be different if the room were not originally used as a bedroom.

For example, in the city, you often see people transforming their double room into two separate bedrooms.

You have to think about building new walls, adding doors, or even windows.

Is the room good enough for sleeping?

We mentioned this quickly in a previous paragraph, but it must be reiterated how important it is that the bedroom offers good sleeping conditions.

Everyone is different and has their own needs when it comes to sleep, but generally, keep the following points in mind.

The room must be well ventilated;

The bed must be placed strategically (to avoid drafts, exposure to light, people who have to step over furniture to move around);

It is preferable not to integrate an office or a workshop in the same room to avoid distractions;

What about soundproofing?

Soundproofing is one of the most important factors in ensuring comfort in a bedroom.

Ensure that the walls, doors, windows, and floors provide a good soundproofing level in the room.

Is there enough storage?

Even people who adopt a more minimalist lifestyle are often going to face a lack of storage options.

Bottom Line

If you want to repaint your room but don’t have skills and experience in interior painting, you might want to work with a professional painting contractor when it comes to the actual implementation.


At Eason Painting, we can even help you pick the right color before we get to the actual painting.

We have years of experience offering interior painting services in Macomb Township, Washington Township, Ray Township, Rochester, Rochester Hills, Romeo, Armada, Troy, Shelby Township, Harrison Township, Chesterfield, and Clinton Township, MI.

Give a call today to find out what creative ideas we have in store for you.


Read more

Resurfacing Your Cabinets in Harrison Twp MI: The Benefits

Resurfacing Your Cabinets in Harrison Twp MI: The Benefits

After living in the same house for a while, it’s normal to need a change. If you aren’t looking to do a big one or don’t want to do something complicated, then you should consider the possibility of doing smaller remodeling projects.
There are rooms that you spend a lot of time in, and the kitchen is one.

More specifically, many homeowners become bored with their kitchen cabinets; color, finish, or both.
Luckily, it’s possible to change the look, and this way, you can give your cabinets a second chance without investing in a whole new set.

How does resurfacing work?

This process comes down to renovating. Your cabinets’ structure remains intact, but the outer layer or ‘skin’ of your cabinets is removed and replaced, repainted, modified. Many people also choose to replace door accessories, like drawers and cabinet handles as well as hinges.

To complete this task, you must be skillful and patient while having some renovation experience under your belt.
The process is not instantaneous and can take between 2 and 4 days. The best way to make sure everything is covered is to purchase a plating set at your local hardware store.
It will contain the plating you will need as well as the application materials.

Keep in mind that not all cabinets can be resurfaced.
Your cabinets need to have a sturdy cabinet frame in plywood or MDF panels, a hardwood frame, and well-functioning drawers or cabinets with good storage options.

Obviously, resurfacing your cabinets won’t be worth it if they are in poor structural condition.

Cost-effective

The relative cost of installing new kitchen cabinets is not something that everyone can afford.
Once again, if you’re thirsty for a change in your kitchen, resurfacing is a great way to achieve that while keeping expenses down.
The cost of resurfacing will be approximately 60% less than that required when installing new cabinets.

An Eco-Responsible Solution to Renew Your Kitchen Cabinets

The reality is that many home improvement projects will cause a lot of losses. Removing old cabinets from the walls and replacing them will obviously lead to a lot of debris, ultimately increasing the amount of material going to landfills across the country.
Besides, many kitchen cabinets contain a material called ‘formaldehyde,’ which is harmful to the environment.

To limit this accumulation of dangerous debris, consider the eco-responsible aspects of this renovation project.
Resurfacing your cabinets will recycle these old materials and give them a second life.

Finishing options

Obviously, completely replacing your cabinets will give you a lot of choice in materials, colors, or finishes.
Being aware that with the resurfacing process, there are a lot of veneer and color options out there too, which will give you access to almost as much variety.
For example, if you like the look of real wood, there are plenty of veneer options like maple, walnut, and birch available.

Not only are the plating and paint options plentiful, but you also have the flexibility to install new hardware.
Why not consider installing edging, moldings, or even glass doors so that you can display your most beautiful kitchenware?
No matter which option you choose, know that there are plenty of possibilities when it comes to resurfacing.

Need some help with that?

If you don’t have the skills, tools, and training, you should consider hiring a professional painting contractor for help.

The painter will advise you on the paints and types of finish best suited to your cabinets and produce the best job.

If you need professional help repainting your kitchen, kitchen cabinets, or even the entire home interior, our team at Eason Painting would be more than happy to help.

We have years of experience offering residential painting services in Macomb Township, Washington Township, Ray Township, Rochester, Rochester Hills, Romeo, Armada, Troy, Shelby Township, Harrison Township, Chesterfield, and Clinton Township, MI.

Call us today at 586-465-5081 for a FREE painting estimate.

Read more
How to choose the paint color for a living room in Harrison Twp MI

How to choose the paint color for a living room in Harrison Twp MI

How to choose the paint color for a living room in Harrison Twp MI

Generally, we do not advise homeowners to color their walls just because it is trendy.

First of all, you have to opt for tones that you like to feel good at home. The difficulty lies above all in harmonizing colors.

While there are no right and wrong shades, it is clear that there are some pitfalls to avoid when choosing the paint color for the living room.

Let us take the time to reconsider things.

A New Colour for The Living Room Walls: The Main Principles

Repainting the living room is a good way to have fun. This makes it possible to rejuvenate the room, and we generally take the opportunity to personalize the decor so that his home is unlike any other.

The living room is the most important because we spend a lot of family time there.

It is also here that we receive friends and family for some good times together.

So we try to bring character to the room by applying two different colors of paint rather than the same color on all the walls. Some combination can make a difference, for example:

  • Red and purple to express luxury in all its splendor,
  • Ecru and chocolate to create a soothing and elegant atmosphere,
  • White and black to play the card of contrasts and add a design note,
  • Black and paprika for the vibrant touch …

Monochrome also works well for a successful cocooning effect. Blue or even powder pink lend themselves particularly well to this, bringing a touch of refinement to the living room.

Paint to enhance the living room

By its color, the paint can enhance an alcove, which until then probably went completely unnoticed or any other architectural detail such as a vault, an old beam, moldings, or a bow window.

A flashy color – like electric blue and orange – should be applied in moderation, that is to say, in small touches to give rhythm to the décor.

It can enhance the main color if it has been chosen specifically in natural tones.

Bring Light to The Living Room

Light is always at the heart of any décor subject. Whatever the color of the living room paint you choose, it should in no way darken the room.

An extensive area open to the garden can tolerate all shades, from the lightest to the darkest.

This is not the case for a small living room that has only one window overlooking a courtyard.

In this case, white paint or eggshell still allows you to enjoy a minimum of brightness.

Valuing Your Property to Sell It Better

These tips are just as valid when applying new paint to the living room before reselling your house or apartment. A big lack of taste can cause negotiations to collapse.

The makeover of your property involves measure because it is highly preferable to opt for neutrality in which buyers can project themselves very easily.

Choosing the new paint for the living room is one art; putting it on is another.

Improper application can spoil the best color combination.

Painting is the most difficult thing to handle on large surfaces when you are not skilled in the art.

This is why it is highly recommended to hire an experienced professional painter for all your residential painting tasks.

When repainting your home for resale, it’s generally safer to stick to neutral, lighter, and softer color tones instead of bold, bright colors.

Also, consider hiring a professional painting contractor for your project. If you haven’t identified a professional painter for your project yet, our Eason Painting team can help.

We have years of experience offering residential interior painting services in Macomb Township, Washington Township, Ray Township, Rochester, Rochester Hills, Romeo, Armada, Troy, Shelby Township, Harrison Township, Chesterfield, and Clinton Township, MI.

Call us today on 586-465-5081 to find out what creative ideas we have in store for you!


Read more
Bathroom Renovation Checklist for Your Home in Rochester, MI

Bathroom Renovation Checklist for Your Home in Rochester, MI

Bathroom Renovation Checklist for Your Home in Rochester, MI

If you’ve landed here, it’s probably because you’re starting a big bathroom remodeling project.

Renovating a bathroom from the ground up is a project that involves several stages and can easily be spread over several weeks.

To ensure that everything runs smoothly and that you reduce the unforeseen in time and money, we have prepared a detailed guide that will serve as a reminder for your project.

This guide will be useful if you want to better understand the different steps that are part of the process when a contractor takes over the work.

Types of Materials for Bathroom Renovation

When it comes to bathroom renovations, you will be spoiled for choice in terms of materials.

Colors, patterns, textures, entry-level, high-end – you can weigh the pros and cons of each, and make an informed decision.

To help you, we have prepared a general overview of the different materials for each element that is part of the bathroom. Have a look;

Counters

The bathroom counter is not as big as a kitchen counter, but it still plays an important role in keeping the room clean and organized.

Since it is generally used to accommodate the sink (s), the sink must be waterproof and easy to clean. Here is an overview of the materials you can choose from:

  • Marble – a high-end material, resistant, waterproof, but expensive.
  • Wood – offers both affordable and much more expensive options, depending on the grade of quality.
  • Slate – a heavy material, which requires a very solid structure, providing an interesting aesthetic element.
  • Granite – a countertop with a resistant surface, available in several shades and patterns.
  • Quartz – an ultra-resistant material, with a rather luxurious aesthetic appearance.
  • Concrete- a raw material, sometimes difficult to maintain, but allowing you to be very creative with the textures, colors, and elements that you can incorporate into concrete.
  • Ceramics- A timeless classic, with models for all tastes and all budgets.
  • Laminate – a product that often mimics the appearance of other more expensive materials very well.

Wall Coatings

The Painting

One of the easiest ways to transform a bathroom is to use paint to change the color and design of the walls.

Is your bathroom too dark? Go for a brighter shade.

Want to create a bold statement? Choose from bright colors like fuchsia, apple green, or canary yellow.

Tip: choose a paint that is suitable for bathrooms. You will find in store formulas of paints specially designed for these rooms, therefore resistant to humidity and dirt.

The wallpaper

The wallpaper comeback in recent years has been with new products that are easy to install, good quality, and decorated with attractive patterns.

For the bathroom, be sure to choose moisture-proof wallpaper with an easy-to-clean surface.

Decorative Panels

Another good option if you would like to cover your walls by adding a little texture, moldings, or 3D design: Decorative panels.

You will find an impressive selection of models of panels, made of wood, plastic, faux brick, faux stone, MDF, and so on.

Quality and prices vary dramatically, so don’t hesitate to shop around to find the right product for you.

Wood

If you prefer, you can also opt for separate wooden planks to create your own wall covering.

However, be sure to use the right finishing products to protect the wood and simplify its maintenance.

The brick

Brick is a material that can be found as much in classic homes as in contemporary settings.

If you would like to install real brick walls in your bathroom, you are going to have to plan this project well, especially if your walls are not originally made of brick.

For a cheaper and faster option to install, you can always install decorative brick panels. However, for a real brick siding, you will need to consider whether the structure of your house is strong enough, as this adds a lot of weight.

Concrete

Concrete can be added in thin layers to wall surfaces to give an industrial decor effect. You can also find concrete or tiles that look like concrete in hardware or decor stores. Finally, you can also create a faux finish with paint or special products available in hardware stores.

If you need professional help with your bathroom repainting and refinishing project, our highly skilled and experienced team at Eason Painting can help.

We have years of experience offering residential painting services in Macomb Township, Washington Township, Ray Township, Rochester, Rochester Hills, Romeo, Armada, Troy, Shelby Township, Harrison Township, Chesterfield, and Clinton Township, MI.

Call us today at 586-465-5081 for a FREE painting estimate.


Read more
Decorative style guide_ Scandinavian decor

Decorative style guide: Scandinavian decor

Decorative style guide: Scandinavian decor

The Scandinavian-style decor is guided by a desire to promote calmness and balance, with an emphasis on light and nature.

Northerners like their homes to have a connection with nature, and this is reflected in their refined style, which combines rustic appeal, clean lines, and simple silhouettes.

In a Scandinavian home, the little details don’t go unnoticed; neglecting certain aspects of a renovation project will, therefore, quickly become apparent.

You can strike a balance between simplicity and functionality by going for the Scandinavian style.

Recreating the beautiful and very popular Nordic decor in your home is very easy. If you don’t know where to start, here are some tips; 

Choose a Pale Color Palette

Scandinavians like to cultivate chic minimalism through the decoration of their home, while incorporating rustic aspects, without choosing items that are too damaged.

Scandinavian design is focused around an austere, monochrome aesthetic combined with warm and comfortable elements.

White and gray walls are popular with Scandinavians and are often touted as one of the main features of this type of decor.

Blue walls and accent walls are also very popular, and any of these colors provide the desired ambiance for a Scandinavian-inspired room. If you go for monochrome walls, consider incorporating pops of blue, specifically a type of blue that contrasts well with hues of black, white, gray, and wood.

The most popular material in Scandinavian homes is wood. Consider installing wood siding on the walls and ceilings to add depth, texture, and warmth to an otherwise minimalist room.

In general, the floors are hardwood, except for the bathroom. If you go for hardwood, choose wood with a light grain.

Copper accessories are also one of the favorite items of the Nordic house.

More specifically, we see a lot of copper lamps. If you like this type of lamp, but don’t particularly appreciate the copper look, consider white paper lamps instead.

Scandinavian functionality

Scandinavian decor aspires to create a comfortable environment.

To this end, pure lines are sought as much in architecture as in furniture.

When furnishing rooms, try to reduce the number of accessories to avoid clutter. Spaces should be furnished to incorporate only those items that are necessary.

By adopting a Nordic decor, you seek to create a sense of well-being that should align with simplicity, since the clutter could lead to a feeling of suffocation.

When it comes to the kitchen, consider open shelving or “butcher block” type counters.

Keep walls and appliances white and adorn them with bolder accessories and hardware.

Some renovations to create a Scandinavian-style decor

Do you want to adopt a Scandinavian-style decor? Here are some renovation ideas.

  • Repaint walls and surfaces with pale and neutral tones: The easiest technique to bring Scandinavian style into a home is to repaint the walls. Of course, shades of white and gray are ubiquitous in these settings, but you can also add small touches of bright colors and some textures and patterns.
  • Integrate elements of nature into your indoor environment: The Scandinavian style is very much associated with elements of nature, especially wood and stone. You could therefore install a floor and/or a wooden or natural stone countertop, a minimalist style staircase in wood or raw metal while ensuring you maximize the presence of natural light in the room with beautiful large windows.

One of the main characteristics of the Scandinavian style is functionality.

There is a lot of multifunctional furniture that takes up little space and can be transformed according to the needs of the moment.

Would you like to adopt the Scandinavian style of decor painting in your home, but don’t know where to start? We can help.

We have years of experience offering residential painting services in Macomb Township, Washington Township, Ray Township, Rochester, Rochester Hills, Romeo, Armada, Troy, Shelby Township, Harrison Township, Chesterfield, and Clinton Township, MI.

Call us today at 586-465-5081 for a FREE painting estimate.

You May Also Like:

Kitchen Cabinet Cleaning Tips for Extended Durability


6 Questions to Ask When Hiring an Interior Painter in Clinton Township, MI


6 Tips for A Perfect Interior Paint Job in Clinton Township, MI

Read more
Tips to Highlight Your House Moldings in Rochester, MI

Tips to Highlight Your House Moldings in Rochester, MI

Tips to Highlight Your House Moldings in Rochester, M

Are moldings just an architectural detail? Beyond aesthetic considerations, these ornaments are also used to delimit spaces, to frame doors and windows, to hide joints, and to fill holes between different elements.

In this article, we will be sharing some tips on how to highlight and accentuate your house moldings and bring out the best of your design.

But first, here is a quick look at the most common moldings;

• The crown molding, which is used primarily in the ceiling, can also be used around some furniture. They are also called cornices.
• The picture rails, which are generally thicker than other types of moldings.
• The corner moldings are used to join two sections of the wall at their meeting point, be it external or internal.
• The frames, which, as the name suggests, are used to frame, mainly around doors and windows.
• The baseboards, which are flush with the ground.

These are just a few

Here Are Tips to Help You Showcase Your Moldings

The size of the moldings: suitable for the room

Before choosing the moldings you will install in your room, you must consider the size of the room and the level of lighting. Large moldings will make the room appear smaller

Painting moldings: contrast and harmony

With a simple stroke of paint, moldings can be integrated into a decor’s color scheme. Depending on the style you want to give to the room, thousands of colors and finishes are available.
White is a versatile color that allows moldings to stand out, without giving too much contrast (unless the walls are very bright or very dark).

However, this should not be seen as the only option. All combinations are possible, as long as they work with your tastes and with the decor accessories you already have.

Careful consideration should be given to the color scheme, as it can affect the ambiance of the room.
We try to bring out the moldings without creating an overly stifling effect.
If you’re looking to showcase moldings without applying a different shade to the walls, you could also play around with the paint finishes.
For example, a matte finish on the wall and a glossy finish on the window frame.
The effect will work quite well, without creating a big contrast.

Be careful, however, not to apply too many coats of paint. At a certain point, it is best to sand the moldings and start over from the base surface.

Moldings in Woodwork and with Patterns

Wood is a rich and warm material that goes well with any decor style.
Pro Tip: if the room is small, it should be used sparingly, that is to say, that some moldings could be made of plain wood while others would be painted, to maintain a good balance.
Moldings are often sold with ornaments, which can be very pretty if they don’t dominate the decor.
Again, it’s a matter of taste. A room with heavily loaded moldings can look great if the rest of the decor matches the patterns.

Custom moldings

Store-sold moldings may suit your needs very well, but it won’t be easy to achieve results as beautiful as you would get by having them made by a professional carpenter.
This specialist will take exact measurements and choose the materials according to your needs.

Interior painting and décor is not a complicated task, but if you don’t have the skills, training, and tools, you’re more likely to make mistakes.

Hiring a professional painting contractor is a sure way to avoid mistakes and get a clean, flawless, and durable paint and décor job.

If you need professional help with your interior painting project, Eason Painting can help.

Our home interior painting services are available in Washington Township, Rochester, Romeo, Shelby Township, Harrison Township, and Clinton Township, MI.

Call us today on 586-465-5081 for a FREE painting estimate.

Read more
Residential Painting Romeo, MI_ 3 Things to Know About Color Psychology

Residential Painting Romeo, MI: 3 Things to Know About Color Psychology

Residential Painting Romeo, MI: 3 Things to Know About Color Psychology

In our daily life, we are surrounded by thousands of different colors, each in their own right, impact our mood in one way or another.

Whether it’s the vibrant green of the fresh grass or the colorful leaves of autumn trees, each one emits energy and causes a different reaction in people.

This is why the colors you choose for your walls will play a huge role in the atmosphere you have at home.

These will reflect not only your personality and tastes but also the energy and vibe you want to create in the room.

While some colors don’t necessarily match all interior decor styles, that shouldn’t stop you from experimenting with different hues that you wouldn’t normally use.

Here are some tips on how to factor in color psychology while choosing your residential paint colors in Painting Romeo, MI.

Start by Understanding the Basic Tones

The universe of paint colors is almost endless, and it is nearly impossible to make a quick and easy choice among them.

In addition to important factors like temperature or intensity, each brand of paint will have custom versions of colors that will sometimes look similar when comparing swatches but will have a very different effect when applied to your walls.

That is why it is good to know at the very beginning in which groups of tones you will want to find the perfect color:

  • Whites: 

white has a vast and varied palette that will give a boost to rooms where you are looking to create this type of effect.

Although white is all-purpose, it will be good to determine in advance whether you prefer a warm shade or a cool shade.

Warmer whites are great for a relaxed and visually relaxing vibe, while cooler hues are best in rooms where you are looking to be more active and alert.

  • Neutrals:

In addition to inspiring calm and relaxation, neutral tones like browns or beiges are perfect for people looking for more than just a white room, but who don’t want to use bolder shades.

These hues will emanate down-to-earth energy and be a perfect match for your productive workdays.

  • Pale colors:

In the world of painting, each bright color inevitably has its diluted version, either pastel or simply paler.

Just like neutral shades, this option will be perfect for people who are still hesitant to take the plunge to dark colors.

Shades like powder blue, sage, pale yellow, or a subtle pink.

  • Dark Colors:

Contrary to popular belief, using dark colors in a well-lit room will not make your space overly dark and constricted.

On the contrary, when well laid out, the place will seem a good size and have a distinguished air.

Each Room Has Its Colorful Message

No matter the size of your home, each room has a specific purpose and its own character.

For example, the bedroom will not have the same role as your dining room, and your office will not have the same use as the kitchen.


That is why, when choosing a color, it would be best to apply the previous points to avoid choosing a shade that might distract you or tire you out in rooms where you need concentration.

For instance, for the bedroom, think about the tones that will give you a sense of calm and relaxation.

With too vibrant colors like red or yellow, your mind will have a hard time resting.

If you like these colors, consider the pastel or diluted versions of these instead, for a less imposing effect.

However, for rooms like the living room or the kitchen, a vibrant and glowing yellow will give life and energy to these places, which are points of gathering and family moments.

If your living room is a place more associated with rest, a dark green like forest green, or even a dark gray are shades that can create a feeling of comfort.

Need Help Repainting Your Home Interior?

Choosing an interior paint color can be fun and exciting, but it can also be a little intimidating.

If you need professional help with your home interior repainting project, Eason Painting can help.

We have years of experience offering residential painting services in Macomb Township, Washington Township, Ray Township, Rochester, Rochester Hills, Romeo, Armada, Troy, Shelby Township, Harrison Township, Chesterfield, and Clinton Township, MI.’

Call us today on 586-465-5081 for a FREE painting estimate.


You May Also Like:

Interior Painting Richmond, MI: Choosing Paint Color for Your Home office

Interior Painting Richmond, MI: Easy Ways to Stretch You’re Decorating Budget with Color.

Interior Painting, Richmond, MI: 7 Color Combinations to Enhance Your Bathroom


Read more
Interior Painting Rochester, MI_ Living Room Color Ideas for 2020

Interior Painting Rochester, MI: Living Room Color Ideas for 2020

Interior Painting Rochester, MI: Living Room Color Ideas for 2020

Changing furnishings is expensive. This is even more true when it comes to living room furniture.
How many times in the past year, while consulting magazines or Pinterest, have you had the urge to change the decoration of your living room?
Your answer is probably between 10 and 50.

Do you want to redecorate everything? To start from scratch? To follow trends? Then Paint.
It’s a simple way to keep up with the trend without breaking the bank.
To inspire you in your decoration, here are the color trends for the living room you can adopt in 2020.

Emerald

For our first living room color idea, we offer you an emerald green.
Pulling slightly on blue, it is a color that recalls nobility.
For decor and a cozy atmosphere, we like to blend it with velvet or even gilding to bring out the rich side of the color.

Peach

Between pink and orange, there is peach.
The peach color will give an air of softness and freshness to your living room.
If you’re not a fan of brown, consider pairing it with burgundy or other shades of pink. To keep a more classic decor, the peach color is very pretty paired with gray or black.

Dark Gray

Even gray has been ubiquitous for the last few years. There is a multitude of shades that are still unexploited.
Dark gray is less intense than black, and it will be more suitable for large spaces since this shade tends to darken small rooms or spaces with little light.
If you plan on painting your room very dark gray, make sure you have enough light and match the shade with white accessories and a lighter cutout.
This will create light points to balance the decor.
Just like when painting with black, make sure you have a matte finish to prevent your dark wall from being too shiny.

Sage

Plants and nature are in the spotlight in 2020 despite all that is happening around us. Sage is a fairly cold color that requires the addition of materials such as sandstone or wood to warm the decor.
Whether for your planter covers, your rug, or wall decoration, the sage color goes perfectly with the macramé trend.
Would you like to match it with another color? Consider greige, a shade between gray and beige.
Together, these two shades will take you to the heart of nature.

Purple

If you want a unique decor, purple is for you.
Are you a fan of this color? If so, know that painting a room purple can help calm your anxiety and manage stress.
Your living room will turn into a place of relaxation. For a cozy atmosphere, pair it with dark accessories.

Whether you decide to redo your decor completely, or just change a few accessories, you can get inspiration from our 2020 color trends for your living room.
Go ahead, try out any of these suggestions.

Need Help with Interior Painting in Rochester, MI?

Interior painting is a priceless, inexpensive, and effective way to add some color into your home, protect your property, and make your interior a little more interesting.

If you need professional help with your home interior repainting project, Eason Painting can help.

We have years of experience offering residential painting services in Macomb Township, Washington Township, Ray Township, Rochester, Rochester Hills, Romeo, Armada, Troy, Shelby Township, Harrison Township, Chesterfield, and Clinton Township, MI.

Call us today on 586-465-5081 for a FREE painting estimate.

Read more
Residential Painting Washington, MI_ Foolproof Painting Tips

Residential Painting Washington, MI: Foolproof Painting Tips

Residential Painting Washington, MI: Foolproof Painting Tips

Repainting your home, furniture, or deck can be a rewording project in addition to increasing the value of your property.

For a relatively small painting project, DIY painting can be a satisfying and even cost-saving achievement, however, if you have a large painting project, consider hiring a professional painting contractor;

Things to Do Before You Start Painting

Before you even start painting, take a few steps to properly prepare your project. Here are a few tips to make sure you start your work the right way.

  • Determine the brushes you will need according to your type of paint and the finish used;
  • Choose the right rollers so that the paint spreads easily;
  • Protect your floors from any paint stains;
  • Provide a small stepladder to reach the top of the walls;
  • Put on old clothes/apron.
  1. Clean Your Rollers Before Starting

Even if they are new, you must clean your rollers with hot water before starting work. This will limit the detachment of hair and particles.

Besides, a slightly damp roller facilitates adhesion to the paint.

However, watch out for the excess water, which could ruin the finish.

Also, make sure you have the right paint roller for the type of work you are going to undertake.


  1. Use A Broom and Damp Cloths to Remove the Dust On Your Walls

Nothing is more unpleasant than spreading dust in a coat of new paint.

Use a broom with damp cloths to remove the dust, and be sure to sweep the floors well to prevent dirt from rising during your work.

Remember also, in addition to cleaning, to prepare the walls well if there are repairs to be done.


  1. Wrap Your Gallon of Paint with A Rubber Band to Remove the Excess

Rather than using the gallon outline to wipe your brush, wrap it with a large elastic band and use it to remove excess paint.

This will limit the damage while keeping your container clean and easy to open in the future.

Did you know that there are different types of brushes depending on the type of paint chosen?

Keep in mind that choosing the right brush for your needs will help you work more efficiently.


  1. Use Plastic Wrap to Cover Objects That Are Difficult to Move

Some objects are difficult to move and stain easily, especially when painting in the bathroom or the kitchen.

Rather than using thick, bulky towels, you can just use plastic wrap to protect them.

  1. Trim The Edges of Your Old Rollers Before Using Them

To avoid apparent roller strokes, you should trim the ends of your used roller slightly. You will feel like you are using a brand new roller.


  1. Use a homemade pad to paint hard to reach surfaces.

The bathroom is often a challenge, even for experienced painters.

The use of a pad glued to a paint mixing stick or a wooden ruler is perfect for the backs of toilets and other areas difficult to access.


  1. Always Keep a Damp Cloth On You

Even if you have an agile hand, you are not immune to a crooked brushstroke.

Fortunately, latex paint can be cleaned very well with a damp cloth, if you don’t wait too long before acting.


  1. Paint One Wall at A Time for Best Results

This may seem trivial, but many people do the complete cutting in before starting to roll.

When painting one wall at a time, you will see an almost imperceptible transition between your brush cutting and your roller application.

This is one of the best tips for a successful cutting in.

The Bottom Line

As earlier mentioned, if you don’t have the skills, tools, and training, you should consider hiring a professional painting contractor for help.

The painter will advise you on the paints and types of finish best suited to your project and produce the best paint job.

If you need professional help repainting your kitchen, kitchen cabinets, or even the entire home interior, our team at Eason Painting would be more than happy to help.

We have years of experience offering residential painting services in Macomb Township, Washington Township, Ray Township, Rochester, Rochester Hills, Romeo, Armada, Troy, Shelby Township, Harrison Township, Chesterfield, and Clinton Township, MI.

Call us today on 586-465-5081 for a FREE painting estimate.

Read more
Interior Décor Romeo, MI_ How to Use Orange and Yellow_

Interior Décor Romeo, MI: How to Use Orange and Yellow?

Interior Décor Romeo, MI: How to Use Orange and Yellow?

Although fall is neither the current nor the next season, it’s worth talking about the decorating ideas suited to the season as we wait for things to calm down.
This will allow you to prepare months in advance, mainly if you plan to make major changes to your interior.

Autumn is the period when warm colors are most used, such as the different shades of brown, deep red, gold, and especially orange.
Since these are not colors that are used very often in interior decorations, you may wonder how you are going to adopt them.

Today, we are going to focus on one of these fall colors: orange!
Is there room for orange in a traditionally designed living room? Modern? Mid-Century?

Yes, orange and yellow are welcome in your interior, whatever your style. Find out below some of the creative ways you can use orange in your home interior.

Create an Accent Wall to Define a Space

In the case of a living room open to the kitchen, the dining room, or a bar arranged in the corner of the living room, the creation of an orange accent wall can be particularly interesting.
By painting the furthest wall in orange, you will not only define the space but also warm the atmosphere in your living room.
With brown furniture around, the decor will be even better.

Paint the Wall (S) Orange

We know that painting is the easiest way to freshen up and transform a room. Is your living room well lit naturally?
So do not hesitate to paint two sections of the wall in orange. It is also a perfect option for warming up a contemporary living room.
Don’t feel constrained to using the likes of pumpkin orange here; even sienna can also offer a magnificent decoration.

Use the Natural Version of the Color

If the pumpkin orange seems too visually overwhelming for a Scandinavian decoration, consider using the color as it appears in nature.
Naturally and spontaneously, bring a warm touch to the living room and accentuate the orange geometric shapes on the wall painting, if any.

Change Curtains

Whatever the color of your living room, you will find a tone of orange that can look elegant on your curtains.
A combination of blue and orange may not be very common, but it offers a striking rendering.

How About Yellow?

Yellow in your home: fresh and fruity or deep and dark
The end of summer and fall are an inexhaustible source of inspiration for tones like yellow.
Just think of the apples and pears that ripen on the trees, but also the leaves that change color in the fall.
The green leaves gradually change color to red and yellow as autumn approaches.

Nature is the primary source of inspiration for tones like yellow, green, and orange. Vegetable dyes provide these colors.
So these are colors that combine effortlessly. These soothing and neutral tones can perfectly coexist with the most improbable tones.

Yellow combines perfectly with light shades of brown, and beige-white. When using the color yellow, pay attention to the rate of light in the room.
In addition, the color should be used sparingly. It is recommended to paint a maximum of half the space in yellow.

What Shade Of Yellow Should You Use?

The yellow color represents optimism and energy, like the sun. You have different shades of yellow.
Dark yellow goes very well with shades of brown, gray, and black. The other hues can be very chic; they exude class and quality.
Please note: a surplus of yellow creates too bright space, which can overwhelm the eye.

Light yellows such as Gentle Yellow, Sunrise, and Prairie Gold are perfect colors to combine with dark shades of brown and gray. They are suitable for living rooms, bedrooms and children’s bedrooms. These colors bring both tranquility and cheerfulness to the room and a certain light.

Need Help With Interior Painting in Richmond, MI?

Interior painting is a priceless, inexpensive, and effective way to add some color into your home, protect your property, and make your interior a little more interesting.

If you need professional help with your home interior repainting project, Eason Painting can help.

We have years of experience offering residential painting services in Macomb Township, Washington Township, Ray Township, Rochester, Rochester Hills, Romeo, Armada, Troy, Shelby Township, Harrison Township, Chesterfield, and Clinton Township, MI.

Call us today on 586-465-5081 for a FREE painting estimate.


Read more
Interior Painting Richmond, MI_ Paint Color Ideas for Small Spaces

Interior Painting Richmond, MI: Paint Color Ideas for Small Spaces

Interior Painting Richmond, MI: Paint Color Ideas for Small Spaces

Are you planning for interior painting in Richmond, MI?
Let your creativity run free for your small spaces with these ideas to decorate your studio or make the most of accent walls, corridors, and other corners of your home with paint.

Light Colors above Eye Level

Since color is a choice that is never discussed, there is no single recommendation for small rooms, but by choosing a light color for surfaces above eye level, you create a visual effect that allows the walls to stretch up.

Light colors can also help make a room appear taller or more open, especially if the room is small or has a low ceiling.
Cover the ceiling with a lighter shade, or that varies slightly from the color of the walls.
The subtle contrast adds depth and dimension to the room without breaking the unity of existing colors.
For the ceiling, the mat finish is the most commonly used.

In a small bathroom, there is no better opportunity to use a bold color to make it more intimate.
You don’t have to take into account the harmony of the colors since the door of this room is usually closed.
Take the opportunity to express your creative sense through color.

No natural light? No problem!

Rich and vibrant colors can be combined with artificial lighting sources to impose themselves naturally.
Don’t be afraid to create contrasts

Accent Color

A wall covered with an accent color immediately attracts attention, whatever the room.
If you live in an apartment, condominium, studio, or house with several small rooms, bold color on a single wall makes it easy to add architectural interest to a small space.

Consider shades that brighten up a room like a sky blue to infuse your interior decor with a bit of the blue of the sky.

The Corridor

Many of the hallways are narrow and poorly lit, especially in townhouses and apartments.
The pale colors make it possible to open this reduced space.
If you want to add a soft glow and a little warmth to what is often overlooked in a home, consider colors like Antique White or Soft Satin to brighten up your hallways.
In addition to making them appear larger, these colors reflect natural light, drawing it from other rooms in the house.

Is Your Hallway Dark?

Consider an off- white from for a refined decor that elegantly illuminates dark passages.

Enhance Details with Color

Decorate certain corners and details to infuse a little playful charm.

The Bottom Line

When carefully chosen, colors have a way of opening and brightening up small paces that are often challenging to keep bright without artificial light.

If the lack of sufficient light is a significant problem in the small space you intend to paint, consider using brighter or neutral colors to open up your space visually.
Also, try painting your ceiling in white or bright color to lend the same effect.

If lighting is not a problem, feel free to experiment with dark colors, or even create an accent wall to make things a little more interesting.

Need Help With Interior Painting in Richmond, MI?

Interior painting is a priceless, inexpensive, and effective way to add some color into your home, protect your property, and make your interior a little more interesting.

If you need professional help with your home interior repainting project, Eason Painting can help.

We have years of experience offering residential painting services in Macomb Township, Washington Township, Ray Township, Rochester, Rochester Hills, Romeo, Armada, Troy, Shelby Township, Harrison Township, Chesterfield, and Clinton Township, MI.

Call us today on 586-465-5081 for a FREE painting estimate.

Related Posts

Interior Painting Richmond, MI: Choosing Paint Color for Your Home office

Interior Painting Richmond, MI: Easy Ways to Stretch You’re Decorating Budget with Color.

Interior Painting Richmond, MI: Important Steps to Keep In Mind


Read more
Special Effect Painting_ 8 Trendy Textures to Look Out For

Special Effect Painting in Rochester, MI: 8 Trendy Textures to Look Out For

Special Effect Painting in Rochester, MI: 8 Trendy Textures to Look Out For

Being more than a simple wall covering, paints and plasters have become real decorative ornaments for many home interiors in Rochester, MI.

Why limit yourself to color when you can play with textures? With increasingly sophisticated material and imitation effects, the new special effect paints (or decorative coatings) decorate your walls with a thousand inimitable textures.

Here are the top 8 decorative painting trends that you should keep up within 2020 and beyond; Waxed Concrete

Effect Painting

Having become essential in the decorative grammar of contemporary interiors, waxed concrete is now used in a whole range of products that are less complex to apply.

Waxed concrete effect paint is typically applied with a roller and then smoothed with a trowel to obtain the “worked” effect of the concrete; an economical and ultra-design alternative is to put them on walls and woodwork.

Marbled Effect painting

Another increasingly trendy decorative plaster: marbled effect paints—ideal for giving a sophisticated aesthetic to interiors and are offered in multiple colors.

Ideal for: spacious, bright, and contemporary interiors, smooth walls, and well-prepared surfaces.

Metallic Effect Painting

The metal effect paint is also part of the big “hits” Decorative painting trends that have risen in recent years.

Best for giving an original and contemporary effect to offices, living rooms, and other living rooms, it goes particularly well with a designer or vintage furniture.

Ideal for small decorative touches, in contemporary interiors. Preferably in bright rooms, the metallic effect is always more successful with dark shades.

Sanded Effect Painting

In tune with the times too, sandblasted effect paints give a chic and warm effect to interiors.

Easily applied by brush, these paints provide a perfect rendering in a cozy and bright living room.

Ideal for: interiors with authentic or even traditional decor, intimate and warm spaces

Iridescent Effect Painting

The latest big trend of the moment on the walls, the iridescent effect paint gives an incomparable radiance and depth effect to the interiors.

A precious texture, to say the least, best for combine with deep colors for a refined effect.

Ideal for: combinations of materials. Iridescent paint should be applied with small decorative touches in combination with more matte colors.

Animal skin effect painting

For fans of the “jungle” and Baroque aesthetic, decorative paints and coatings now imitate the leather and coat of the most exotic species.

They provide a multitude of patterns from elephant leather to python skin!

Ideal for: interiors with a refined decor or decorative effect on an architectural element (headboard, mirror, doors, etc.)

Glitter paint

Glitter paints have made very big progress in recent years. Available in multiple colors (beige, pink, black, blue …), this type of decorative painting can be used both to boost the decor of a living room, a kitchen, or transform a little girl’s bedroom into a real princess dream!

Ideal for: children’s bedrooms and original decorations.

Velvet effect painting

Want delicate walls for an intimate atmosphere? Pearlescent and iridescent effect paints are made for you.

Ideal for: renovating an interior to give it a touch of modernity. Combine with matte finishes on the other walls.

Need Help With Interior Painting in Rochester, MI?

Interior painting is a priceless, inexpensive, and effective way to add some color and texture in to your home, protect your property, and make your interior a little more interesting.

If you need professional help with your home interior repainting project, Eason Painting can help.

We have years of experience offering residential painting services in Macomb Township, Washington Township, Ray Township, Rochester, Rochester Hills, Romeo, Armada, Troy, Shelby Township, Harrison Township, Chesterfield, and Clinton Township, MI.

Call us today on 586-465-5081 for a FREE painting estimate.

You may also like:

Interior Painting Richmond, MI: 6 Ways to Add Color into Your Home

5 Common Interior Painting Mistakes to Avoid In Clinton Township, MI


Interior Painting Clinton Township, MI: How to Evaluate a Painting Estimate

Read more
Interior Painting Romeo, MI_ Critical Rules and Tips to Keep In Mind.

Interior Painting Romeo, MI: Critical Rules and Tips to Keep In Mind.

Interior Painting Romeo, MI: Critical Rules and Tips to Keep In Mind.

Have you decided to upgrade your interior paint? From the choice of paint to the preparation of the surface through the application technique, we share the basic rules you need to follow for a successful and durable paint job.

Let’s get in right away:

Interior Painting: Buy the Appropriate Material
Choose brushes preferably in raw wood and having a good grip.
Be sure to choose synthetic bristles for water-based paint and natural silk or wool bristles for oil-based paint.
Reserve the rollers for lacquers, glossy paints, and anti-drips for ceilings.

Interior Painting: Calculate the Right Volume of Paint Needed

If you’re hiring a painting contractor, he will calculate the necessary volume of paint himself.
On the other hand, if you do the work yourself, before buying the paint, measure each wall and ceiling of the rooms you want to paint as follows: length of the wall (x) width of the wall to be painted.

Note: Do not forget to take into account the ceilings if you plan to paint them. To be sure you have a sufficient amount of interior paint, check the hiding power of your paint.

Choose The Interior Paint According To The Room And Use

Opt for oil-based paint or water-repellent paint for damp rooms (bathroom – kitchen), its formula being resistant to humidity.
There are also special paints for rooms particularly subject to high levels of humidity.

In terms of finishes, satin paint is generally more suitable for living rooms while matt finish paint is generally intended for bedrooms.
If in doubt, a professional will be able to direct you to the product that best suits your needs and your budget.

Interior Painting: Choose Paint Color

Choosing the right paint color is often a matter of taste and trend.
However, some basic rules exist, such as favoring light colors in small spaces and reserving the darkest colors for walls with doors and windows.
Another rule to keep in mind: Don’t vary more than 2-3 colors in shades (in the same color range) to avoid an overly patched effect in the decor.

Interior Painting: Pay attention to Quality

Before choosing the paint, take the time to read the technical sheets.
You can always opt for economical paints, but remember to check that the paint will work well for your surface.
Does the product has the necessary performance qualities? For all delicate painting work (wet rooms, special rendering for decoration, etc.), it is nevertheless advisable to opt for higher ranges and pay a little more.
It will be the best guarantee of quality and durability over time.

Surface Preparation

Before applying paint to the walls and ceiling, you need to prepare them.
If they are too damaged, you can consider fixing a faulty ceiling or sanding the walls.
In most cases, you will just have to clean and fill the holes.
Surface preparation will allow you to obtain a quality interior paint job.

Interior Painting: Consult a Professional

If you don’t have the skills, tools, and experience to do interior painting, consider hiring a painting contractor in Romeo, MI.

Be sure to hire a painting contractor that is reliable, honest, and efficient, has sufficient interior painting experience, and uses high-quality paints.
If you haven’t identified a professional painter for your project yet, our team at Eason Painting can help.

We have years of experience offering residential interior painting services in Macomb Township, Washington Township, Ray Township, Rochester, Rochester Hills, Romeo, Armada, Troy, Shelby Township, Harrison Township, Chesterfield, and Clinton Township, MI.

Call us on 586-465-5081 for a FREE non-obligatory estimate.

You may also like:

Interior Painting Richmond, MI: 6 Ways to Add Color into Your Home

5 Common Interior Painting Mistakes to Avoid In Clinton Township, MI


Interior Painting Clinton Township, MI: How to Evaluate a Painting Estimate


Read more
Kitchen cabinet painting Romeo, MI_ Typical steps to keep in mind

Kitchen cabinet painting Romeo, MI: Typical steps to keep in mind 

Kitchen cabinet painting Romeo, MI: Typical steps to keep in mind 

Now is a good opportunity to review your interior decoration, and update some of the interior jobs that you’ve been postponing.

Did you know that it is possible to give a major facelift to your kitchen simply by refreshing your cabinets?

In today’s article, we will be going through the essential steps that you or your professional painting contractor will typically follow to restore your kitchen cabinets.

Have a look;

Disassemble The Cabinets And Remove The Accessories

Before removing all of your cabinet doors, be sure to make a plan of their different positions.

Use numbered labels to identify the place for each: if you have 25 identical panels, once removed, you will have a hard time which panel needs to go where.

Do the same for drawers and other panels.

It is also recommended that you remove all accessories such as handles and hinges to facilitate uniform and quality finish.

Preparation

Like most painting projects, preparation is an essential step.

If you plan to change the handles and/or the hinges when your panels are repainted, you should remember to fill the holes left by the old accessories (if they do not correspond to the new accessories, of course) before painting.

To do this, use a latex wood filler and follow the manufacturer’s instructions.

Then, it is strongly recommended to clean your cabinets with a degreaser (e.g., TSP) to remove all the residues that have accumulated over time (grease, dust, food, etc.).

Subsequently, sanding the surface to be painted is necessary so that the new paint adheres well.

To make your work easier and faster, we recommend using an electric sander and medium-grit sandpaper.

Apply A Primer

In most cases, the application of a primer is necessary before applying the desired paint.

We recommend a 100% acrylic primer or an alkyd primer, which is particularly suitable for this type of work.

Determine The Type Of Material Used

Before undertaking any painting project, be sure to identify the material your cabinets.

Is it melamine, wood, laminate, plywood? Depending on the type of surface, the steps needed to restore your cabinets and get a quality result will vary.

We also suggest that you carry out a color test on a small area of ​​your cabinets to have an overview of the result, since the final color may vary depending on the type of material on which it is applied.

  • For melamine and laminate: Melamine and laminate are not the ideal surfaces for this type of work, but it is still possible to paint them. For the paint to adhere as much as possible, first sand the surface to be painted. Then apply a specialized primer.
  • For varnished surfaces: For surfaces with one or more layers of varnish accumulated over the years, a good sanding must be done before applying the primer.
  • For wood: Real wood cabinets, such as oak, requires special treatment. It is recommended to sand the panels, apply a primer, and then stain them, not paint them. Since the wood has “pores,” the paint may clog them and cause the wood to crack.

Painting WITH A Sprayer

To quickly paint your kitchen cabinets and for a uniform and completely smooth finish, the paint spray gun is recommended.

You will simply have to practice a little on pieces of cardboard or scrap wood before starting your work.

The Bottom Line 

This is just a general outline of what happens during a kitchen cabinet painting session. The details and materials required will vary depending on the size of your job, the material of the kitchen cabinets, and the method of painting.

If you need professional help repainting your kitchen, kitchen cabinets, or even the entire home interior, our team at Eason Painting would be more than happy to help.

We have years of experience offering residential painting services in Macomb Township, Washington Township, Ray Township, Rochester, Rochester Hills, Romeo, Armada, Troy, Shelby Township, Harrison Township, Chesterfield, and Clinton Township, MI.

Call us today on 586-465-5081 for a FREE painting estimate

You May Also Like

Kitchen Cabinet Painting, Shelby Twp: Ideas for Two-Toned Cabinets

How to strip and re-stain kitchen cabinets Clinton Township, MI


Read more
Why You Should Consider Organic Paint for Your Interior Painting Project in Romeo, PA

Why You Should Consider Organic Paint for Your Interior Painting Project in Romeo, MI

Why You Should Consider Organic Paint for Your Interior Painting Project in Romeo, MI

Compared to conventional paints, organic paints have components that do little harm to the environment.
If you are interested and want to use ecological paint for your next repainting project in Romeo, MI, this article is for you;

Goof for Your Environment 

Unlike acrylic and oil paints created from several chemical components, ecological paints consist of natural products.
Here are the main components: For the fillers, mainly chalk, vegetable oil, marble flour, silica or hemp are used. For diluents and solvents, they use turpentine, metal oxides, citrus terpene and of course water. For binders, there is flax, natural resins, beeswax, etc. The most commonly used pigment is a mineral oxide (iron or ocher). Note that these components are all biodegradable and recyclable.

On application, the 100% ecological paint is odorless. While artificial paints give off an extremely toxic odor, 100% natural paints give off very little harmful volatile components or VOC (volatile organic compounds) during painting work and drying time.

By using organic house paint, you will preserve the indoor air quality of numerous toxic and carcinogenic substances.

Ecological Paints Are Easy to Apply
Ecological paints are easily applied with a roller, brush, and sponge. Washable quality, ecological paints are the allies of bedrooms, dining room, living room and all other sensitive areas, such as the bathroom, the corridor, the stairwell, etc.

Natural Paint Has Excellent Covering Power

Ecological paints have a high covering power for which, in principle, two layers are more than enough to cover underlying stubborn stains or dark colors.  Note: the covering power of organic paints may vary depending on the brand chosen. Good quality paint obviously costs more, but often with such, you will need fewer coats of paint to hide imperfections.

Organic House Paint Is Waterproof

Acrylic paints and oil paints are often loaded with resins and other toxic substances that make walls waterproof. Natural paints, on the other hand, follow a completely different logic.

These paints cover the walls while letting them breathe, in other words, they allow out all the internal humidity from the substrates. In summary, organic paints are microporous.

Natural Paint Has an Excellent Shelf Life and Ages Well

Formerly known for their short lifespan and premature aging, the popularization of organic paints has enabled different brands to make production profitable and improve the quality of paints.
100% natural paints have never stopped evolving.

Today, thanks to their new components such as soy lecithin or boron salt, biological paints are more easily resistant to climatic aggressions and other factors of degradation.

Unlike conventional paints, organic house paints have excellent weather and ultraviolet light stability. The pigments do not tarnish and are not easily washed away by rainwater.

Other Advantages of Using an Ecological Paint for Your Home’s Interior 
Natural paints offer a full range too (there is paint for wood, siding restoration, stucco, etc.)The price of your painting work per m2 using a 100% natural paint is equivalent or lower than a good quality classic paint, it allows you to personalize the interior of your house or apartment Now widely available, just like conventional paints. It is ideal for painting the interiors

Things to Note:
• Organic paints can sometimes be allergenic• Compared to traditional paints, organic paints take longer to dry

Need Help With Interior Painting in Romeo, MI?
Interior painting is a priceless, inexpensive, and effective way to add some color into your home, protect your property, and make your interior a little more interesting.

If you need professional help with your home interior repainting project, Eason Painting can help.
We have years of experience offering residential painting services in Macomb Township, Washington Township, Ray

Township, Rochester, Rochester Hills, Romeo, Armada, Troy, Shelby Township, Harrison Township, Chesterfield, and Clinton Township, MI.

Call us today on 586-465-5081 for a FREE painting estimate.


You may also like:

Interior Painting Richmond, MI: 6 Ways to Add Color into Your Home


5 Common Interior Painting Mistakes to Avoid In Clinton Township, MI


Interior Painting Clinton Township, MI: How to Evaluate a Painting Estimate


Read more
Interior Painting Richmond, MI_ Important Steps to Keep In Mind

Interior Painting Richmond, MI: Important Steps to Keep In Mind

Interior Painting Richmond, MI: Important Steps to Keep In Mind


One of the easiest and cheapest ways to update a room or even completely change its style is to repaint it.

You can easily do this yourself for little cost, but it is important to prepare the surfaces to be painted properly.

The primer is essential to get a professional finish, because if you do not use it, the paint can be irregular in appearance, crack and flake off.

Here are the basic steps involved in interior wall painting for most projects.

However, before starting, be sure to lay a canvas in the room, remove movable items out of the way, clean the wall and apply a coat of primer.

  1. Start By Painting the Edges. 

Dip a 6.5 cm beveled brush into the paint you have chosen.

Dip only a third of the brush and tap it rather than wiping it on the pot to remove excess paint.

Paint the edges and corners of the wall with colored bands of about 5 cm.

  1. Dip A Roller In The Paint.

To fill the central area of ​​the wall as well as the parts that you have not yet painted –the best method is using a roller.

Here are some tips for covering the paint roller.

  • Moisten the roller before dipping it in paint –Moisten it with water for latex-based paints.
  • For oil-based paints, moisten the roller with a suitable thinner.
  • Pour enough paint into the pan so that it almost rises to the grid. It is not necessarily better to put more.
  • Dip the roller in the tray filled with paint and press it against the grid to remove excess paint while covering the roller evenly.
  1. Paint The Wall.

After dipping the roller in the tank, cover the wall with paint by zigzagging horizontally (like M or W shapes).

Continue using these movements until the wall is fully painted. When applying the paint this way, it is important to think about the following points.

  • When following the zigzag shape, do not remove the roller from the wall. Keep it glued against the surface until you need to recharge your roller with more paint.
  • When the roller starts to make a sticky sound as you roll it over the wall, it’s time to reload it with paint. Dip it into the tray and repeat the above step.
  • Let the paint dry for several hours.


  1. Apply a coat of paint on the moldings.

You may have moldings to paint. Again, you can either protect the wall with masking tape (wait for the paint to dry before sticking the tape to it) or paint directly.

  • To paint wide moldings, use a wide, straight brush.
  • To paint narrow moldings, use a 2.5 to 5 cm beveled brush.
  1. If Necessary, Apply A Second Coat of Paint.

For best results, apply the second coat following the same procedure as in the first.

Pro Tip: Color the primer with a little paint that you will apply to the walls. This way, the paint will have a better chance of covering the primer well.

Need Help With Interior Painting in Richmond, MI?

Interior painting is a priceless, inexpensive, and effective way to add some color into your home, protect your property, and make your interior a little more interesting.

If you need professional help with your home interior repainting project, Eason Painting can help.

We have years of experience offering residential painting services in Macomb Township, Washington Township, Ray Township, Rochester, Rochester Hills, Romeo, Armada, Troy, Shelby Township, Harrison Township, Chesterfield, and Clinton Township, MI.

Call us today on 586-465-5081 for a FREE painting estimate.


You may also like:

Interior Painting Richmond, MI: 6 Ways to Add Color into Your Home

5 Common Interior Painting Mistakes to Avoid In Clinton Township, MI


Interior Painting Clinton Township, MI: How to Evaluate a Painting Estimate


Read more
Interior Painting, Richmond, MI_ 8 Color Combinations to Enhance Your Bathroom

Interior Painting, Richmond, MI: 7 Color Combinations to Enhance Your Bathroom

Interior Painting, Richmond, MI: 7 Color Combinations to Enhance Your Bathroom

Repainting or renovating your bathroom in Richmond, MI? Get out of the aqua blues, here are ideas full of style and originality to transform your bathroom space.
Colors have a direct influence on our well-being. As soon as you get out of bed, enjoy the benefits of energetic and cheerful shades in the bathroom to start the day in a good mood.

1. Pink and orange

This duo is made up of the two most positive colors: pink and orange.
Both send messages of happiness and positive energy.
Combined with white, they become even brighter and will be your ray of morning sunshine.

Choose light white as the base color and use pink and orange in lively touches in accessories and decoration.

2. Blue And Anise Yellow

This sharp contrast brings together the tranquility of blue and the strong luminosity of yellow, a sort of sea-sun alliance.
Sunflower or anise yellow works fine, generally choose yellow in a lively tone for its energy and warmth.
Choose a deep blue to accentuate the contrast: cobalt or a deep navy will be magnificent with a bright yellow!

Playing on the different shades of blue, going as far as white, with a succession of tiles makes it possible to reduce the feeling of the darkest tones on the ground while still maintaining the color intensity.

3. Blue and white

In a completely white bathroom, the shower screen can be the most colorful area, and it gives it more depth.
Adding this color in accessories or furniture handles is a simple trick to bring color into a white bathroom.
A bright shade like a solar yellow, a bright pink, or a sparkling turquoise will accentuate this bright and very cheerful contrast.

On the other hand, if you are looking for a more calm and elegant atmosphere, opt for a darker color.
A beautiful azure blue will be very soothing.
Yellow and gray

Here is an easy-going duo, between solar yellow and very wise gray. Particularly recommended for windowless bathrooms, this combination brings a lot of light and softness to the smallest spaces.

4. Red and white

In this powerful combination, the energy of red is softened by white.
You can use it to bring cheerfulness and dynamism to space.
A red floor gives an impression of solidity and instantly warms a slightly cold room, which can be the case for “clinical white” walls
Prefer the lightest and brightest reds, like a vermilion or a coral, to accentuate the lightness of the checkerboard effect.

5. Pink and brown

This association of colors stands out particularly well in an environment of slightly pearly or bronze tiles.
A touch of gold will make it luxurious and sensual.

6. Orange and brown
Here is a very active color, especially in its most candid tones: pure orange or orange-red.
To soften it and keep your feet on the ground, combine a beautiful sparkling orange with dark wood tones, on the floor, or in furniture.

7. Green and white

Green is one of the most challenging colors to recommend in a bathroom; it’s unfortunately accused among others (unfairly) of darkening a room.
Ignore these prejudices for a moment and look at the many shades available: sparkling and fresh mint greens, sweet and refined jade, bright and tangy anise –without forgetting the depth of real turquoises and sumptuous emerald green.

Combining different greens is easy, because these shades have, as in nature, the ability to relate to each other.

Pro Tip: mint green, fresh and invigorating, is one of the most active in the range. It is close to the real “pure green” and brings authentic energy to the room.

Painting your bathroom is an ideal way to freshen up your dull and faded walls and also increase the value of your home.

If you need professional help with your home interior repainting project, our highly skilled and experienced team at Eason Painting can help.

We have years of experience offering residential painting services in Macomb Township, Washington Township, Ray Township, Rochester, Rochester Hills, Romeo, Armada, Troy, Shelby Township, Harrison Township, Chesterfield, and Clinton Township, MI.

Call us today on 586-465-5081 for a FREE painting estimate.


You may also like:

Interior Painting Richmond, MI: 6 Ways to Add Color into Your Home

5 Common Interior Painting Mistakes to Avoid In Clinton Township, MI


Interior Painting Clinton Township, MI: How to Evaluate a Painting Estimate


Read more
Interior Painting Ambler, PA_ Crucial Tips For Kitchen Painting

Interior Painting Richmond, MI: Crucial Tips For Kitchen Painting

Interior Painting Richmond, MI: Crucial Tips For Kitchen Painting

Painting your kitchen in Richmond, MI is different from other parts of the house.
In many ways, it is a more forgiving space than that of the bedrooms or living room because you are dealing with limited wall space.
Yet, predictably, you pay the price in another way: cleaning and prep work.

Let’s take a look at the process in detail, and some tips you should keep in mind.

Kitchen paint colors

Choose your kitchen paint color wisely and carefully, especially if you use your kitchen to entertain guests and coffee breaks.

The best kitchen colors tend to create a high visual impact and align it with the idea and vibe of dining and wining.

For example, blue tends to be one of the worst colors for a kitchen because there are few really blue foods and also, research has shown that blue lowers the appetite.

Choose the Paint Finish

Think of paint finishes as you would color spectrum on a paint color wheel.
Except, in this case, the spectrum is not colors but levels of brightness.

Matte (flat, non-shiny) at one end, and gloss (so shiny you can almost see your face) at the other end.

What is the best paint finish for the kitchen? Satin and semi-gloss, ranking in the middle of this spectrum, give the best results in the kitchen: bright enough to be wiped but flat enough to hide surface imperfections.

Prepare Your Room

You must determine the area in square feet of your walls to know the quantity of paint to buy. You will either:

Paint an empty room: Usually new construction, this kitchen is simply drywall. Calculate the area of each wall by multiplying the height of the room (probably 8 feet) by the length of the room (variable).
Then add all the walls to get the total.

Paint a finished room: Usually a remodel or repaint, this kitchen is fully equipped with cabinets, appliances, flooring, etc.
Here you have a lot less square footage than an empty room.
The cabinets take up a lot of wall space. One method is to assume it is an empty room and buy enough paint to cover all the walls as if it were an empty room.
The extra paint you have left is great to save for those inevitable touch-ups.
If you are strapped for cash then you will need to carefully calculate the size of all the small stripes, squares and rectangles on the wall.

Clean the Surfaces to Be Painted

Unless you’re dealing with an empty room with relatively new drywall, the kitchen walls usually need a lot of cleaning.

Many times, the areas above and around the stove, oven, and counters need to be cleaned using hot water and trisodium phosphate.
The door trim can also benefit from TSP treatment.

Walls more than five feet from the areas mentioned above may require just little more than a light dry dusting.
Remove dust and cobwebs from the tops of baseboards and other trim with a vacuum cleaner and a damp cloth.

Tools: Brush, roller or sprayer?

For an empty room, use a paint roller or sprayer for the walls. For window and door trim, use a brush.

For a finished room, use a roller on large areas of the wall and a paintbrush for small strips. Again for the window and door trim, use a brush.

Masks and Canvas

For the empty room with no finished floor, you don’t need much masking and covering.

Just paint. The drops of paint on the sub-floor don’t matter; they will be covered later.
If you are using a paint sprayer, use plastic to cover the doors of the adjoining rooms so that the mist doesn’t penetrate.

For the finished kitchen, apply duct tape to the trim before painting the walls.

Place canvas on the floor. Drape large items such as cupboards, appliances, and tables with plastic sheeting or a self-adhesive product like Easy Mask Tape & Drape.

The Bottom Line

If you don’t have the skills, tools, and training, you should consider hiring a professional painting contractor for help.

The painter will advise you on the paints and types of finish best suited to your building and produce the best paint job.

If you need professional help repainting your kitchen, kitchen cabinets, or even the entire home interior, our team at Eason Painting would be more than happy to help.

We have years of experience offering residential painting services in Macomb Township, Washington Township, Ray Township, Rochester, Rochester Hills, Romeo, Armada, Troy, Shelby Township, Harrison Township, Chesterfield, and Clinton Township, MI.

Call us today on 586-465-5081 for a FREE painting estimate.


You May Also Like:

Kitchen Cabinet Cleaning Tips for Extended Durability


6 Questions to Ask When Hiring an Interior Painter in Clinton Township, MI


6 Tips for A Perfect Interior Paint Job in Clinton Township, MI

Read more
Residential Painting Richmond, MI_ When to use anti-humidity paint

Residential Painting Richmond, MI: When to use anti-humidity paint

Residential Painting Richmond, MI: When to use anti-humidity paint

Anti-humidity paint helps prevent moisture stains on walls, but it is not a solution for all humidity problems when doing residential painting in Richmond, MI.

In this article, we will discuss when it is recommended to apply anti-humidity paint and what you should pay attention to with such kinds of paints.

But as usual, if you’re unsure of any decision on which type of paint to use, or how to go about it, consider hiring an experienced painting contractor in Richmond, MI like Eason Painting

When To Use Anti-Humidity Paint?

This type of paint can be applied preventively to protect the walls from penetrating humidity.
It is very useful for naturally damp rooms, such as the bathroom or the kitchen.
The siding can also be treated with anti-humidity paint to prevent (or fight against) water infiltration.

What If I Already Have Humidity Problems?

Some humidity problems can be resolved by applying anti-humidity paint, but others require more treatment.

Wet walls

If you are dealing with moisture in the walls, this may be due to several reasons.
Hairline cracks in the paint, for example, is a common problem that can allow moisture to get behind the paint film.

Generally, tackle the humidity problem first before applying pain –this way, the treatment will be a definitive solution.

But in the case of minor surface moisture infiltration, applying anti-humidity paint may be enough to solve the problem.

Mold

When it comes to treating mold, anti-humidity paint can do the trick, but again, it is highly recommended that you address the underlying humidity issues first.
As you may already know, mold is often caused by excess moisture.

Therefore, treating a moisture problem can readily reduce the formation of mold. Good ventilation can also prevent these problems from appearing in the first place.

Anti-Humidity Paint For Interior and Exterior Walls

Moisture problems can occur on both interior and exterior walls. This is why there are anti-humidity paints for these two applications.

Exterior Walls: Waterproofing Paint

Applying anti-humidity paint to exterior walls can be quite helpful in preventing moisture infiltration and water staining.
Besides, this additional layer of paint also serves to protect the siding against unwelcome organic growth.

Before painting exterior walls with anti-humidity paint, the siding must be properly cleaned and prepared for better paint adhesion.

Protect Exterior Walls

The anti-humidity paint is used to protect the interior walls against penetrating humidity. Also, the paint layer masks the moisture spots on the walls in question.

This paint is especially handy in rooms where condensation typically forms, such as the kitchen and the bathroom.

Tackle Moisture Problems At Their Source!

Anti-humidity paint helps prevent certain humidity problems.
In some cases, like moisture infiltration, it can even solve existing problems.
But if you are dealing with a much bigger problem, the painting will not be enough to solve it.

As we mentioned, it’s best to fix the humidity problem first before moving on to painting. Consider repainting as a final step to solving the water stain and humidity problem.

If you need professional help dealing with water stains and humidity in your home, Eason Painting can help.

We have years of experience offering residential painting services in Macomb Township, Washington Township, Ray Township, Rochester, Rochester Hills, Romeo, Armada, Troy, Shelby Township, Harrison Township, Chesterfield, and Clinton Township, MI.

Call us today on 586-465-5081 for a FREE painting estimate.


You may also like:

Interior Painting Richmond, MI: 6 Ways to Add Color into Your Home

5 Common Interior Painting Mistakes to Avoid In Clinton Township, MI


Interior Painting Clinton Township, MI: How to Evaluate a Painting Estimate


Read more
Interior Painting Richmond, MI_ 6 Ways to Add Color into Your Home

Interior Painting Richmond, MI: 6 Ways to Add Color into Your Home

Interior Painting Richmond, MI: 6 Ways to Add Color into Your Home

When it comes to interior décor, not every homeowner in Richmond, MI, has the money or time to re-invent their interior.

Luckily, you don’t have to spend so much money to infuse your favorite colors into your living space.

In this article, we share some tips and hacks on how to add blue color, among other popular colors, into your home interior in Richmond, MI.
Ready?

1. Add a Backsplash

A backsplash is a great way to add a splash of color to your decor.
If you don’t already have one, this is the perfect opportunity to add a little extra interest to your living space.

You can integrate your favorite color where it lends itself best, whether in the kitchen, the bathroom, or the laundry room.

Besides, there is a solution for all budgets, from the painted backsplash to wallpaper, including stickers.

2. Refresh Your Kitchen Cabinets

If you are tired of seeing your old-fashioned cabinets, give them a second life with a new color outlook.
There are several ways to give style to your old kitchen cabinets, including applying new paint and changing the door handles.

3. Add Accessories to Your Décor

Adding blue accessories can also do the trick.
Besides, this option is rather economical and straightforward.
It can be a matter of simply changing your cushions, a few throw pillows and lampshades.

Otherwise, you could create your own decorative elements with ornaments that are no longer in use.
Just apply a coat of spray paint on the chosen object, let it dry, and voila!

It will surprise you what magic you can do with a simple can of spray paint and unused items lying around.
A quick example is an empty bottle of wine spray-painted in your favorite color.

4. Create an Accent Wall

The blue color represents calmness, so it’s a great shade to add to your bedroom.
You could also integrate some shades of blue in other rooms to inspire relaxation. Again, there are 1,001 ways to create an original accent wall inexpensively.

5. Decorate or Paint a Ceiling

Have you ever thought of decorating or painting a ceiling in color?
This trend is becoming more popular with many homeowners in Richmond, MI, and professional decorators love it too!
Check out some photos on Pinterest, and some results will impress you.

6. Transform an Old Piece of Furniture

If you have an old piece of furniture that is not used at home, it’s time to transform it! With a little time and paint, everything is possible.
You don’t have to be a professional to carry out this project. Still, if you’re actively using a piece of furniture or valuable antique furniture, you’re better hiring a professional.

Ready to Add Some Color into Your Home Interior?

Interior painting is a priceless, inexpensive, and effective way to add some color into your home, protect your property, and make your interior a little more interesting.

Choosing an interior paint color can be fun and exciting, but it can also be a little intimidating.

If you need professional help with your home interior repainting project, Eason Painting can help.

We have years of experience offering residential painting services in Macomb Township, Washington Township, Ray Township, Rochester, Rochester Hills, Romeo, Armada, Troy, Shelby Township, Harrison Township, Chesterfield, and Clinton Township, MI.

Call us today on 586-465-5081 for a FREE painting estimate.


Read more
The Common Interior Painting Mistakes to Avoid In Clinton Township, MI

5 Common Interior Painting Mistakes to Avoid In Clinton Township, MI

5 Common Interior Painting Mistakes to Avoid In Clinton Township, MI

A fresh coat of paint on your home interior in Clinton Township, MI, can dramatically improve the aesthetics, protect your walls against rapid deterioration, and ultimately add value to your home.

The best way to gain these benefits is by hiring a professional painting contractor in Clinton Township, MI, to do the job for you.

The pros have the training experience and the right tools to produce a clean, durable job.

However, if you want to try DIY interior painting, here are some of the most common mistakes you should avoid;

  1. Assuming The Walls Are Clean

Even if at first glance, they do not seem dirty, your walls have accumulated dust.

To be successful in your painting, the surface must be perfectly clean.

So remember to dust and/or wash them well.

  1. Painting On A Poorly Primed Surface

Wall painting requires a clean and smooth surface: to apply paint on new walls, all it takes is a good dusting followed by a suitable undercoat.

For most interior painting jobs, starting with a coat of a primer increases paint adhesion, creates an even surface, and helps covers any stubborn stains and dark old paint colors.

   3. Ignoring old Chipping of Paint

Plan for stripping if you notice flaking problems on the old paint.

If you try to paint on them anyway, the finish will have flaws, and the problem may resurface in just a few months.

Not to mention the fact that the paint can easily peel off since the current coat itself is no longer adherent.


If you notice that the old paint is severely failing and needs a lot of work to prepare the surface, you’re better off hiring a professional painting company that will do all the legwork for you.

  1. Buying Low-Quality Paint

Hoping to save some money, many homeowners look for inexpensive solutions in terms of materials such as paint.

This is also common with some painting contractors who offer cheap painting estimates.

Buying cheap, often low-quality paint might save you some money upfront. However, you’re more likely to get inferior results.

You may notice inadequate paint coverage, poor paint adhesion, and reduced durability.

Ultimately, you might have to spend more to correct some defects that will inevitably occur.

  1. Poor surface Prep

How your paint job turns out is 80% depending on your prep work. Inadequate prep work is the most common cause of premature paint failure.

For instance, painting on a dusty or wet surface can lead to poor paint adhesion, which ultimately leads to paint peeling or bubbling.

So before you even open the paint can be sure to dust, wash, strip the paint, sand, and prime where appropriate.

The Bottom Line

Interior painting is not a complicated task, but if you don’t have the skills, training, and tools, you’re more likely to make one or more of the above mistakes.

Hiring a professional painting contractor is a sure way to avoid the above mistakes and get a clean, flawless, and durable paint job.

If you need professional help with your interior painting project, Eason Painting can help.

Our home interior painting services are available in Washington Township, Rochester, Romeo, Shelby Township, Harrison Township, and Clinton Township, MI.

Call us today on 586-465-5081 for a FREE painting estimate.


You May Also Like: 

6 Questions to Ask When Hiring an Interior Painter in Clinton Township, MI


6 Tips for A Perfect Interior Paint Job in Clinton Township, MI

Read more
Interior Painting Clinton Township, MI_ How to Evaluate a Painting Estimate

Interior Painting Clinton Township, MI: How to Evaluate a Painting Estimate

Interior Painting Clinton Township, MI: How to Evaluate a Painting Estimate

Hiring a professional painting contractor in Clinton Township, MI is the best way to get high-quality, flawless and durable painting results.

Whether you’re planning for interior painting, exterior painting, kitchen cabinet painting, or deck staining, you can always find a contractor specialized in that.

Before the contractor finally starts work on your project, they will give you an estimate of the project cost and details.

Now, many times, if you don’t know how to evaluate a painting estimate, you can easily land into a misunderstanding with your contractor.

Ideally, they should be as specific as possible and explain any area of the estimate that you might not understand.

In this article, we want to share some quick tips on getting and evaluating painting estimates from painting contractors.

Getting the Painting Estimates 

A painting estimate in an important document that gives you a rough idea of how much the project will cost, and how long it will take, and the work to be done.

Ideally, you need to get painting estimates from 2 to 3 painting contractors in your area.

Search for local painters who have significant experience, highly rated and reliable.

You can check out their reviews on Google My Business, online business directories, and industry blogs.

Avoid any painters that have significant negative reviews, don’t have a painting website and have nothing to show for their track record.

Choose three of the best painting contractors and invite them to your project separately for a painting estimate.

Be sure to give them similar project details and scope of work so you can get comparable estimates.

What Should Be Included In The Painting Estimate? 

There is no standard format for a painting estimate, at least not yet.

However, there’re very specific details that each painting contractor should provide to help you make the best decision.

Here are the most important details that should be included: 

  • Business contact details and physical address
  • Contact Person name, phone number, and email address
  • Scope of the project
  • Project timelines
  • Paint details–brand, colors, type of paint, number of coats, sheen, etc.
  • Surface prep process
  • The cost of the project
  • Payment specifications
  • Labor
  • Guarantee Of Work
  • Miscellaneous supplies
  • Other terms and conditions

The wording and format may vary from one contractor to another, but the above basic details need to come out.

If you notice any details missing which you deem important, ask for more information from the contractor.

Have a Q&A session with the contractor to learn more about any important details that you’re unsure of before the project gets started.

How to know you’re getting the Best Value for Your Money. 

While cost is a critical factor, far too many homeowners focus so much on how much the project will cost rather than the value they’re getting.

This often results in them working with contractors that cut corners and use inferior labor and materials.

To avoid this, don’t automatically go for the cheapest contractor on the list.

Instead, choose a contractor that offers the best value for your money–this means they use high-quality paint products, do thorough prep work, and employ the best panting practices.

Any painter that requests a significant amount of down payment in advance, uses cheaper paint products, requests payment in cash only, doesn’t offer a guarantee or has no references should be avoided.

Bottom Line 

To get the best painting service, focus on the value that a painter offers by scrutinizing the entire estimate rather than focusing on the cost only.

At Eason Painting, we provide you with a detailed and clear painting estimate with all the information you need to make the decision.

So if you’re looking to update your home’s interior or exterior paint as part of the renovation, our team at Eason Painting can help.

Our home interior and exterior painting services are available in Macomb Township, Washington Township, Ray Township, Rochester, Rochester Hills, Romeo, Armada, Troy, Shelby Township, Harrison Township, Chesterfield, and Clinton Township, MI.

Call us today on 586-465-5081 for a FREE painting estimate 


You Also Like: 

Simple and Affordable Improvements for Your Kitchen in Harrison Twp.

Kitchen Cabinet Cleaning Tips for Extended Durability

Kitchen Cabinet Painting, Shelby Twp: Ideas for Two-Toned Cabinets


Read more
Interior Painting Richmond, MI_ Choosing Paint Color for Your Home office

Interior Painting Richmond, MI: Choosing Paint Color for Your Home office

Interior Painting Richmond, MI: Choosing Paint Color for Your Home office

Choosing the right paint colors for your home office in Richmond, MI can both maximize productivity and boost your creativity.

From greens that improve efficiency to energetic touches of red and yellow, the list for home office colors is virtually endless.

In this article, we will share some tips on how to choose the best paint color for your home office, along with recommendations of the best options;

Relaxing Paint Colors: A Blank Slate

Given the disruptions that can exist at home, it is essential to be able to stay focused in your home office.
Our favorite colors for this purpose include neutrals, blues, and greens.
Some research suggests that green is an effective wall color for increasing focus.

The pale colors are not only soothing but they create superb backgrounds for bulletin boards, images, and shelving without “disrupting” too much in a space where concentration is important.
Also, you can never go wrong with white for a studio or home office.

Lighting and Accent Walls

Accent walls and paneling can provide colorful, creative punctuation for your office, library or closet.
Some of the most vivid and energizing colors we love for accents include Fruity Yellow and California.

Remember, light plays a major role in transforming colors in any room.
So use a balance between work and ambient lighting with attractive light temperatures to make the office both functional and comfortable.

Sheen: The Final Touch

Remember to take into account the effect of paint sheen on the design. Because it reduces glare, a matte finish will produce a soft appearance perfect for an office.

Chairs, desks, cupboards, bookcases or any other office furniture offer the opportunity to use outstanding sheens to add some interest.

Some Specific Color Options for Your Home Office

Brown

Brown: elegant and full of style. This color creates an atmosphere of security, solidity, stability, and comfort.
It combines perfectly with beige to give a distinguished and classic impression.

Blue

Blue: calm and soft. Blue promotes rest and calmness, so it is suitable for an office. Indigo blue, turquoise blue, sky blue, and such other blues are very trendy.

The blue palette is wide and the choices are nearly endless. For an office with a refined look, combine a shade of gray and blue-gray.
A few touches of bright colors like fuchsia can energize the room and add some interest.

Green

Green: calmness and serenity. Make way for nature that invites itself into the house with a tender green that reinforces the impression of tranquility.
A pistachio green covering a single wall, and combined with white or a pearl gray will create an effective balance between calmness and dynamism.
Or the turquoise which uniquely combines the calmness of green and the natural softness of blue.

Neutral office paint colors

Gray, white, beige or taupe blend perfectly into an office. These shades bring a touch of serenity and can be associated with sharper colors like blue or yellow.

Their color also allows you to accessorize your office with style.
You can opt for colorful furniture or a coat rack hanging on the wall

Purple and mauve

Meditation and concentration; when used in an office, purple promotes concentration. But be careful not to use it in a too strong shade which could seem aggressive.
Purple has a way of stimulating creativity in workspaces.

Well, I hope that the quick overview of the best office paint colors was useful.
If you need professional help with your home office repainting project, Eason Painting can help.
Our home interior painting services are available in Washington Township, Rochester, Romeo, Shelby Township, Harrison Township, and Clinton Township, MI.

Call us today on 586-465-5081 for a FREE painting estimate.


You may also like:

Interior Painting Richmond, MI: 6 Ways to Add Color into Your Home

5 Common Interior Painting Mistakes to Avoid In Clinton Township, MI


Interior Painting Clinton Township, MI: How to Evaluate a Painting Estimate


Read more
How to strip and re-stain kitchen cabinets Clinton Township, MI

How to strip and re-stain kitchen cabinets Clinton Township, MI

How to strip and re-stain kitchen cabinets Clinton Township, MI

If your kitchen cabinets in Clinton Township, MI desperately need a change in style and look, you can refresh them by stripping them and giving them a new coat of stain.

If they’re in good shape, hopefully, they’ll only need a slight facelift to look new.

Stripping and re-staining kitchen cabinets is a relatively easy project, but it needs some skills and specific tools.

Stripping cabinets to restore them can save you from having to replace them entirely.
Take the time to consider the color and stain options available on the market.

Do a little research and once you have your idea in mind, follow our step-by-step guide to make your cabinets look new in no time.

Start Stripping the Cabinets

If your cabinets were previously painted, keep in mind that a thin layer of wood will have to be removed with sandpaper to reach the natural wood underneath.

Start by detaching your cabinets, remove the drawers and doors from their location in the wall.

You can do this by using a screwdriver and unscrewing the doors, handles, and drawers.

It is important to keep all screws and hardware in a safe place, as you will still need them.
Also, identify cabinet doors to avoid confusion and to know where they go after the project is completed.

You can do this using cutout tape. Be sure to remove the labels before staining or applying primer or paint on the cabinets. Also, do not replace the cabinets until they are dry.

Put on your rubber gloves and apply a thin layer of paint stripper to the faces of the cabinets.
Start by applying one coat at a time on all the cabinets, drawers, and doors.
Wait 10 minutes and scrub off the softened stripper using a putty knife.

You should have a canvas placed under your work area to catch any dirt and residues.

Sand and Stain

Subsequently, sand the surfaces using 100 grit sandpaper.

If your cabinets have any details or grooves, use a sanding block to access all the nooks and crannies.

Wipe off all the dirt and residues before staining.

Then, working with your paintbrush, start staining the cabinets.
Follow the same method as used to apply the paint stripper and focus on a door and the corresponding drawer before continuing.

Cover all the surfaces and wipe any excess stain–wait for the stain to dry completely.

If you’re painting your cabinets instead, consider starting with a primer designed for wood.

Depending on the condition of your cabinets, you may want to apply two coats of paint for the best outcome.

Also, you don’t have to strip the previous paint coat to the last trace–but all the loose old paint on the surface must be sanded off.

In either case, always make sure you apply the paint or stain on a clean and dry surface free of grease, dust, old loose paint or residues.

Get A FREE Quote for Your Kitchen Cabinet Renovation Project

Kitchen cabinet repainting, resurfacing and re-staining projects might seem easy at a first glance, however they require some technical skills and tools.

If you don’t have the training, experience, and tools to handle your own kitchen cabinet refinishing project, consider hiring a professional painting contractor.

If you need professional help to repaint your kitchen, kitchen cabinets, or even the entire home interior, our team at Eason Painting would be more than happy to help.

We have years of experience offering residential painting services in Macomb Township, Washington Township, Ray Township, Rochester, Rochester Hills, Romeo, Armada, Troy, Shelby Township, Harrison Township, Chesterfield, and Clinton Township, MI.

Call us today on 586-465-5081 for a FREE painting estimate


You Also Like: 

Simple and Affordable Improvements for Your Kitchen in Harrison Twp.

Kitchen Cabinet Cleaning Tips for Extended Durability

Kitchen Cabinet Painting, Shelby Twp: Ideas for Two-Toned Cabinets


Read more
Clinton Township MI Eason Painting

8 Improvements For Your Living Room In Clinton Township, MI

8 Improvements For Your Living Room In Clinton Township, MI

There are many ways you can improve your living room in Clinton Township, MI.

The living room is one of the central rooms in your home — a place where people often gather to relax, play a board game, or even enjoy a cup of coffee.

It also gives visitors a taste of the taste that you have when you see the decor in the living room.

That being the case, here are eight improvements for your living room in Clinton Township, MI.

1. Color Choices Are Important

The colors you choose for your living room can impact the space.

Bright colors and ones that are warmer can be ideal for your living room space.

Dark and dull colors, on the other hand, can make your living room appear smaller, which is usually not considered a positive thing.

2. Keep Your Living Room Well Lit

Your living room can be appreciated as a comfortable space if it has the right amount of lighting.

This means that you shouldn’t keep your guests and family in the dark, but you shouldn’t also put in too many light sources and flood the room with light.

Choose a few well-placed light fixtures, perhaps ones that reflect who you are as individuals, to express yourself and keep your living room bright.

3. Make Sure You Have Good Layout

There’s a certain expression that asks the question, “What’s a good plate with nothing on it?”

We can say a similar thing for a living room — what is a living room full of furniture if it is not laid out well?

If you have good furniture, make sure that it is all put out nicely with the flow so that there’s ample room to walk around, find a place to sit, etc.

4. Rugs Make For Great Living Rooms

A rug is one of the simplest ways to make a big difference in your living room.

It can add a tremendous splash of color, for example, and stands out from the rest of the living room.

5.Potted Plants

A potted plant in your living room will add a little green to your room and add to the variety of the room.

It can also be fun for kids to have something to water regularly and something to care for.

6. Keep It Simple

Sometimes the best thing you can do for your living room is to keep it simple!

Minimize the number of unnecessary decorations that are sitting on the shelf, not being appreciated, and any chairs that might not be getting used.

As beautiful as a good painting can be, you don’t have to fill the entire wall surface with several of them.

7. Eliminate Wire Clutter

If you have a television in your living room — and most people have one these days — the best look you might have is a more simple look.

Start by taking a television that will lay flat against the wall, and then hide the walls underneath the tv so they don’t overwhelm the eye.

8.Dining Chairs to Save Space

When you are setting up your living room, you sometimes want to take action to make as much room as possible.

There are two ways to make sure you have space in a room — one being to have fewer things in the area, and the other being to have things that take up less space.

Using dining chairs in your living room can save you a lot of room in your living room.

If you need professional help to repaint your living room or even the entire home interior, our team at Eason Painting would be more than happy to help.

We have years of experience offering residential painting services in Macomb Township, Washington Township, Ray Township, Rochester, Rochester Hills, Romeo, Armada, Troy, Shelby Township, Harrison Township, Chesterfield, and Clinton Township, MI.

Call us today on 586-465-5081 for a FREE painting estimate

Related: Kitchen Cabinet Painting, Shelby Twp: Ideas for Two-Toned Cabinets

Kitchen Cabinet Cleaning Tips for Extended Durability

5 Things to Know Before Refinishing Laminate Countertops in Harrison Township. MI

Read more
Interior Painting Shelby Township: Pro Ceiling Painting Tips

Interior Painting Shelby Township: Pro Ceiling Painting Tips

Interior Painting Shelby Township: Pro Ceiling Painting Tips

Most homeowners in Shelby, Township, are often too busy repainting their walls and decorating the inside of their homes to pay attention to the ceiling.

However, be aware that ceilings have a noticeable influence in the mood and brightness you want to give to your home.

When redecorating a room, you should ideally paint your ceiling first to avoid dripping paint on the already painted wall.

Know when to contact a building contractor

If your walls are textured, consider calling a contractor for a better result. For acoustic ceilings, prefer spray paint, which, again, should be handled by a building professional.

If you have a plasterboard ceiling that you wish to repair, consider calling a repairer first. He will rectify the places where the plaster crumbles and the ceiling will be much easier to paint afterward.

Lastly, if you don’t have the skills, the right tools, or some experience, you should consider hiring a professional interior contractor in Shelby Township to give you a hand.

Prepare the ceiling

Assemble the necessary equipment: You need a thick nap roller that is telescopic to reach the ceiling. Combine it with a regular brush.

You will probably also need:

  • a paint tray and a tarp cloth to cover the floor
  • a broad brush for wall finishes
  • putty and a putty knife to seal the holes and cracks
  • a caulk for the corners

Choose your Paint

The best type of paint to use for your ceiling is flat paint. It’s slightly different from the conventional wall paint.

Flat paint is generally good at hiding surface imperfections that might be on the surface of the ceiling.

You also need to decide on the paint color for your ceiling.

While most homeowners default to white, you can get a little playful and choose to add some color to your ceiling.

Or, at the very least, choose a unique shade of while that coordinates well with your wall paint color.

Move your furniture and prepare the room.

Try to empty it as much as possible and make room. This may be a problem if you live in an apartment or if you have sofas, beds, or cupboards that are too heavy. If this is your case, then cover all furniture with plastic covers to protect them.

However, do not use plastic to cover the floor. It easily gets torn and tends to get slippery when wet. Instead, consider using canvas tarp cloth for the floor.

Use duct tape to cover the area around the moldings, as well as where the ceiling and walls meet.

Apply a coat of primer to the walls before painting.

The primer will help the paint to adhere to the ceiling and absorb it like a sponge.

For best results, use an anti-stain primer. That should cover the imperfections and stains present on the walls, such as the infiltration of water, and smoke.

Paint the Ceiling

 Start by cutting in using a two-inch brush at the edges. Using a brush to work the edges in sweeping, long movements.

Next, use a roller attached to an extension pole to paint the remaining larger surface, starting from the corner.

As earlier mentioned, repainting the ceiling can be an overwhelming task if you don’t have the skills, tools, and experience.

If you need professional help with your ceiling or even the entire home interior repainting project, Eason Painting can help.

Our home interior painting services are available in Macomb Township, Washington Township, Ray Township, Rochester, Rochester Hills, Romeo, Armada, Troy, Shelby Township, Harrison Township, Chesterfield, and Clinton Township, MI.

Call us today on 586-465-5081 for a FREE painting estimate.

Read more
kitchen cabinet painting

Kitchen Cabinet Painting, Shelby Twp: Ideas for Two-Toned Cabinets

KITCHEN CABINET PAINTING, SHELBY TWP: IDEAS FOR TWO-TONED CABINETS

As opposed to the traditional plain wood cabinets from the top to the bottom, homeowners and interior designers in Shelby Township prefer at least two hues on a single cabinet set for a unique look.

If you too would love to join this trend, this article will give you some ideas on how to make this possible in various magnificent ways.
Let’s get started, shall we?

Select a Focal Point

To make a two-toned cabinet paint job a success, you first need to pick one area of interest.

Often, the kitchen island is a favorite spot for homeowners and interior designers for this trend.
There’re space planning apps you can use for this purpose if you want to get a little sophisticated.
They help you pick the ideal space to splash some color and draw various angles to the eye of the viewer.

Once you have selected a focal point, you can move on to picking the colors and tones you need for your two-toned cabinets.
Ensure the focal point is eye-catching by using bold shades. The hue you decide to use is up to you, but you can use the rest of the kitchen shade as inspiration to select the appropriate one.

Do Not Limit Your Vision to the Paint Colors

If you do not prefer a bold shade, you don’t need to worry.
Consider various ways to attain this look for your two-toned kitchen cabinet.
The use of different materials is one way to achieve a bold focal point.
For instance, you can use aluminum and glass to provide an industrial look.
You can also use a laminate to add a sleek finish.
Wood is the most common finish for a bold and natural focal point.

If you plan to match and mix in this manner, seek design inspirations either online or from friends. Use the specific style you need for the design as a start and get ideas on how to match the materials from various interior design sites to get the appropriate aesthetic finish.

Make the bottom darker

Another way to get the two-toned kitchen cabinet trend right is to use a darker shade for the lower part cabinets.
Once done, consider lighter shades for your top part. This option gives an illusion of a larger kitchen as the top lighter shade will draw any viewer’s eyes upwards.

Mixing a dark or bold shade with white is common for this two-toned kitchen cabinet trend.
However, you can consider an Ombre look. To make this look perfect, do not stop at the cabinet. Consider using the same pattern and shades for other applications around the kitchen for a uniform look.

Ensure You Coordinate Various Elements

Whichever design, color tones, and shade you choose for your cabinets be sure to include a coordinating element for them all.
When you have two distinctive looks, it’s always essential to ensure that you use some design element that links them together.

For instance, you can use a similar color palette for all cabinets in your kitchen. Two different shades of the same color are a great way to go about creating a coordinating element.

Consider Color Blocking

This is a popular trend that can make your cooking space unique. You can apply blocking by using a number of contrasting colors or varying shades of the same color.
For an all-white kitchen, consider painting a few random cabinets in a striking color like cobalt blue or grassy green.

If symmetry is important in your design, consider color blocking either bottom or top cabinets in a contrasting color such as red, yellow, orange or pink.

Bottom line

Whichever color scheme you choose for your two-tone kitchen cabinet, the trend remains affordable and infuses a sense of uniqueness into your kitchen cabinetry. The unexpected color pairings and the unconventional approach will create an uplifting and unique cooking space for you and your family.

If you need professional help repainting your kitchen, kitchen cabinets, or even the entire home interior, our team at Eason Painting would be more than happy to help.

We have years of experience offering residential painting services in Macomb Township, Washington Township, Ray Township, Rochester, Rochester Hills, Romeo, Armada, Troy, Shelby Township, Harrison Township, Chesterfield, and Clinton Township, MI.

Call us today on 586-465-5081 for a FREE painting estimate


Read more

Kitchen Cabinet Cleaning Tips for Extended Durability

Kitchen Cabinet Cleaning Tips for Extended Durability

Kitchen cabinets in your Clinton Township home undergo a lot of wear and tear over the years. Grease, food particles, and dust can accumulate on kitchen cabinets and be difficult to remove, so it’s a good idea to clean them often. When deep cleaning is needed, use a natural cleaner such as baking powder to avoid damaging the top finish. 


In this article, we share some of the most effective but often ignored tips for cleaning and keeping your kitchen cabinets and furniture looking new and flawless. 


Perform Daily Cleaning


Prepare a solution of vinegar by mixing a glass of white vinegar with a glass of water. This gentle cleansing solution is perfect for everyday use on wood kitchen cabinets. It does not damage the wood or the finish. 


If you do not like cleaning with vinegar, you can replace it with a mild soapy solution. Mix a teaspoon of dishwashing liquid with a glass of water.

Do not use aggressive multipurpose cleaning products on your cabinets. They can discolor and deform the wood.


Wipe The Exterior Surface Of The Cabinets After Cooking. 


Grease and food particles can accumulate on cabinet surfaces each time you cook. If you dry your kitchen cabinets every time you cook, they will stay in better condition. Dip a washcloth or clean cloth into the vinegar solution and use it to wipe the doors and underside of the cabinets 


The kitchen cabinets should not be soaked, as moisture can ruin the wood. Squeeze the towel you use so that it is moist, but not soaked.

The smell of vinegar will leave as soon as the kitchen cabinets are dry. If vinegar mixed with water does not work, you will have to buy an industrial degreasing product.


 Dry The Kitchen Cabinets With A Clean Cloth.


Since the moisture left on the kitchen cabinets can damage the wood, use a clean, dry towel to remove any traces of cleaning solution.


Clean The Inside Of The Kitchen Cabinets Regularly.


Spices and other foods that you keep in the cabinets can sometimes spill over, so make sure the inside of your kitchen cabinets stays clean by cleaning it every few weeks. Empty kitchen cabinets completely and clean inside with a mild solution of vinegar or soap. 


Dry the kitchen cabinets with a clean cloth and put all the items on the shelves.

If there are often spilled foods in your cabinets, you may want to consider investing in good storage boxes. If you store spices and dry foods in glass or metal boxes, you will protect them from insects and minimize the risk of spilling them.


Dust Your Kitchen Cabinets Regularly.


To remove a small amount of dust and polish the kitchen cabinets, use a soft, dry cloth to clean the interior and exterior surfaces. It is especially important to regularly dust the outside of kitchen cabinets, as the grease and steam produced when cooking will stick the dust to the surfaces of the cabinets, making it more difficult to remove if you rarely clean.


 Perform deep cleaning


Purchase a soap-based wood cleaner with oil. This product is made to remove grease and other adhered substances without damaging wooden surfaces. Oil soap is more powerful than vinegar or a simple solution of dishwashing liquid.

If the kitchen cabinets are covered with a tough layer fatty, the oil soap will be ideal for cleaning. For extra stubborn stains, consider using a degreaser.


If your kitchen cabinets are looking dated and dull, cleaning alone might not be enough to restore their lost glory. In such a case, consider hiring a pro to refinish your cabinets. 


If you need professional help repainting your kitchen, kitchen cabinets, or even the entire home interior, our team at Eason Painting would be more than happy to help.


We have years of experience offering residential painting services in Macomb Township, Washington Township, Ray Township, Rochester, Rochester Hills, Romeo, Armada, Troy, Shelby Township, Harrison Township, Chesterfield, and Clinton Township, MI.


Call us today on 586-465-5081 for a FREE painting estimate.

Read more
Interior painting

Simple and Affordable Improvements for Your Kitchen in Harrison Twp.

If you’re planning to renovate your kitchen on a tight budget in Harrison Township, the idea might have scared you a little bit at first.
Kitchen remodeling and renovation projects are generally known to be incredibly expensive and time-consuming.

However, you do not have to tear down the cabinets or demolish a wall to create an impact in your cooking space.
In this article, we will be sharing simple, effective, inexpensive, and accessible kitchen improvements you can use to add some freshness and life back into your kitchen.

Let’s get right into it, shall we?

Repaint Your Kitchen Cabinets

Kitchen cabinets occupy a large space in your kitchen; if their looks and condition are outdated, they can make your kitchen look old and neglected.
Thankfully, a fresh coat of paint may be all you need to improve your kitchen’s aesthetics and bring back that ‘new’ look.

Choose a paint color that coordinates or harmonizes with your kitchen wall color for a unified look.
You will probably want to hire a painting contractor like Eason Painting for help with this one because repainting cabinets can get a little technical if you don’t have the right skills and tools.

Rebuild Your Counter

Refurbishment your counter will make a significant difference, both functionally and aesthetically.
In the absence of marble or precious stones (which are beautiful, but can quickly increase your budget), you can opt for a butcher-style wooden counter.

Available in different styles and colors, you can customize everything to match the decor of your kitchen.
It may sound simple, but it will add a ‘freshly-renovated’ look into your kitchen space.

Add a Backsplash

Adding a backsplash to your kitchen remains a simple and affordable idea to refresh the kitchen for homeowners on a tight budget.
It is often placed on a small surface, typically behind the sink, which makes it less expensive.

Like the countertop, there’re self-adhesive tiles which are easy to hang on the wall and to remove with a dryer when you need to change the look. They are available in different colors and patterns, enough to blend into any kitchen design and color theme.

Open-air Storage

Have you considered open shelve storage?
You can not only add different decorations such as photos, art, or your most beautiful dishes, but they will motivate you to stay organized since they’re visible to everyone.

You will also be able to play with different styles of organization to add a personalized and decorative touch.
For a touch of freshness, add some plants. Alternatively, you can simply remove your cabinet doors to create open space.

Decorative Accessories and Ornaments

Small details are often the ones with the most impact.
Consider investing in these small details: changing cabinet handles, decorative lighting, decorative storage baskets, art, plants, and more.

These small changes revive the space and give it a new appearance, without asking for an exorbitant budget.
The best part is you can make most of these small changes on your own without having to hire a renovation expert.

The Bottom line

The above list is by no means exhaustive on the simple ideas you can add to your kitchen.
Things changing the main faucet, adding an area rug, repainting the ceiling, and painting an accent wall are all pocket-friendly options you can explore.

If you need professional help repainting your kitchen, kitchen cabinets, or even the entire home interior, our team at Eason Painting would be more than happy to help.

We have years of experience offering residential painting services in Macomb Township, Washington Township, Ray Township, Rochester, Rochester Hills, Romeo, Armada, Troy, Shelby Township, Harrison Township, Chesterfield, and Clinton Township, MI.

Call us today on 586-465-5081 for a FREE painting estimate.

Read more
interior paint colors

6 Tips for Choosing Interior Paint Color in Rochester Hills

Do you have an upcoming interior painting project in Rochester Hills but can’t seem to figure out the right paint color?

We’ve worked with hundreds of homeowners in this area, and we understand your struggles.

Typically, we do offer free color consultation for each of our existing and new clients. However, if you need some tips on how to figure out the best interior color on your own, this article will come in handy. Use the following tips to make the color choosing process more fun and less intimidating.

Start By Analyzing Your Room

Analyze the decorations of your room to have an idea of what color is the best fit. It’s much easier to choose a paint color that goes with your furniture and decor than the other way round. If you choose the wall paint before the décor, you may end up limited to a few options of fabrics, decorations, and furniture that match your wall.

On the other hand, if you base your color scheme on existing items, you will be much more likely to get a color scheme that fits naturally. Patterned elements are particularly interesting options, as they often incorporate several shades and can be used as a base for your entire color palette

Apply These Few Golden Rules

Rules for selecting the right paint color

Over the years, many interior designers have established general rules to follow when decorating the interior to realize the best results.

  • Decorate from dark to light, vertically – it is advisable to use darker shades for the floor, medium hues for the walls, and light shades for the ceiling for a natural, beautiful look. The goal is to imitate the outside environment and to represent it in the room.
  • The rule of three colors –A well-balanced interior décor and paint scheme should be based on three colors.
  • The rule of 60-30-10 –When painting, divide the colors as follows: 60% of a dominant color (walls), 30% of a secondary color (doors, ceiling, windows, etc.) and 10% of an accent color (accessories and decorations).

Look At the Adjacent Rooms

Have you ever visited a house where paint choices were very odd from room to room? Naturally, this is not pleasant for the eyes. Usually, this feeling occurs when homeowners try to do too much with different color concepts! It may be interesting to give each room its own style and color scheme but always take into account that the interior of a house must be consistent from one room to another.

Think about your emotions

It is a well-known fact that different colors create different moods, and this affects our emotions. Your color scheme can affect you psychologically when you spend a lot of time in a room with a dominant color.

  • Soft, cool, and neutral colors usually create a feeling of calm while stronger colors are more dramatic.
  • Warmer, contrasting, and slightly brighter colors add to a sociable atmosphere. Green blues and deeper neutrals will give a more formal atmosphere.
  • Be careful not to overstimulate your children and other occupants with intensely bright colors. Some brighter colors can cause irritability!

Do Not Be Fooled By The Color Chart

The color charts provided in the store or online are handy for selecting the right colors. However, remember that the applied hue is often darker than the tone on the color chart. That is due to several factors like lighting, different layers of paint, and even the shape and orientation of the surface being painted. Consider choosing a shade below the one you want to avoid this surprise.

Test the Effect Of Lighting On Your Color

Like it or not, the way a room is lit can have a massive impact on its appearance. Each type of light generates a different shade of color. That’s why the rooms are often very different at night compared to the day. With that in mind, it’s essential to make sure you’re happy with your choice of color, regardless of the time of day. You can always request for a sample to test the color shade on your wall and observe at different times of the day.

The Bottom Line 

Choosing interior paint can be fun and exciting, but it can also be a little intimidating. Use the above tips to make sure that you don’t end up with any unpleasant surprises.

If you need professional help with your home interior repainting project, Eason Painting can help. We have years of experience offering residential painting services in Macomb Township, Washington Township, Ray Township, Rochester, Rochester Hills, Romeo, Armada, Troy, Shelby Township, Harrison Township, Chesterfield, and Clinton Township, MI.

Call us today on 586-465-5081 for a FREE painting estimate.

Read more
Interior painting

5 Things to Know Before Refinishing Laminate Countertops in Harrison Township

If your laminate countertops in Harrison Township are starting to look aged, replacing them might be a costly project. However, if they are still in good physical and structural conditions, you don’t have to toss them. A simple paint job might restore their looks and extend their durability.

In this article, we will be sharing five critical things you should know before refinishing your laminate countertops. Read on;

1. Surface Preparation

Paint doesn’t adhere properly to dirty surfaces or surfaces that are partially cleaned. If washing doesn’t get rid of all the surface dirt and grime, consider sanding the surfaces to remove stubborn stains and grime. Subsequently, wash the countertop with hot water and detergent – tri-sodium phosphate is good at removing grease and other residues. Proper washing and sanding create a clean and roughened surface that increase paint adherence while reducing the chances of paint flaking and peeling.

2. Don’t Skip the Primer

Some homeowners and DIY enthusiasts tend to ignore the primer when painting countertops and kitchen cabinets. Paint generally doesn’t stick well to bare surfaces, and enamel is a particularly tricky surface in regards to paint adherence. The primer binds to the laminate surface better than the paint and gives you an even base to apply the paint on. That will ensure that your topcoat comes out smooth and lasts much longer.

Other than improving paint adherence, the primer can also help block unsightly stains and the dark underneath colors. That is important if you’re moving from a dark-colored to a light-colored finish –you don’t want the old dark finish bleeding through your new coat of paint. You can also tint your primer with a bit of the new paint to smooth out the transition.

3. Play Around With Texture and Color

If you loved the laminate look, you don’t have to ditch it entirely for flat single-colored paint. You can recreate that look differently by using sponges, feathers, and paintbrushes to create surfaces that resemble marble or give a splattered effect to the surface. If you want your countertop to look like granite, use the faux-stone spray paint.

These variations will add dimension and depth to your countertop. While at it, don’t forget to use a sealer –it minimizes daily wear to your countertop besides preventing the paint from being scratched.

4. Allow Enough Time for the Countertops to Cure.

After you’re done with painting, it will take 3-5 days for the sealer, primer, and paint on your countertops to completely cure. It’s, therefore, essential to arrange for an alternative countertop. After the five days have passed, avoid placing heavy equipment (such as a toaster or a microwave) on the newly painted surface for at least one more week.

5. Keep It Clean

When painting, cover the other surfaces that you don’t intend to paint. The cabinets below your countertops are common culprits, and it’s nearly impossible to remove stray paint once it lands on them. Make sure that you tape and drape a plastic sheet over surfaces that are not to be painted.

Bottom Line

Painting your laminate countertops is no doubt the most cost-effective way to restore them compared to replacement. While DIY painting is an option, painting your laminate countertops can be particularly tricky if you don’t have sufficient skills, experience, and tools to handle the job.

The best way to restore and make sure your countertops last for a little while longer is by hiring a professional painting contractor like Eason Painting. We have years of experience offering interior painting services in Macomb Township, Washington Township, Ray Township, Rochester, Rochester Hills, Romeo, Armada, Troy, Shelby Township, Harrison Township, Chesterfield, and Clinton Township, MI.

Call us on 586-465-5081 for a FREE painting estimate.

Read more
Interior painting tips

6 Tips for A Perfect Interior Paint Job in Clinton Township, MI

Your home is where you find comfort and peace of mind after a long day. So it’s crucial to consider interior painting because it plays a critical role in providing a relaxing atmosphere and setting your mood. Interior repainting requires more effort compared to the exterior, but still, it presents a sizable challenge.

For high-quality and long-lasting results, it is advisable to work with a professional interior painting contractor. However, if you still want to give the DIY painting a try, here are some tips to make your painting project more efficient, flawless, and durable.

1. Surface Preparation

Preparation is essential, and paint adheres best to a clean, dry, non-glossy surface. One of the best materials you can use to clean the surface before painting is the tack cloth, which is inexpensive and efficient. The tack cloth will lightly pull off any wood shavings, sawdust, and other debris from the surface to be painted.

2. Use High-Quality Brushes and Roller Covers

Low-cost and inferior-quality roller covers will leave lint and fuzz embedded on your walls. When the paint dries, you will be left will rough and bumpy walls. Painting with low-quality brushes will also leave unappealing streaky brush marks. For a more thorough and meticulous paint job, ensure that you purchase good-quality brushes and roller covers.

3. Use High-Quality Paint

One of the greatest advantages of hiring professional painters is that they will never get it wrong when it comes to choosing the best paint for your projects. Cheap paints generally have fewer solids and do not adhere properly to the surface. These paints often leave the surface looking dull, and they do not last long. Interior painting requires paint that offers adequate coverage, shows consistency in color, and lasts longer.

4. Don’t Skip the Primer

Primer might seem unnecessary, but it provides a good surface for paint. It blocks the previous dark colors are stains from showing through your new paint job improves paint adherence for a durable paint job. Besides, the primer allows your fresh coat of paint to display the best possible color.

5. Test for Loose Paint Using the Duct Tape Test

Will the existing painted surface take new paint, and will it hold this paint for years to come? While it is impossible to predict the future, you can get a good sense of the quality of a surface by testing it with a strip of duct tape. That involves laying a strip of duct tape over the existing painted surface and ripping it off. If the duct tape comes off with flakes of paint, then you will need to scrape and sand the surface before adding a fresh coat of paint.

6. Hire a Professional Interior Painting Contractor

Sometimes working with brighter colors can prove challenging even to the most confident homeowner. However, professional interior painters have the experience and expertise needed to handle different types of paints as well as interior surfaces. Working with expert painters will also save you a lot of time and money.

Interior Painting Clinton Township MI

Painting the interior of your home is an ideal way to freshen up your dull and faded rooms and also increase the value of your home. It is, therefore, vital to consider hiring an interior painting company in Clinton Township, MI, for a more professional look.

If you need professional help with your home interior repainting project, our highly skilled and experienced team at Eason Painting can help. We have years of experience offering residential painting services in Macomb Township, Washington Township, Ray Township, Rochester, Rochester Hills, Romeo, Armada, Troy, Shelby Township, Harrison Township, Chesterfield, and Clinton Township, MI.

Call us today on 586-465-5081 for a FREE painting estimate.

Read more
5 Signs It’s Time For Home Interior Repainting

5 Signs It’s Time For Home Interior Repainting in Rochester Hills, MI

How often do you repaint the interior of your home? How do you know it’s time to repaint in the first place? Well, we sure all know that a fresh coat of paint can brighten up the dull and tired wall and cover up some minor surface imperfections. 


Interior painting, as you can imagine, is a considerably costly project; you don’t want to do it more often than necessary. On the flip side, waiting for too long before repainting the interior can potentially damage your wall and lead to expensive repairs down the line. So when should you repaint your home’s interior? Below are the top five signs which will show you it’s time to repaint your home’s interior;


1. Paint Color Fading 

Paint fading is the excessive lightening of the paint color. Fading is not a common problem on interior paint jobs because it’s primarily caused by exposure to UV rays. However, using low-quality paints and poor painting techniques can also lead to paint color fading. It’s usually difficult to touch up fading paint, but if you notice large patches of excessive fading, it’s time for a new interior paint job. 


2. Stains/Scuffmarks/Finger Prints 

Stains, Scuff marks, fingerprints, smoke, and ink are all too common in active homes that haven’t been painted in a while. If you have an extremely busy household with plenty of kids and pets, marks and stains on the walls are inevitable. 


We don’t suggest that you repaint the entire room or house at a sign of a few scuff marks. However, an accumulation of dirt, stains, fingerprints, and scuff marks can make your interior look old and neglected. If your house interior is in this state by any chance, it’s time for a new paint job. 


3. Water Stains

Water stains need to be addressed with a sense of urgency, especially if you have drywall or wooden siding. Water stains are the first sign of water damage, which happens behind the scenes and reflects on the walls or ceiling. Before addressing the water stains, you need to do a thorough inspection, determine the root cause of the water damage, and correct it. Water stains can usually be eliminated by sanding and painting over the affected area. 


4. Mold and Mildew 

Mold and mildew are often a sign of excessive moisture and limited ventilation. They can grow on pretty much any surface, but they’re most common on drywall, wood and even vinyl. A professional painting contractor will first address the moisture problem and treat the affected areas before applying a new coat of paint. If you’re noticing mold or mildew in your home, report to an expert immediately because they can spread pretty fast.  


5. Paint Cracking and Flacking 

Paint cracking, flaking, and blistering are common and obvious signs of paint failure, often caused by loss of paint adhesion. They can also be caused by painting over wet surfaces, using inferior painting methods or low-quality paint products. Either way, failing paint is a clear sign that you need to have a conversation with a professional painting contractor. 


The Bottom Line 

The above five are the most obvious signs that your home’s interior needs a new paint job. Even without the above visible signs, if it’s been over five years since you last painted your interior, you should consider a new paint job. 


If you need professional help with your home interior repainting project, our highly skilled and experienced team at Eason Painting can help. We have years of experience offering residential interior painting services in Macomb Township, Washington Township, Ray Township, Rochester, Rochester Hills, Romeo, Armada, Troy, Shelby Township, Harrison Township, Chesterfield, and Clinton Township, MI.

Call us today on 586-465-5081 for a FREE painting estimate. 

Read more
interior painting

6 Questions to Ask When Hiring an Interior Painter in Clinton Township, MI

Are you considering hiring a painting contractor in Clinton Township, MI? If this is your first time hiring a professional painter, you might not be sure what to look for and which questions to ask. Professional painting contractors generally provide a high-quality and durable painting service.

However, if you happen to engage an unreliable, inefficient, and dishonest painter, the results and the experience can be quite frustrating. To get the best residential painter in Clinton Township, MI, you need to ask the right questions. In this article, we compiled six questions that will help you uncover the level of expertise, experience, and reliability of any painter. Have a look;

1. Are You Insured And Duly Licensed?
Documentation is probably the very first thing you want to check. Most professional painting contractors who have been in the industry for a while have their documentation in order. However, if you’re in any doubt, request the painter to share copies of their business license and insurance.

A state-issued license is an indication that the painter has all the certification and skills required and is likely to produce a high-quality job. Business insurance and workers’ compensation cover protects you against any additional charges in the event of an employee injury or damage to the property

2. How Long Have You Been In Business?
The number of years a painter has been in the industry isn’t an automatic indicator that they are reliable and efficient. However, if they have received positive reviews and a wide acceptance within Clinton Township and beyond, you can count on their many years of experience. A minimum of five years of operation is a good benchmark

3. Are Your Painters Employees Or Sub-Contractors?
There is nothing wrong with using sub-contractors, especially during the high season. However, if you will be leaving the painters to their own devices inside your house, ask if the company has done background checks on each of them. Also, make sure each sub-contractor in individually insured.

4. What is your Surface prep work like?
Surface preparation is the most critical part of any paint project. As the painter answers this question, it should be clear that the painter won’t apply paint on a surface that is dirty, damaged, or has traces of the previous loose paint.

5. Which Paint Products Do You Recommend?
The paint quality has a massive impact on the aesthetic appearance of the topcoat and the durability of the paint. The painter should generally use high-quality paint products from established manufacturers like Sherwin Williams and Benjamin Moore. If you’re being steered toward low-cost products, find out why or find another painter.

6. Do You Offer A Warranty? Does It Include Labor And Paint?
High-quality paints from established manufacturers often come with a warranty. Also, a good contractor should always offer to repair or replace any damaged paint job within a set period. For instance, if the paint suddenly starts peeling just after a few weeks of application, they should offer a free touch-up.

The Bottom Line

The above questions should help you find a painting contractor that is reliable, honest, efficient, has sufficient interior painting experience and uses high-quality paints. Once you get the right answers, everything else should fall in place. If you haven’t identified a professional painter for your project yet, our team at Eason Painting can help.

We have years of experience offering residential interior painting services in Macomb Township, Washington Township, Ray Township, Rochester, Rochester Hills, Romeo, Armada, Troy, Shelby Township, Harrison Township, Chesterfield, and Clinton Township, MI.

Call us on 586-465-5081 for a FREE non-obligatory estimate.

Read more
Interior painting

Can You Alter A Rooms Perceived Size Using Paint?

Paint can do more than just change the color on the wall and the feel of the room or space. Did you know that painting contractors and interior designers can use paint to alter the perceived physical size of a room? Well, this approach is more common than you might think.

By using certain shades of paints in certain areas of a room, you can alter the perception of the size of a room. For instance, it is possible to make small rooms appear larger than they are or long rooms wider. So if you have one of those irregular shaped rooms with irregular walls, too high/low ceiling, or too long in dimension, you can use painting and color selection tips to give your space a new perspective.

Here are a few examples of how this works:

How to Make a Small Room Seem Larger

The most popular way of giving a sense of space to a smaller room is by painting it in white color. White surfaces are reflective, allowing light entering the space to bounce around the room. Painting both your walls and ceiling in white brings a sense of airiness and openness to an originally cramped room.

But of course, if you don’t want too much white that could make your space look clinical, you have an alternative of choosing one dominate white surface, such as the ceiling and complimenting it with other lighter or neutral colors. Colors such as soft yellow, cool blue or light beige would go along pretty well.

How to Make a Large Room Seem Smaller

If you have a room that seems too big for its purpose, Painting the room in darker colors will seemingly bring the walls closer. If you want to make an otherwise too open lounge seem cozier and intimate, painting the walls and ceiling using darker but complementing colors could do the trick. To add to that, you might also want to use the more reserved matte paint sheens than the reflective glossy finishes.

How to Make a Low Ceiling Look Higher

If you have a low ceiling, decorate it using white paint –most professional painters and interior designers would automatically go for this. Generally, the ceiling should be a color that is lighter compared to the wall to make the ceiling appear brighter and receded. If you can deliberately paint the walls a darker color than you originally intended, you could enhance this effect.

Have a long high ceiling? Simply do the reverse –paint the ceiling in a darker color than the walls and use matte paint if you can. This makes the ceiling seem lower than it actually is while increasing the perceived horizontal space.

Making a Long Room Look Shorter

Large, long rooms can be quite overwhelming, especially when used as family entertainment or dining spaces. A popular way of dealing with this is to separate the room in some way; folding screens, bookcases or shelving. However, using darker and warm color shades on the most distant wall can make it seem closer and this will visually correct your space. On the flip side, using a brighter color on walls that are too close and intimate can add some perceived visual distance in between.

Conclusion

So yes, you can alter the physical size of any room using a clever selection of paint colors. Other tricks such as furniture arrangement, using mirrors and painting in stripes could also enhance a particular effect you’re trying to create.

If you need any help repainting the interior of your home to achieve any of the above effects and more, Eason Painting can help. We have years of experience offering residential interior painting services in Macomb Township, Washington Township, Ray Township, Rochester, Rochester Hills, Romeo, Armada, Troy, Shelby Township, Harrison Township, Chesterfield, and Clinton Township, MI. Give us a call today on 586-465-5081 to find out what creative ideas we have in store for you!

Read more

Handling Textured Ceilings When House Painting in Clinton Township, MI

We are seeing more textured ceilings pop up in many homes in Clinton Township, MI.

If your textured ceiling is starting to look a little dated and faded, has signs of water damage or you’re simply tired of the current look, giving it a quick repaint is the best way to restore the beauty of your room. Textured walls can be created through a variety of ways, and the characteristic of the texture can range from almost flat to near ½-inch peaks with defined valleys and tips.

Relatively smooth ceiling textures, like those that resemble an orange peel, are generally simple to paint using a roller and an extension pole. However, when the texture becomes larger, using a paint sprayer might be the best option. Most popcorn ceilings, for instance, might benefit more from a paint sprayer than a roller or a paintbrush.

Generally, painting overhead means there would be an increased risk of paint spills and splatters –whether you’re rolling or spraying. So before you start painting, make sure you tape off existing walls with painter’s tape that features a lightweight rollout plastic drop cloth. Turn off the electrical breaker in any room you’re going to paint and install temporary lights from an extension cord. If you can’t remove the light fixture, drape it completely using a painters tape and plastic sheets.

Rolling the Ceiling

Rolling is a suitable option for ceilings that have relatively shallow textures. Before you start rolling, wear a hat and old clothing or cover yourself up using a disposable paint suit. You want to use a thick, high-quality roller cover for this project. We recommend using lambswool or specialty synthetic covers with a thickness of ¾ of an inch to 1¼ of an inch.

It’s important to roll using light pressure and avoid the temptation of over-saturating some areas. Clean any visible dust particles and cobwebs, and roll on a coat of the primer before applying the paint. Generally, use a medium-nap roller for nearly smooth texture, but switch to a large-nap roller if the texture is deeper.

Spraying the Ceiling

As mentioned earlier, if your texture is deeper, spraying the paint might be your best option. Low-cost paint sprayers from your local paint store might not be the best option because they rely on a paint hopper or reservoirs that tip when you aim the spray gun towards the ceiling. You should preferably rent a commercial paint sprayer which typically comes with a pump and a more flexible hose.

You might want to strain the paint and primer using a nylon paint strainer before spraying. Applying multiple, light coats of paint are better than one or two heavy coats. You can spray all the way up to the taped-off walls, which means you don’t have to use a paintbrush after.

When spray painting, a respiratory musk, and a disposable paint suit are highly necessary. You will also need goggles and a pull-on disposable head covering with a cutout area for the face.

The Bottom Line

Painting any ceiling can be a tricky and messy job, and things get even tougher if it’s a textured ceiling. If you don’t have the skills, training and the right tools, you definitely should leave the ceiling painting project to the professionals.

At Eason Painting, for instance, we have years of experience offering interior painting services in Macomb Township, Washington Township, Ray Township, Rochester, Rochester Hills, Romeo, Armada, Troy, Shelby Township, Harrison Township, Chesterfield, and Clinton Township, MI. Give us a call today to find out what creative ideas we have in store for you.


Read more
interior painting

Should I Paint an Accent Wall in My Bedroom?

Wondering whether or not you should add an accent in your bedroom in Clinton Township, MI? Well, we hope this article will help you make a decision. Many homeowners have indeed come to appreciate the value of accent walls, which are typically set up in primary living areas such as the dining rooms, eat-in kitchens, and living rooms. But is creating an accent wall in your bedroom worth the hassle?

From a general viewpoint, an accent wall adds a bit of drama and excitement in any space. It also creates a focal point where your eyes can visually rest and enjoy the subtle diversity. Interior designers also use accent walls as a backdrop for highlighting certain decorative features.

When used in the bedroom, an accent wall allows you to add some pops of color in an otherwise dull bedroom. It gives you a chance to add flavor and variety and go bold with part of the room without overwhelming your entire private space.

Why an Accent Wall in Your Bedroom?
For many homeowners, the bedroom is essentially a box made of a plain ceiling above, four painted walls and a solid color carpet below. While these features might be designed in different creative ways, including an accent wall, can really add a bit of excitement and make your room pop.

Throwing in an accent wall will definitely throw things out of balance a little bit –in a good way –and it will break your unconscious expectation that all your walls need to look the same. With accenting, your walls are no-longer just a background feature but rather, a creative addition that creates an attractive focal point.

Picking the Accent Wall
Picking an accent wall is as challenging as picking the color to use, and it’s important that you pick a wall that feels right so that your room doesn’t feel out of balance or confused. The best wall for many bedrooms is the wall at the head of the bed or the one opposite it.

However, if you want to use a different wall, or if you are unable to determine which wall stands out in your bedroom, you might want to ask for a second opinion from a friend, family or a professional interior designer. The trick here is picking a wall that grabs your attention once you walk into your bedroom.

While the above considerations are important, make sure that whichever wall you choose is not obscured or too bare. Your headboard will most likely be against the accent wall, but in the event that it’s not, make sure that the accent wall is not obscured by things like an enormous wardrobe, windows or ceiling-to-floor drapes.

Picking the Accent Color
The easiest and probably safest way to go about this is to pick a darker shade of the color you have on the other three walls. Two tones darker should offer sufficient contrast. However, if you’re looking for something bolder and a little more dramatic, consider the bright color that matches the lamp or pillow in your room, your favorite color which won’t clash with other colors in the room, or even a patterned wallpaper.

Bottom Line
With that overview and a sneak peek of the benefits of accent walls, you’re probably itching to give it a try. However, if you don’t have skills and experience in interior painting, you might want to work with a professional painting contractor when it comes to the actual implementation.

At Eason Painting, we can even help you pick the right accent wall and color before we get to the actual painting. We have years of experience offering interior painting services in Macomb Township, Washington Township, Ray Township, Rochester, Rochester Hills, Romeo, Armada, Troy, Shelby Township, Harrison Township, Chesterfield, and Clinton Township, MI. Give a call today to find out what creative ideas we have in store for you.

Read more

Top 5 Benefits of Repainting Your Home’s Exterior in Clinton Township, MI

When most homeowners talk about repainting their exterior, it’s almost always about changing the color or refreshing the existing color of their home as the top benefit on their mind. While that is an important transformation, there’s actually much more that goes on during exterior painting than just changing the color.

At Eason Painting, our exterior [painting process] is much more compressive than you can imagine. We have a thorough preparation process that involves visual siding inspection and proper surface preparation –from power washing, sanding and stripping to mold/mildew treatment, caulking, and priming. We also replace any defective materials and always use high-quality paints and stains.

As you can see, before we even get to that actual painting and changing your exterior’s color, your house will already be sparkling clean with all the material defects addressed. From the first visual inspection to the time the painting crew walks out of your compound, here are some of the top benefits you can expect moving forward;

1. Improve Your Home’s Aesthetic Appeal

Keeping your home’s exterior paint job updated ensures that it looks great. This is the first reason most homeowners seek residential exterior painting services in Clinton Township, Michigan –aesthetic appeal. It gives you an opportunity to change the existing color to your favorite, or refresh your beautiful existing colors. An exterior paint job will address any unappealing signs of paint fading, flaking, peeling, or bubbling.

2. Increased Home Value

Your home being one of your largest investment, it’s important that it receives the attention it deserves. Updating your exterior regularly will increase the value of your home and protect your investment from deteriorating. When done correctly with a tasteful color choice, a brand-new coat of exterior paint can actually offer a higher return than what you spent on it. Compared to other types of home renovations, repainting your exterior is actually a cost-effective method of increasing your home’s value.

3. Enhanced Protection Against the Elements

One of the biggest reason sidings deteriorate is exposure to harsh weather elements. Whether you realize it or not, the paint coat on the exterior of your home protects your siding against harsh elements such as rain, snow, and humidity. But this is only true as long as the paint system is intact.

A solid and intact coat of paint on your exterior will minimize potential damages on your siding by the elements, daily wear, and tear and even insects. By preventing moisture from sipping through to your siding, things like mold growth and paint bubbling can be avoided.

4. Inspection

As earlier mentioned, and like with most painting contractors, our exterior painting process starts with a thorough inspection of the siding and the existing paint system. We also do replacement of defective materials such as rotting or loose fascia boards, eaves, gutters, siding or shingles upon request. Either way, if a contractor detects any damage or insect activity while painting, it’s a perfect opportunity to arrange for repairs.

5. Better Curb Appeal

What is the first impression your visitors get when they walk/drive through your home’s gate? Curb appeal is the tone your home’s exterior sets, not just for you, but anyone who walks into your home.

If you’re planning to sell your home anytime soon, then getting your home exteriors painted can indeed leave a great impact. It enhances the curb appeal of your home and gets it sold at a proper price. Even if you are not planning to get your house sold, an exterior painting will add a dash of innovation and a fresh charm to your neighborhood.

Bottom Line

As you can see, repainting your home’s exterior comes with numerous undisputed benefits. You do not only get to change the color and enhance the aesthetic appeal, but also increase your home’s value and protect it against damage from weather element, insects and other factors.

Any signs of paint failure such as paint peeling, fading, and bubbling are a clear indication that it’s time to repaint your exterior. If you reside in Clinton Township, MI and need any professional assistance repainting the exterior of your home, we would be happy to help you. Just give us a call and let us know when we should pay you a visit for a free estimate.

Read more
epoxy flooring

4 Tips for Maintaining Your Epoxy Flooring

Do you have epoxy floor coatings in your home or industrial space in Clinton, Michigan? Do you know proper maintenance and care procedures for your particular floor? Keeping your epoxy floor well maintained is fairly easy and has numerous benefits to your property. Some of the benefits include:

• Safety and Performance –if you have any industry or commercial epoxy floor, safety is extremely important. Many times, your floor will need to be waterproof, slip-resistant and/or offer static control for ultimate performance and safety; so proper maintenance is key.

• Appearance: if your floor has decorative high performance or custom industrial coating, it’s important to maintain its good looks. Finishes, special coatings, and logos on the floor impact your environment. Pristine floor appearance is particularly important in retail and commercial locations.

• Durability: most floors often require occasional re-coat or touch-up depending on the usage and traffic. But, appropriate upkeep and care can ensure that your epoxy floor lasts longer before requiring major repairs. Simple maintenance and care routine will keep your floor looking new for years.

Your professional epoxy flooring installer might offer specific procedures and methods for maintaining your particular flooring system. In the meantime, here are general tips you can use to care for your floors:

  1. Sweep the Floor Everyday
    This is probably the simplest way to keep your epoxy floor clean, extend its lifespan and avert any potential damages. Daily sweeping prevents buildup up of dirt especially in high traffic areas. You want to remove particles and substances that damage your floor and keep your working or living environment safe. For this, you can simply use a soft indoor broom or a dust mop.
  2. Wash the Floor Regularly
    One of the much sort after properties of epoxy coatings is that they seal the porous concrete and make it much easier to clean. If you use your garage or workspace for messy projects, your epoxy floor may develop scuffs and marks. Deep cleaning as soon as possible is required to prevent permanent floor damage. For deep cleaning, mopping with hot water and ammonia is recommended for keeping your floor clean. Use 120ml of ammonia in every 4L of water. Soap and acid-based cleaners should not be used as they often damage and dull the floor.
  3. Treat Stains Immediately
    Other than presenting an immediate safety hazard, spills can be damaging to your floor depending on the type of material. Acids, oils, harsh solvents and caustics can damage your floor coating if not immediately removed.
    Wipe off spills on your floor with a soft cloth or paper towel immediately to avoid staining your surface. If the floor has tougher stains such as rust, you can use a kitchen scrubbing pad and hot water to gently scrub them away. Just never use abrasive cleaning products or chemicals on your epoxy floor.
  4. Keep Sharp Objects Away
    If you have installed high-performance flooring, you can be assured of the best puncture and scratch resistance. However, depending on how you use your floor, occasional cuts, gouges, and scratches are inevitable. Where possible, avoid dragging, rolling or sliding potentially rough or sharp items, heavy equipment or pallets across your floor to prevent scratching and cutting.

Bottom Line
If you’re a homeowner or a facility manager, you want to keep your epoxy floor looking clean and beautiful, and performing at its best. The above simple care and maintenance tips will not only keep your floor looking pristine, but will also increase its durability and performance in the long haul.

Otherwise, if your epoxy floor has lost its spark, protective properties, and performance, our crew at Eason painting can help. Whether it is the floor in your garage or the warehouse in your shop, we can transform your concrete floor or worn out epoxy coating from an unattractive dirt and oil magnet into a chemical resistant, easy to clean durable finish. Contact us today for more details.


By DYB Virtual

Read more
exterior painting

How Often Should You Repaint Your Home’s Exterior in Clinton Township, MI?

How Often Should You Repaint Your Home’s Exterior in Clinton Township, MI?

Repainting your home exterior is undoubtedly the best renovation with the highest return on investment you can ever do to your home.

Other benefits of repainting your exterior include improved curb appeal, increased property value, protection against the harsh weather elements, and extending the durability of your siding.

With that in mind, how frequent should you repaint your home exterior? Well, there is no single answer to that, it mainly depends on several of factors such as the type of your siding, the finish, the quality of last paint job, among other factors.

The Type of Siding

Different siding materials have different durability rates and their ability to hold paint also varies. Here is a quick look at the most common materials;

  • Wood siding: Wood siding is probably the least durable, lasting about 3-7 years when painting and approximately 4 years when stained.
    • Aluminum: can go about 5 years before requiring another paint job
    • Stucco: typically lasts 5-6 years
    • Brick: 12-15 years if it’s painted.
    • Cement fiberboard siding: 10-15 years.

Averagely, repainting needs to be done every 5 years. However, this can change depending on a number of factors such as weather, climate, location and the quality of the previous paint job.

Factors Affecting the Durability of a Paint Job

  1. Previous Paint Job

The durability of paint on any siding largely depends on the quality of the last paint job and products used. Exterior repaint is an extensive project that requires a lot of preparation and patience. Any surface that is showing signs of the paint peeling, flaking or bubbling needs to be stripped, sanded and thoroughly cleaned before paint can be applied.

Skipping or skimping on any of the important surface preparation processes means that the paint won’t properly adhere to the surface as required, hence setting a stage for premature paint failure. High-quality primer and paint applied using the correct technique is also more likely to last longer.

  1. Weather Elements

Your location and the weather around you will affect how long your previous paint job lasts. Rain, frost, sleet, high humidity, and UV rays all can quickly degrade your paint job. So if you live somewhere with extremely hot and humid summers or your home is not sheltered by trees, the effect of UV rays is likely to degrade your paint much faster. Thankfully, Clinton Township and Michigan, in general, don’t receive much of these weather extremities.

  1. Maintenance

How long your paint job lasts depends on the maintenance effort you put in. Regular inspection of your siding and preventative maintenance can help you notice and remedy paint failure issues before the damage becomes extensive.

. If you notice chalkiness, rot, mold or dampness, fix them right away and your paint job could last much longer –saving you a lot of money and time in the long.

Other than the recommended repaint timelines above, you should always be on the lookout for signs of a failing paint job. Regardless of when you last painted your home’s exterior, signs of damage may mean it’s time for a new paint job.

While minor signs of paint damage may be fixed with a simple touch-up, extensive paint peeling, fading, flaking, bubbling and mold/mildew growth might mean it’s time to repaint your entire exterior.

Bottom Line

Regularly updating the paint on your home’s exterior is a great way of increasing your home’s value, improving your curb appeal and ensuring that your property lasts much longer.

If your exterior is showing significant signs of paint failure, our team at Eason Painting can offer professional help. Our team has extensive experience and training to handle any type of siding and we only use high-quality paint products.

Read more

Interior Condo Repaint New Baltimore, MI

We recently finished this complete interior Repaint of the walls, ceilings, trim and doors in this New Baltimore condo . I love the colors they turned out great with the dark grey doors. I would love to see this condo fully furnished and decorated. I did get a peek at it and am hoping the customer sends us some finished photos. Thanks to my crew for another job well done!


Read more
exterior painting

6 Signs it’s Time to Refinish Your Deck

When your previously fabulous deck starts to look tired and won out, you should probably start thinking about refinishing it. Refinishing your deck will not only make your entire exterior beautiful but will also extend the life of the wood itself. Refinishing your deck in good time before major damage happens is much cheaper than having to replace wood in the deck.

You can instantly stop major structural damage and possible deck failure by fixing a few boards and protecting the entire deck with a new refinish job. If you’re planning to resell your home any time soon, a well maintained and refinished deck increases the overall resale value of your property.

Having said that, it’s important to know the signs that warranty minor fixes and those that call for an entire deck refinishing. So, besides your deck generally looking bad, here are specific signs it’s time to repaint it.

1. Split or Cracked Boards

Cracking or split deck boards are the early signs that a much bigger problem is on the way. This needs to be replaced before staining can be done. Check everything including the posts, railings, joists, and sills for any signs of cracking. If there’re any severely warped boards, placing a heavy weight on them could lead to complete breaking or splitting.

2. Wood Looks Dry and Old

If your wood generally looks old, dry, and faded, maybe with signs of peeling paint, deck restoration and refinishing can restore the glory and beauty of your aging deck and create an appealing relaxing environment.

3. Peeling and Flaking Paint

Paint and stain eventually deteriorate; however high-quality the paint is. Rain, frost, sleet, snow, and UV rays all contribute to gradual paint breakdown which might lead to signs like peeling and flaking paint.

Even if you have a newly re-painted deck, you can still notice signs of fading, flaking and peeling paint if the surface prep work was not well done. For instance, if the surface was not well washed, stripped and sanded where necessary, the paint will not properly stick. For the best results, you should consider stripping and properly power washing any deck that has peeling paint.

4. Mold and Mildew

Mold, mildew and other types of fungi can easily grow on your deck when the conditions are right. Most fungi thrive on damp wooden surfaces that are constantly exposed to moisture. Inspect your siding carefully and Pay special attention to where every post touches the ground.

Mold and mildew will often appear in grey, black or whitish patches
If you see extensive mold on the boards, they will need to be replaced before any staining can be done. Minor patches can, however, be scrapped off and the surface treated using a mixture of 3 parts of water and 1 part of household bleach.

5. Spongy and Soft When Walked On

When inspecting your deck, walk around it and note how the wood responds. If you feel sponginess, soft spots or bowing, there might be moisture issues underneath. In this case, the affected planks need to be replaced. Many times, in these cases, you will find rotting underneath the surface that cannot be seen by naked eyes. If the rotting is extensive, it might mean replacing the entire deck.

6. Splintering Boards

When the deck in the wood is constantly exposed to water and rain, wood fibers might be raised. Wood fibers can often remain raised and may cause splinters. If you notice splintering, it’s a warning that your boards are damaged and likely letting moisture and that will eventually cause mold growth and rotting. If this is not fixed in good time, it might cause the boards to collapse.

Bottom Line

If your deck looks dull, is fading or has mold and mildew growing on it, it’s definitely time to refinish it. The weather, traffic, and even chemicals can degrade your paint system and wood. The best way to have your deck properly inspected and refinished is by hiring a professional painting and refinishing contractor.

If you need professional help refinishing and restoring your deck in Clinton Township, Michigan, our professional and trained team at Eason Painting can help. Give us a call today and let’s give your deck a new, fresh, and long-lasting look.

Read more

Home Interior Colors of 2019

Home is a place where you come to seek comfort after a long and stressful day.  A home can only soothe your eyes if it is gorgeously painted, and neatly decorated, with fine walls, ceilings, and furniture.  Gray and white are the back drops choice for a majority of these color combinations we are seeing in the houses we are painting for 2019. Just glance at Benjamin Moore’s color if the year  Metropolitan AF-690 a cool soft gray and you will see the possibilities are endless .Take a good look at all these interior color trends 2019 and pick a few to have Eason Painting come and paint your walls and ceilings this year.

1. Profound Berry Reds

9EB75D8B-BD09-4130-AB2D-43CF05FA7656

If you take a look at home interior trends 2019, you will find that berry red shades add a ton of life to your room, so much that it’s overwhelming!  This color is so energizing that its richness creates coziness and comfort in the home. Shop for Sherwin Williams Salute and also look at Borscht for a rich berry tone. 

2. Rich Subdued Purple

4F79FD08-F891-44D0-BD91-EFC10538D4E7


This ultra violet shade is one of the best interior color trends 2019. However, this year, the trend is to stick to muted and understated tones of purple that can fill you up with a dose of energy.  The toned down, and muted version of the color creates more diversity.  You can use Valspar Metropolis Lilac as a muted purple to paint your walls. 

3. Invigorating Aquas

949F01BC-FA0C-4D76-A1BE-2511AC9F059D


The color aqua makes a bold and vibrant statement, and looks more charming if used in combination with soft pastels, and pinks.  It is a fun color for your walls, and adds a splash of power and humor.  This one is a sure shot winner if you talk about home interior trends 2019. You can select Aqua-Sphere SW 7613 by Sherwin Williams, to get this trendy color. 

4. Jewel Toned Shades of Aquamarines, Emeralds, and Sapphires  

76F9ABBC-B5AE-44A6-ACD9-5368CF7E7698

Add a splash of color to your living room with jewel toned shades of aquamarines, sapphires, and emeralds.  You can even have kitchen drawers and cabinets painted in these shades.  You just have to balance between the different jewel toned shades and you will be good to go. Get Sapphire SW 6963 by Sherwin Williams to add a jewel-toned accent to your bedroom. 

5.  Rosy Neutrals and Muted, Dusty Blushes

4A4B0D23-6559-41B0-B412-62B47B7B7BEA

Pastel colors are super trendy! Add a spatter of softer and more pastel pink shades, like rosy neutral, and dusty, muted blushes. These shades represent spirituality and innocence, and with orange lights on, your living room will feel like the coziest place in the world. Buy Orchid Blush by Valspar to follow the growing trend.

6. Misty Blues

A64CFE5A-F8CE-4A71-B00B-9661CFF3674B

Soft, hazy, and misty blues are so 2019! These hazy shades of blue are extremely calming and soothing and add real energy to your home.  They give you a sense of mental clarity, and keep you humble and grounded.  Misty Blue 820 from Benjamin Moore will have you achieve this look.  

7. Deep Jungle Greens

8EE7EB00-5976-4740-B5E5-99548CCD5B9F

These deep shades of green help you heal inside. When you look at these greens, you automatically feel refreshed and re-invigorated.  The deep accents of greens cool your eyes and add freshness to your mind and senses.  Galley Green by Sherwin Williams will make you feel like your room is surrounded by nature.

Conclusion

These seven home interior color trends 2019 can seriously brighten up your home and make it look super classy and trendy. Try some of these and you will see how different and beautiful your house will feel and look. What ever color you decide to choice this year, just sit back relax and call Eason Painting to paint your interior bedroom, bathroom, kitchen or great room. You will not be disappointed! 


Read more

Interior Repaint, Drywall Repairs Clinton Twp, MI 48036 Rental House

We just finished this interior repaint of this beautiful rental home located in Clinton Twp, Mi. The color selected for the walls was SW 7036 Accessible Beige. This house will have all new refinished floors and carpet once done. It is very spacious with a full upstairs and basement. If anyone is looking for a great house to rent contact me and I will hook you up with the owner. Thank you Rob for putting your trust Eason painting and allowing us to repaint this house for you .

93B1959B-03AD-46B4-9395-58117E09E076

Read more

Interior Bedroom & Bathroom Repaint Grosse Pointe, MI 48230

We just finished up this interior painting of 2 bedrooms and bathroom in Grosse Pointe. Thanks to my crew for another  job well done. The customer was very happy with the job you performed. We used all Sherwin Williams products and colors. Ceilings are painted with SW #7005 Pure White. Please Call us today to transform your room  586-465-5081

Bedroom 1 was painted with SW # 6520 Honest Blue on the walls with SW #7626 Zurich White for the casing, doors and baseboards.

Bedroom 2 was painted with SW # 7628 Wind Fresh White for the walls and SW #7004 Snowbound for the casing, baseboards, doors and windows.

Bathoom was painted with SW #7512 Pavillon Beige for the walls and SW # 7004 Snowbound for the casings,baseboards, doors and windows.


BE082713-CDBE-496B-89CC-8278C1A8EAE8


Read more